今日から始めるお家OpenShift
はじめに
皆様こんにちは、あかいけです。
近々社内でOpenShiftの勉強会を予定しており、それに備えてお家でOpenShiftをコネコネしてみたところ、
思いのほか簡単にセットアップできたため、記事にしてみました。
私だけかもしれませんが、OpenShiftって敷居が高いイメージがありませんか?
しかし本記事でご紹介するやり方であれば、誇張抜きでおそらく今日から始められると思います。
「OpenShift、気になってるけど触れてない…」みたいな方はぜひやってみてください。
OpenShiftってなんだろう。
そもそもOpenShiftとはなんでしょうか?
公式のサマリーでは以下のように説明されていますが、
おそらくこれでOpenShiftを一発で理解できた人はいないのではないでしょうか…。(少なくとも私はそうです)
Red Hat OpenShift は、業界をリードするハイブリッドクラウド・アプリケーション・プラットフォームです。各種ツールおよびサービスの包括的なセットにより、開発からデリバリー、アプリケーション・ワークロードの管理に至るまで、アプリケーション・ライフサイクル全体を効率化します。
改めてOpenShiftを一言で表すと、
「コンテナオーケストレーションプラットフォームであるKubernetesをベースに、開発者向けの機能を強化したエンタープライズ向けコンテナアプリケーション基盤」 です。
まだまだイメージしずらいですね…??
もっと簡単に言うと 「Kubernetesをいい感じにラッピングしてくれて便利機能を色々付けた、Red Hatが開発しているマネージドサービス」 です。
色んな機能があるので、正直この一言ではかなり説明不足感が否めないですが、
始めるにあたってはこんなイメージで大丈夫だと思います。
また他のKubernetesのマネージドサービスと言えば、以下が代表的と言えるでしょう。
- GKE : Google Kubernetes Engine
- EKS : Amazon Elastic Kubernetes Servic
- AKS : Azure Kubernetes Service
- OKE : Oracle Cloud Infrastructure Container Engine for Kubernetes
いきなりKubernetesと出会うというよりは、クラウドプロバイダーと触れ合う内に、自然とKubernetesマネージドサービスと出会った方が多いのではないでしょうか。
(私の初めてはGKEでした)
OpenShiftの種類
次にOpenShiftの種類についてです。
一口にOpenShiftといっても様々な提供形態があり、主要なものとしては以下が挙げられます。
- Red Hat OpenShift Container Platform
- Red Hat OpenShift Dedicated
- Developer Sandbox for Red Hat OpenShift
- Red Hat OpenShift Service on AWS (ROSA)
- Microsoft Azure Red Hat OpenShift
- OpenShift Local(旧:Code Ready Container)
その中でも今回はOpenShift Localを利用します。
OpenShift Localはローカル環境でOpenShiftを利用することに特化しており、無料で利用できます。
その代わりに以下のような制約があり、あくまで試験環境と割り切って利用する必要があります。
-
OpenShift Container Platform クラスターは一時的なもので、実稼働環境での使用を目的としたものではない
-
OpenShift Container Platform バージョンへのアップグレードパスがサポートされていない
-
コントロール プレーンとワーカー ノードの両方として機能する単一のノードを使用
-
カスタマイズできないクラスター設定 (ドメイン、内部クラスター通信に使用されるアドレス範囲)
やってみた
前提条件について
1.ハードウェア要件
まずハードウェア要件として以下が最小要件となっています。
ちょっとリッチな構成が求められるので、インストール前に要件を満たせているか確認してください。
- 4 つの物理 CPU コア
- 10.5 GBの空きメモリ
- 35 GBのストレージスペース
なおVMに割り当てるリソースは調整できますが、上記が設定可能な最小値となっています。
2.RedHat アカウント
OpenShift Localの利用にあたり、RedHatのアカウントが必要となります。
アカウント作成だけでは料金は特にかからないので、安心して作ってください。
筆者の環境
筆者の環境は以下の通りです。
普段はゲーム用途で利用しているPCです。
- OS:Windows 11 Pro
- CPU:Ryzen 5 5600X
- メモリ:DDR4 32GB
- ディスク:SSD 1TB
※ 補足1.Hyper-Vを利用する都合上、Windows 11 Home だと動かないようです
※ 補足2.本当はMacBook(メモリ16GB)でやりたかったのですが、普通にリソース不足で動きませんでした
セットアップ手順
手順は公式の以下手順をもとにしています。
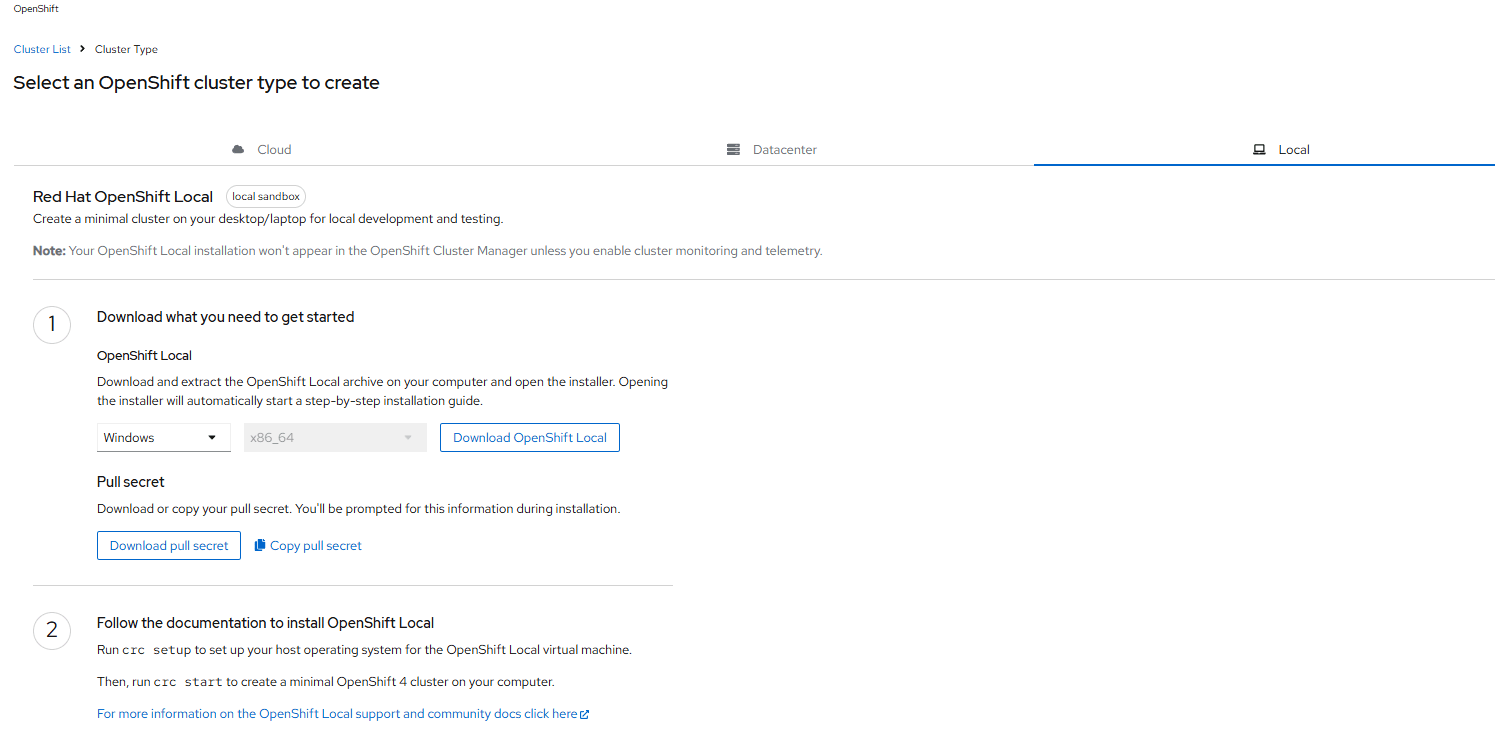
1.OpenShift Local ダウンロード
以下ダウンロードページにアクセスして、
実行環境のOSに合わせて、「Download OpenShift Local」をクリックしてインストーラーをダウンロードします。
また「Download Pull Secret」もクリックしてダウンロードしておきます、こちらは後ほどVM起動時に利用します。
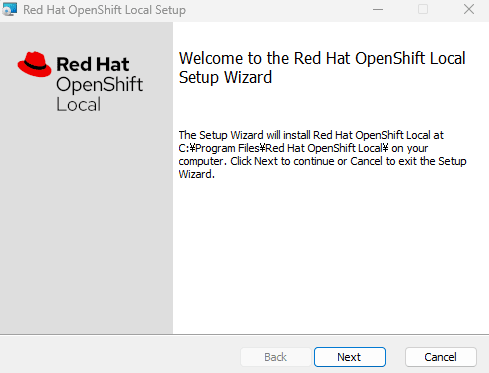
2.OpenShift Local インストール
ダウンロードしたzipファイル(crc-windows-installer)を解凍起動して、
インストーラー(crc-windows-amd64)を実行して指示に従いインストールしてください。
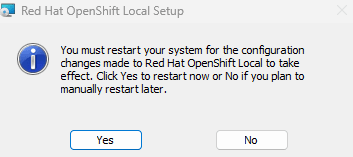
インストールが完了したら再起動を促されるので、再起動しましょう。
この後の作業はPowerShellでやります。
再起動後、正常にバージョンが確認できるはずです。
> crc version

CRC version: 2.49.0+e843be
OpenShift version: 4.18.2
MicroShift version: 4.18.2
あとは以下のコマンドで環境をセットアップできます、
筆者の環境では完了まで20分程度かかったため、気長にお待ちください。
> crc setup
また最初に統計情報の送信について聞かれるので、ここはお好みで回答してください。
CRC is constantly improving and we would like to know more about usage (more details at https://developers.redhat.com/article/tool-data-collection)
Your preference can be changed manually if desired using 'crc config set consent-telemetry <yes/no>'
Would you like to contribute anonymous usage statistics? [y/N]:
以下のような表示が出ればセットアップ完了です、超簡単ですね。
Your system is correctly setup for using CRC. Use 'crc start' to start the instance
なおOpenShift Localにはプリセットというものがあり、
特に指定しない場合は、デフォルトでopenshiftプリセットが設定されます。
使ってみた
手順は公式の以下手順をもとにしています。
CRCコマンドについて
CRCは、ローカル開発環境でOpenShiftクラスターを実行するためのツールです。
VM自体の管理(起動/停止/削除/設定)などを担当しています。
> crc --help

CRC is a tool that manages a local OpenShift 4.x cluster optimized for testing and development purposes

Usage:
  crc [flags]
  crc [command]

Available Commands:
  bundle      Manage CRC bundles
  cleanup     Undo config changes
  completion  Generate the autocompletion script for the specified shell
  config      Modify crc configuration
  console     Open the OpenShift Web Console in the default browser
  delete      Delete the instance
  help        Help about any command
  ip          Get IP address of the running OpenShift cluster
  oc-env      Add the 'oc' executable to PATH
  podman-env  Setup podman environment
  setup       Set up prerequisites for using CRC
  start       Start the instance
  status      Display status of the OpenShift cluster
  stop        Stop the instance
  version     Print version information

Flags:
  -h, --help               help for crc
      --log-level string   log level (e.g. "debug | info | warn | error") (default "info")

Use "crc [command] --help" for more information about a command.
インスタンス 設定
インスタンスの設定にはcrc configを利用します。
> crc config
Modifies crc configuration properties.
Properties:

* bundle                                               Bundle path/URI - absolute or local path, http, https or docker URI (string, like 'https://foo.com/crc_hyperv_4.18.2_amd64.crcbundle', 'docker://quay.io/myorg/crc_hyperv_4.18.2_amd64.crcbundle:2.49.0' default 'C:\Users\kanik\.crc\cache\crc_hyperv_4.18.2_amd64.crcbundle' )
* consent-telemetry                                    Consent to collection of anonymous usage data (yes/no)
* cpus                                                 Number of CPU cores (must be greater than or equal to '4')
* disable-update-check                                 Disable update check (true/false, default: false)
* disk-size                                            Total size in GiB of the disk (must be greater than or equal to '31')
* enable-bundle-quay-fallback                          If bundle download from the default location fails, fallback to quay.io (true/false, default: false)
* enable-cluster-monitoring                            Enable cluster monitoring Operator (true/false, default: false)
* enable-emergency-login                               Enable emergency login for 'core' user. Password is randomly generated. (true/false, default: false)
* enable-experimental-features                         Enable experimental features (true/false, default: false)
* enable-shared-dirs                                   Mounts host's user profile folder at '/' in the CRC VM (true/false, default: false)
* host-network-access                                  Allow TCP/IP connections from the CRC VM to services running on the host (true/false, default: false)
* http-proxy                                           HTTP proxy URL (string, like 'http://my-proxy.com:8443')
* https-proxy                                          HTTPS proxy URL (string, like 'https://my-proxy.com:8443')
* ingress-http-port                                    HTTP port to use for OpenShift ingress/routes on the host (1024-65535, default: 80)
* ingress-https-port                                   HTTPS port to use for OpenShift ingress/routes on the host (1024-65535, default: 443)
* kubeadmin-password                                   User defined kubeadmin password
* memory                                               Memory size in MiB (must be greater than or equal to '10752')
* nameserver                                           IPv4 address of nameserver (string, like '1.1.1.1 or 8.8.8.8')
* no-proxy                                             Hosts, ipv4 addresses or CIDR which do not use a proxy (string, comma-separated list such as '127.0.0.1,192.168.100.1/24')
* persistent-volume-size                               Total size in GiB of the persistent volume used by the CSI driver for microshift preset (must be greater than or equal to '15')
* preset                                               Virtual machine preset (valid values are: [openshift okd microshift])
* proxy-ca-file                                        Path to an HTTPS proxy certificate authority (CA)
* pull-secret-file                                     Path of image pull secret (download from https://console.redhat.com/openshift/create/local)
* shared-dir-password                                  Password used while using CIFS/SMB file sharing (It is the password for the current logged in user)
* skip-check-admin-helper-service-running              Skip preflight check (true/false, default: false)
* skip-check-administrator-user                        Skip preflight check (true/false, default: false)
* skip-check-background-launcher-install               Skip preflight check (true/false, default: false)
* skip-check-bundle-extracted                          Skip preflight check (true/false, default: false)
* skip-check-crc-users-group-exists                    Skip preflight check (true/false, default: false)
* skip-check-daemon-task-install                       Skip preflight check (true/false, default: false)
* skip-check-daemon-task-running                       Skip preflight check (true/false, default: false)
* skip-check-hyperv-installed                          Skip preflight check (true/false, default: false)
* skip-check-hyperv-service-running                    Skip preflight check (true/false, default: false)
* skip-check-podman-in-ocbindir                        Skip preflight check (true/false, default: false)
* skip-check-ram                                       Skip preflight check (true/false, default: false)
* skip-check-ssh-port                                  Skip preflight check (true/false, default: false)
* skip-check-user-in-crc-users-and-hyperv-admins-group Skip preflight check (true/false, default: false)
* skip-check-vsock                                     Skip preflight check (true/false, default: false)
* skip-check-windows-edition                           Skip preflight check (true/false, default: false)
* skip-check-windows-version                           Skip preflight check (true/false, default: false)

Usage:
  crc config SUBCOMMAND [flags]
  crc config [command]

Available Commands:
  get         Get a crc configuration property
  set         Set a crc configuration property
  unset       Unset a crc configuration property
  view        Display all assigned crc configuration properties

Flags:
  -h, --help   help for config

Global Flags:
      --log-level string   log level (e.g. "debug | info | warn | error") (default "info")

Use "crc config [command] --help" for more information about a command.
初期設定では、CPUは4、メモリは10.5GB使うように設定されています。
> crc config get cpus
Configuration property 'cpus' is not set. Default value '4' is used

> crc config get memory
Configuration property 'memory' is not set. Default value '10752' is used
環境に合わせてお好みで増やすことができ、以下は1.5倍にした例です。
> crc config set cpus 6
Changes to configuration property 'cpus' are only applied when the CRC instance is started.
If you already have a running CRC instance, then for this configuration change to take effect, stop the CRC instance with 'crc stop' and restart it with 'crc start'.

> crc config set memory 16128
Changes to configuration property 'memory' are only applied when the CRC instance is started.
If you already have a running CRC instance, then for this configuration change to take effect, stop the CRC instance with 'crc stop' and restart it with 'crc start'.
以下のコマンドで設定値が変更されていることが確認できます。
またこの設定はVMの次回起動時から有効となります。
> crc config view
- consent-telemetry                     : no
- cpus                                  : 6
- memory                                : 16128
なおCPU、メモリについてデフォルト値が最小値となっているため、下げることはできません。
> crc config set cpus 2
Value '2' for configuration property 'cpus' is invalid, reason: requires CPUs >= 4

> crc config set memory 5376
Value '5376' for configuration property 'memory' is invalid, reason: requires memory in MiB >= 10752
インスタンス 起動
前置きが長くなってしまいましたが、ついに起動の時が来ました。
> crc start
初回起動の場合はPull Secretの入力を求められるので、
あらかじめダウンロードしたpull-secret.txtの内容をそのまま貼り付けてください。
また起動完了まで10分ぐらいかかるので、気長に待ちましょう。
? Please enter the pull secret
正常に起動できると、以下のようにコンソールのURLとログイン情報が表示されます。
The server is accessible via web console at:
  https://console-openshift-console.apps-crc.testing

Log in as administrator:
  Username: kubeadmin
  Password: XXXXX-XXXXX-XXXXX-XXXXX

Log in as user:
  Username: developer
  Password: developer

Use the 'oc' command line interface:
  PS> & crc oc-env | Invoke-Expression
  PS> oc login -u developer https://api.crc.testing:6443
インスタンス ステータス
以下のコマンドでVMのリソース使用状況が確認できます。
> crc status
CRC VM:          Running
OpenShift:       Running (v4.18.2)
Disk Usage:      24.98GB of 32.68GB (Inside the CRC VM)
Cache Usage:     30.21GB
Cache Directory: C:\Users\kanik\.crc\cache
インスタンス 停止
以下のコマンドでVMを停止できます。
> crc stop
INFO Stopping kubelet and all containers...
INFO Stopping the instance, this may take a few minutes...
WARN Failed to remove crc contexts from kubeconfig: <nil>
Stopped the instance
> crc status
CRC VM:          Stopped
OpenShift:       Stopped (v4.18.2)
Disk Usage:      0B of 0B (Inside the CRC VM)
Cache Usage:     30.21GB
Cache Directory: C:\Users\kanik\.crc\cache
インスタンス 削除
以下のコマンドでVMを削除できます。
> crc delete
Do you want to delete the instance? [y/N]: y
Deleted the instance
> crc status
Machine does not exist. Use 'crc start' to create it
なお注意点として、上記はあくまでVMのみを削除するコマンドです。
実際に比較してみると、「~/.crc/machines」のVM関連のディレクトリのみ削除されていることがわかります。
% du -h ~/.crc
 26G    /Users/akaike.haruka/.crc/cache/crc_vfkit_4.18.2_arm64
 31G    /Users/akaike.haruka/.crc/cache
  0B    /Users/akaike.haruka/.crc/bin/podman
  0B    /Users/akaike.haruka/.crc/bin/oc
  0B    /Users/akaike.haruka/.crc/bin
 26G    /Users/akaike.haruka/.crc/machines/crc
 26G    /Users/akaike.haruka/.crc/machines
 57G    /Users/akaike.haruka/.crc
% du -h ~/.crc
 26G    /Users/akaike.haruka/.crc/cache/crc_vfkit_4.18.2_arm64
 31G    /Users/akaike.haruka/.crc/cache
  0B    /Users/akaike.haruka/.crc/bin/podman
  0B    /Users/akaike.haruka/.crc/bin/oc
  0B    /Users/akaike.haruka/.crc/bin
  0B    /Users/akaike.haruka/.crc/machines
 31G    /Users/akaike.haruka/.crc
OpenShift Local自体をアンインストールするコマンドは用意されていないため、
完全にアンインストールする場合は「~/.crc」配下のファイルを必要に応じて削除してください。
Webコンソールログイン
以下コマンドを実行すると、ブラウザでWebコンソールログイン画面が開きます。
> crc console
Opening the OpenShift Web Console in the default browser...
なおログイン情報は以下コマンドで確認できます。
> crc console --credentials
To login as a regular user, run 'oc login -u developer -p developer https://api.crc.testing:6443'.
To login as an admin, run 'oc login -u kubeadmin -p XXXXX-XXXXX-XXXXX-XXXXX https://api.crc.testing:6443'
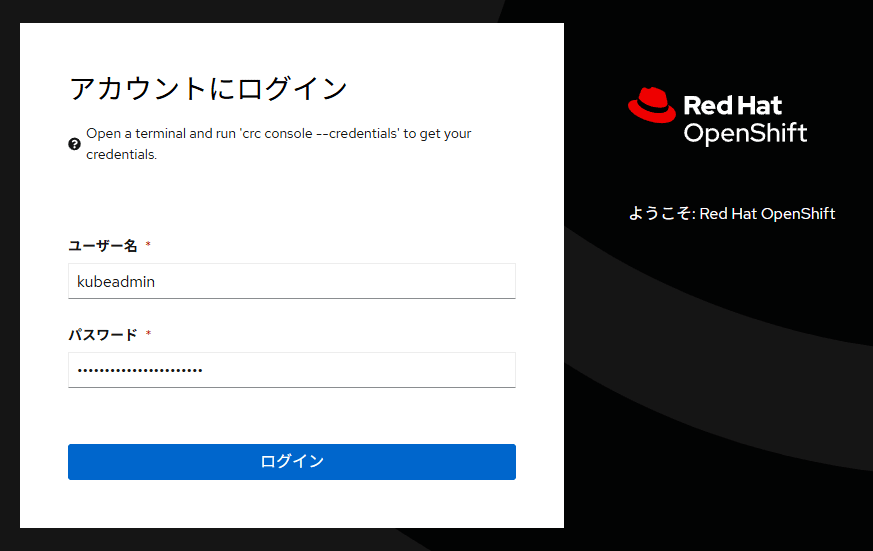
管理者ログイン
ユーザ名はkubeadmin、
パスワードはcrc console --credentialsなどでご確認ください。
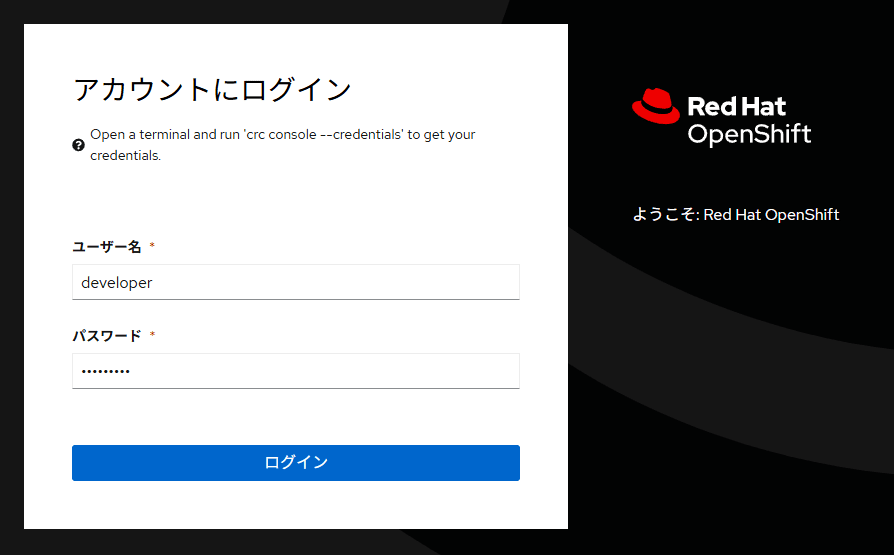
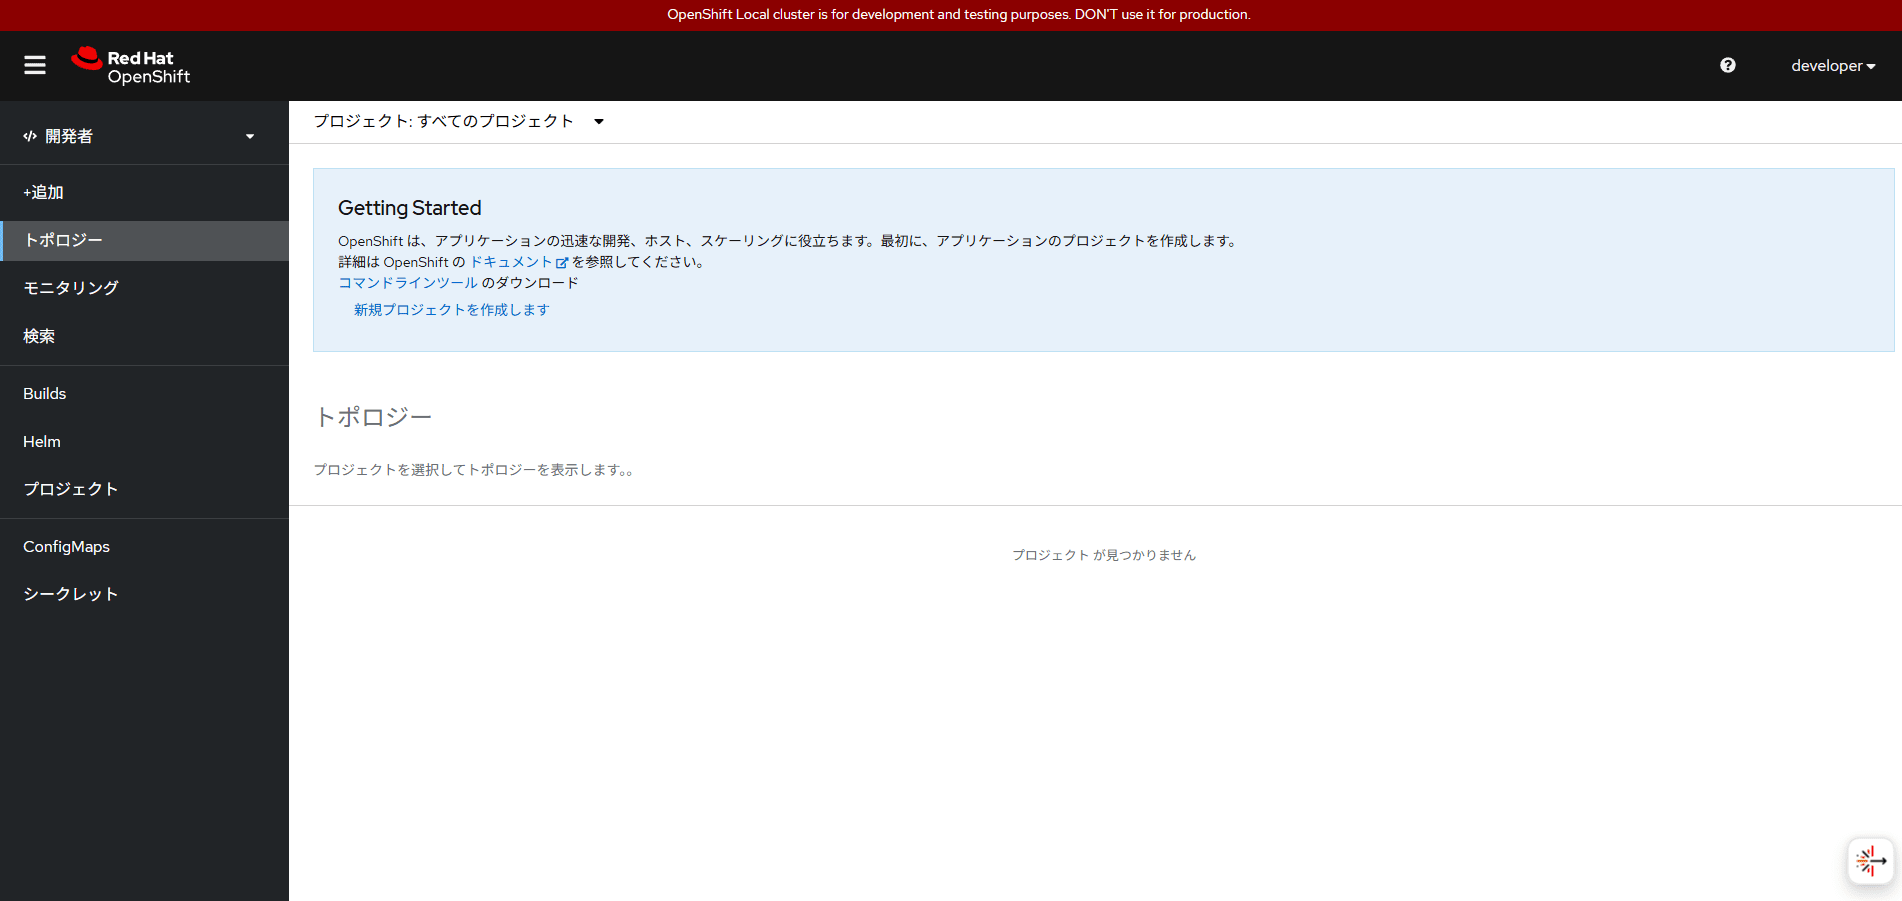
開発者ログイン
ユーザ名、パスワードは両方ともdeveloperです。
OCコマンドについて
OCは、OpenShiftクラスター上のアプリケーションを管理するためのツールです。
またサブコマンドのadmでクラスター自体の管理もできます。
※ kubectlのOpenShift版、みたいなイメージ
以下コマンドでパスを通すと使えるようになります。
> crc oc-env | Invoke-Expression
> oc --help
OpenShift Client

This client helps you develop, build, deploy, and run your applications on any
OpenShift or Kubernetes cluster. It also includes the administrative
commands for managing a cluster under the 'adm' subcommand.

Basic Commands:
  login             Log in to a server
  new-project       Request a new project
  new-app           Create a new application
  status            Show an overview of the current project
  project           Switch to another project
  projects          Display existing projects
  explain           Get documentation for a resource

Build and Deploy Commands:
  rollout           Manage a Kubernetes deployment or OpenShift deployment config
  rollback          Revert part of an application back to a previous deployment
  new-build         Create a new build configuration
  start-build       Start a new build
  cancel-build      Cancel running, pending, or new builds
  import-image      Import images from a container image registry
  tag               Tag existing images into image streams

Application Management Commands:
  create            Create a resource from a file or from stdin
  apply             Apply a configuration to a resource by file name or stdin
  get               Display one or many resources
  describe          Show details of a specific resource or group of resources
  edit              Edit a resource on the server
  set               Commands that help set specific features on objects
  label             Update the labels on a resource
  annotate          Update the annotations on a resource
  expose            Expose a replicated application as a service or route
  delete            Delete resources by file names, stdin, resources and names, or by resources and label selector
  scale             Set a new size for a deployment, replica set, or replication controller
  autoscale         Autoscale a deployment config, deployment, replica set, stateful set, or replication controller
  secrets           Manage secrets

Troubleshooting and Debugging Commands:
  logs              Print the logs for a container in a pod
  rsh               Start a shell session in a container
  rsync             Copy files between a local file system and a pod
  port-forward      Forward one or more local ports to a pod
  debug             Launch a new instance of a pod for debugging
  exec              Execute a command in a container
  proxy             Run a proxy to the Kubernetes API server
  attach            Attach to a running container
  run               Run a particular image on the cluster
  cp                Copy files and directories to and from containers
  wait              Experimental: Wait for a specific condition on one or many resources
  events            List events

Advanced Commands:
  adm               Tools for managing a cluster
  replace           Replace a resource by file name or stdin
  patch             Update fields of a resource
  process           Process a template into list of resources
  extract           Extract secrets or config maps to disk
  observe           Observe changes to resources and react to them (experimental)
  policy            Manage authorization policy
  auth              Inspect authorization
  image             Useful commands for managing images
  registry          Commands for working with the registry
  idle              Idle scalable resources
  api-versions      Print the supported API versions on the server, in the form of "group/version"
  api-resources     Print the supported API resources on the server
  cluster-info      Display cluster information
  diff              Diff the live version against a would-be applied version
  kustomize         Build a kustomization target from a directory or URL

Settings Commands:
  get-token         Experimental: Get token from external OIDC issuer as credentials exec plugin
  logout            End the current server session
  config            Modify kubeconfig files
  whoami            Return information about the current session
  completion        Output shell completion code for the specified shell (bash, zsh, fish, or powershell)

Other Commands:
  plugin            Provides utilities for interacting with plugins
  version           Print the client and server version information

Usage:
  oc [flags] [options]

Use "oc <command> --help" for more information about a given command.
Use "oc options" for a list of global command-line options (applies to all commands).
コンソールログイン
crc console --credentialsで表示されるコマンドでログインできます。
以下は管理者ログインの例です。
> oc login -u kubeadmin -p XXXXX-XXXXX-XXXXX-XXXXX https://api.crc.testing:6443
Login successful.

You have access to 65 projects, the list has been suppressed. You can list all projects with 'oc projects'

Using project "default".

> oc whoami
kubeadmin
いくつかコマンドを実行してみます。
クラスターバージョン確認
> oc get clusterversion
NAME      VERSION   AVAILABLE   PROGRESSING   SINCE   STATUS
version   4.18.2    True        False         22d     Cluster version is 4.18.2
クラスターオペレーター確認
> oc get co
NAME                                       VERSION   AVAILABLE   PROGRESSING   DEGRADED   SINCE   MESSAGE
authentication                             4.18.2    True        False         False      17m
config-operator                            4.18.2    True        False         False      22d
console                                    4.18.2    True        False         False      19m
control-plane-machine-set                  4.18.2    True        False         False      22d
dns                                        4.18.2    True        False         False      19m
etcd                                       4.18.2    True        False         False      22d
image-registry                             4.18.2    True        False         False      19m
ingress                                    4.18.2    True        False         False      22d
kube-apiserver                             4.18.2    True        False         False      22d
kube-controller-manager                    4.18.2    True        False         False      22d
kube-scheduler                             4.18.2    True        False         False      22d
kube-storage-version-migrator              4.18.2    True        False         False      20m
machine-api                                4.18.2    True        False         False      22d
machine-approver                           4.18.2    True        False         False      22d
machine-config                             4.18.2    True        False         False      22d
marketplace                                4.18.2    True        False         False      22d
network                                    4.18.2    True        False         False      22d
openshift-apiserver                        4.18.2    True        False         False      19m
openshift-controller-manager               4.18.2    True        False         False      10m
openshift-samples                          4.18.2    True        False         False      22d
operator-lifecycle-manager                 4.18.2    True        False         False      22d
operator-lifecycle-manager-catalog         4.18.2    True        False         False      22d
operator-lifecycle-manager-packageserver   4.18.2    True        False         False      19m
service-ca                                 4.18.2    True        False         False      22d
ノード確認
> oc get node
NAME   STATUS   ROLES                         AGE   VERSION
crc    Ready    control-plane,master,worker   22d   v1.31.6
メトリクス
初期状態ではメトリクスが取得されておらず、
以下コマンドで次回起動時からメトリクスの取得を有効化できます。
> crc config set enable-cluster-monitoring true
Successfully configured enable-cluster-monitoring to true
VMを起動している場合は、再起動すると適用されます。
> crc stop
> crc start
なおメトリクス有効化にあたり、最低14GiB必要なためデフォルト設定で起動すると怒られます。
Too little memory (10.5GiB) allocated to the virtual machine to start the monitoring stack, 14GiB is the minimum
なので14GiB以上を設定してから起動しましょう。
> crc config set memory 16128
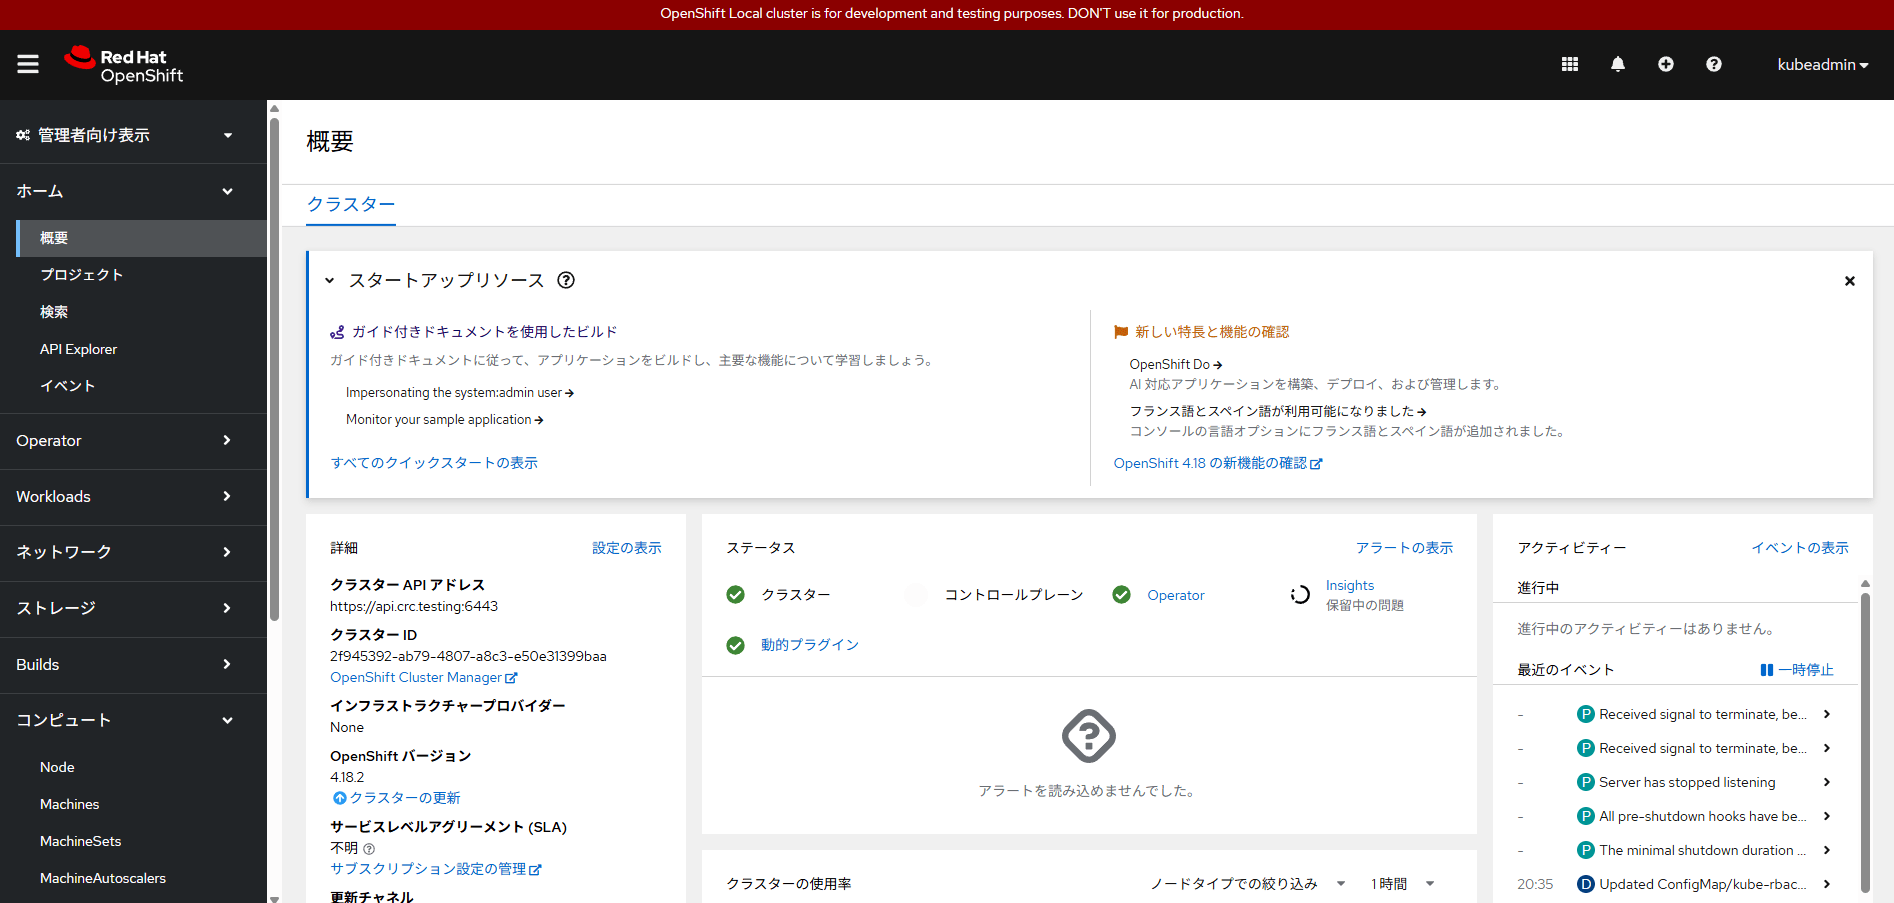
Webコンソールにログインすると正常にメトリクスが取得できているはずです。

サンプルアプリ
最後にサンプルアプリを作成してみましょう。
まずproject(kubernetesのNameSpaceのようなもの)を作成します。
> oc new-project sample-project
Now using project "sample-project" on server "https://api.crc.testing:6443".

You can add applications to this project with the 'new-app' command. For example, try:

    oc new-app rails-postgresql-example

to build a new example application in Ruby. Or use kubectl to deploy a simple Kubernetes application:

    kubectl create deployment hello-node --image=registry.k8s.io/e2e-test-images/agnhost:2.43 -- /agnhost serve-hostname
ご丁寧にサンプルアプリを用意してくれているので、これを実行してみます。
初回起動だとイメージ取得などあるため、10分前後かかりました。
> oc new-app rails-postgresql-example
以下で起動中のログが見れるので、これを眺めて待ちましょう。
> oc logs -f buildconfig/rails-postgresql-example
アプリの起動が完了すると、以下のリソースが作成されていることが確認できます。
> oc get all
Warning: apps.openshift.io/v1 DeploymentConfig is deprecated in v4.14+, unavailable in v4.10000+
NAME                                            READY   STATUS      RESTARTS   AGE
pod/postgresql-5c4c78985c-q8lz6                 1/1     Running     0          13m
pod/rails-postgresql-example-1-build            0/1     Completed   0          13m
pod/rails-postgresql-example-6c6dd5cdb4-zmzsz   1/1     Running     0          9m34s

NAME                               TYPE        CLUSTER-IP     EXTERNAL-IP   PORT(S)    AGE
service/postgresql                 ClusterIP   10.217.5.52    <none>        5432/TCP   13m
service/rails-postgresql-example   ClusterIP   10.217.4.248   <none>        8080/TCP   13m

NAME                                       READY   UP-TO-DATE   AVAILABLE   AGE
deployment.apps/postgresql                 1/1     1            1           13m
deployment.apps/rails-postgresql-example   1/1     1            1           13m

NAME                                                  DESIRED   CURRENT   READY   AGE
replicaset.apps/postgresql-58f56ff6f7                 0         0         0       13m
replicaset.apps/postgresql-5c4c78985c                 1         1         1       13m
replicaset.apps/rails-postgresql-example-6c6dd5cdb4   1         1         1       9m34s
replicaset.apps/rails-postgresql-example-d74f8b75d    0         0         0       13m

NAME                                                      TYPE     FROM   LATEST
buildconfig.build.openshift.io/rails-postgresql-example   Source   Git    1

NAME                                                  TYPE     FROM          STATUS     STARTED          DURATION
build.build.openshift.io/rails-postgresql-example-1   Source   Git@28f2fe3   Complete   13 minutes ago   3m42s

NAME                                                      IMAGE REPOSITORY                                                                                  TAGS     UPDATED
imagestream.image.openshift.io/rails-postgresql-example   default-route-openshift-image-registry.apps-crc.testing/sample-project/rails-postgresql-example   latest   9 minutes ago

NAME                                                HOST/PORT                                                  PATH   SERVICES                   PORT    TERMINATION   WILDCARD
route.route.openshift.io/rails-postgresql-example   rails-postgresql-example-sample-project.apps-crc.testing          rails-postgresql-example   <all>                 None
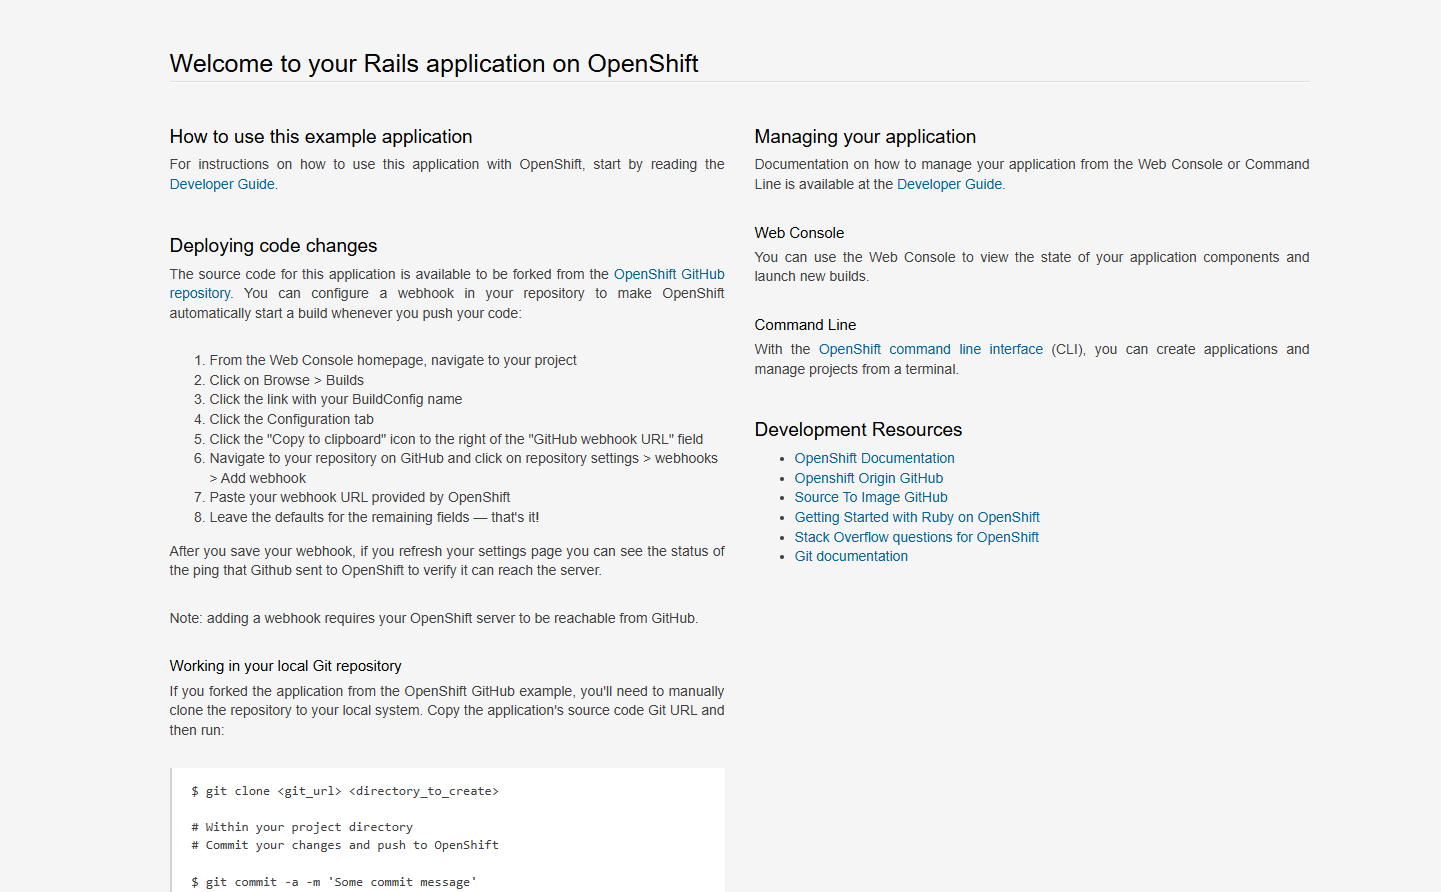
以下URLにログインすると、アプリケーションが起動していることが確認できます。
http://rails-postgresql-example-sample-project.apps-crc.testing/
確認が終わったので、プロジェクトごとリソースを削除します。
> oc delete project sample-project
project.project.openshift.io "sample-project" deleted
さいごに
以上、今日から始めるお家OpenShiftでした。
どうでしたか?ちょっとハードウェア要件が高いこと以外は特に障壁はないのでないでしょうか。
よければこれを機にお家OpenShiftを始めてみてください。
次回はOpenShift Container PlatformやRed Hat OpenShift Service on AWS (ROSA)など、
より実践的な内容をやろうと思います。