第一回ケチケチ dbtハンズオン!(超入門編)
この記事は公開されてから1年以上経過しています。情報が古い可能性がありますので、ご注意ください。
AWS事業本部コンサルティング部の石川です。dbtを始めてみたいけど、実行環境や環境構築、更には利用費が気になって試すことをためらっている方へ、CloudShell(無料) と Amazon Athena だけで簡単にお試しいただける dbtハンズオン(超入門編) を作成しました。15分程で一通りやれる内容なので、気になっている方はお試しください。
dbt とは
dbt(Data Build Tool) は、データ変換とデータモデリングを効率的に行うためのオープンソースツールです。主にデータアナリストやデータエンジニアが使用し、ELT(Extract, Load, Transform)プロセスの「Transform」部分を担当します。
dbtの主な特徴
データ変換の自動化
dbtは、SQLベースのデータ変換を自動化し、複雑なデータパイプラインを簡単に管理できます。
コード中心のアプローチ
dbtは、SQLとJinja2テンプレート言語を組み合わせたコードを使用します。これにより、柔軟で再利用可能なデータ変換ロジックを作成できます。
テストとドキュメント化
データモデルのテスト機能を提供し、データの品質を保証します。また、自動ドキュメント生成機能により、データパイプラインのドキュメントを簡単に作成できます。簡易なデータカタログとテーブルレベルリネージを標準で提供します。
dbtの仕組み
- ユーザーがSQLベースのデータモデルを定義
- dbtがそのコードをコンパイルし、純粋なSQLに変換
- 生成されたSQLをデータウェアハウス(BigQuery、Snowflake、Redshift、Athena など)で実行
dbtの利点
- データ加工処理の実装が容易(SQLの知識があれば十分)
- 複数のデータウェアハウスに対応(BigQuery、Redshift、Snowflake、Athena など)
- 依存関係の管理が可能(DAG: Directed Acyclic Graph)
- アクティブなコミュニティサポート
dbtは、データ変換プロセスを効率化し、データアナリストやエンジニアがより価値の高い分析作業に集中できるようサポートします。小規模から大規模まで、様々な組織でのデータワークフローの改善が可能です。
環境構築
インストール
最初にオープンソース版のdbt(dbt-core)をインストールします。AWS の CloudShell を起動して、下記のスクリプトをコピー&ペースとして実行します。まあ、環境構築はこれだけです。
sudo dnf install tree -y
pip install dbt-athena-community
実行例:
[cloudshell-user@ip-10-134-21-79 dbt]$ sudo dnf install tree -y
Last metadata expiration check: 0:11:36 ago on Fri 13 Dec 2024 12:55:09 PM UTC.
Dependencies resolved.
:                                                                     1/1
:
:
Installed:
  tree-1.8.0-6.amzn2023.0.2.x86_64

Complete!

[cloudshell-user@ip-10-134-21-79 ~]$ pip install dbt-athena-community
Defaulting to user installation because normal site-packages is not writeable
Collecting dbt-athena-community
  Downloading dbt_athena_community-1.8.4-py3-none-any.whl (84 kB)
     |████████████████████████████████| 84 kB 2.6 MB/s
Collecting dbt-common<2.0,>=1.0.0b2
  Downloading dbt_common-1.14.0-py3-none-any.whl (82 kB)
     |████████████████████████████████| 82 kB 1.3 MB/s
:
:
:
Successfully built daff
Installing collected packages: pytimeparse, parsedatetime, ordered-set, msgpack, mashumaro, leather, isodate, Babel, types-urllib3, protobuf, pathspec, deepdiff, colorama, agate, types-requests, more-itertools, importlib-metadata, dbt-common, tenacity, sqlparse, snowplow-tracker, packaging, mypy-boto3-lakeformation, mypy-boto3-glue, mypy-boto3-athena, fsspec, dbt-semantic-interfaces, dbt-extractor, dbt-adapters, daff, pyathena, mmh3, dbt-core, dbt-athena-community
Successfully installed Babel-2.16.0 agate-1.9.1 colorama-0.4.6 daff-1.3.46 dbt-adapters-1.10.4 dbt-athena-community-1.8.4 dbt-common-1.14.0 dbt-core-1.9.0 dbt-extractor-0.5.1 dbt-semantic-interfaces-0.7.4 deepdiff-7.0.1 fsspec-2024.10.0 importlib-metadata-6.11.0 isodate-0.6.1 leather-0.4.0 mashumaro-3.14 mmh3-4.1.0 more-itertools-10.5.0 msgpack-1.1.0 mypy-boto3-athena-1.35.74 mypy-boto3-glue-1.35.80 mypy-boto3-lakeformation-1.35.74 ordered-set-4.1.0 packaging-24.2 parsedatetime-2.6 pathspec-0.12.1 protobuf-5.29.1 pyathena-3.11.0 pytimeparse-1.1.8 snowplow-tracker-1.0.4 sqlparse-0.5.3 tenacity-9.0.0 types-requests-2.31.0.6 types-urllib3-1.26.25.14
dbtのサンプルプロジェクトの作成
dbtのサンプルプロジェクトの作成します。ここでは、dbtディレクトリを作成して、その下に prj_athena プロジェクトを作成します。
mkdir dbt && cd dbt
dbt init prj_athena
実行例:
[cloudshell-user@ip-10-134-21-79 ~]$ mkdir dbt && cd dbt

[cloudshell-user@ip-10-134-21-79 dbt]$ dbt init prj_athena
13:02:27  Running with dbt=1.9.0
13:02:27  [ConfigFolderDirectory]: Unable to parse logging event dictionary. Failed to parse dir field: expected string or bytes-like object.. Dictionary: {'dir': PosixPath('/home/cloudshell-user/.dbt')}
13:02:27  Creating dbt configuration folder at
13:02:27
Your new dbt project "prj_athena" was created!

For more information on how to configure the profiles.yml file,
please consult the dbt documentation here:

  https://docs.getdbt.com/docs/configure-your-profile

One more thing:

Need help? Don't hesitate to reach out to us via GitHub issues or on Slack:

  https://community.getdbt.com/

Happy modeling!

13:02:27  Setting up your profile.
Which database would you like to use?
[1] athena

(Don't see the one you want? https://docs.getdbt.com/docs/available-adapters)

Enter a number: 1
s3_staging_dir (S3 location to store Athena query results and metadata, e.g. s3://athena_query_result/prefix/): s3://cm-dbt-20241213/athena_query_result/
s3_data_dir (S3 location where to store data/tables, e.g. s3://bucket_name/prefix/): s3://cm-dbt-20241213/tables/
region_name (AWS region of your Athena instance): ap-northeast-1
schema (Specify the schema (Athena database) to build models into (lowercase only)): dbt_20241213
database (Specify the database (Data catalog) to build models into (lowercase only)) [awsdatacatalog]:
threads (1 or more) [1]:
13:04:23  Profile prj_athena written to /home/cloudshell-user/.dbt/profiles.yml using target's profile_template.yml and your supplied values. Run 'dbt debug' to validate the connection.
プロジェクトファイルの確認
サンプルファイルを確認します。
tree ~/
実行例:
[cloudshell-user@ip-10-134-21-79 dbt]$ tree ~/
/home/cloudshell-user/
└── dbt
    ├── logs
    │   └── dbt.log
    └── prj_athena
        ├── analyses
        ├── dbt_project.yml
        ├── macros
        ├── models
        │   └── example
        │       ├── my_first_dbt_model.sql
        │       ├── my_second_dbt_model.sql
        │       └── schema.yml
        ├── README.md
        ├── seeds
        ├── snapshots
        └── tests

10 directories, 6 files
今回のハンズオンに関連するディレクトリやファイルを解説します。
modelsディレクトリ- dbtプロジェクトにおいて、データ変換処理を定義するSQLファイルを格納するディレクトリ
- dbtはこのディレクトリ内のファイルを順に処理し、データウェアハウスやデータレイクにテーブルやビューなどのデータモデルを構築する
exampleディレクトリの下のSQLファイルがモデルファイル、schema.ymlがモデルのメタ情報やテストを定義したファイル- (本当は、重要な
sourceもあるが今回は解説しない)
testディレクトリ- dbtプロジェクトでデータモデルのテストを定義したSQLファイルを格納するディレクトリ
- テストは、モデルの構造、データ品質、ビジネスロジックの正しさを検証する
dbt_project.yml- dbt プロジェクトの設定を定義する YAML ファイル
- dbt コマンドラインツールはこのファイルを使用して、プロジェクトのディレクトリ構造、ターゲットデータベース接続、モデルの構成などを判断する
profiles.yml- ~/.dbt/profiles.ymlに作成されるが、
- dbtがデータウェアハウスやクラウドデータプラットフォームに接続するための情報を記述したYAMLファイル
- dbtコマンドを実行する際に、このファイルから接続情報を読み込み、データソースへの接続と操作を行う
- dbtコマンドを実行する際に、--targetオプションで接続プロファイル名を指定することで、そのプロファイルに記載された接続情報を使用してデータソースに接続できる
- その他
- 今回のハンズオンでは使用しません
動作確認
生成されたプロジェクトフォルダに移動して、サンプルプロジェクトをデバックします。
cd prj_athena/
dbt debug
実行例:
[cloudshell-user@ip-10-134-21-79 dbt]$ cd prj_athena/

[cloudshell-user@ip-10-134-21-79 prj_athena]$ dbt debug
13:08:34  Running with dbt=1.9.0
13:08:34  dbt version: 1.9.0
13:08:34  python version: 3.9.20
13:08:34  python path: /usr/bin/python3
13:08:34  os info: Linux-6.1.115-126.197.amzn2023.x86_64-x86_64-with-glibc2.34
13:08:35  Using profiles dir at /home/cloudshell-user/.dbt
13:08:35  Using profiles.yml file at /home/cloudshell-user/.dbt/profiles.yml
13:08:35  Using dbt_project.yml file at /home/cloudshell-user/dbt/prj_athena/dbt_project.yml
13:08:35  adapter type: athena
13:08:35  adapter version: 1.8.4
13:08:35  Configuration:
13:08:35    profiles.yml file [OK found and valid]
13:08:35    dbt_project.yml file [OK found and valid]
13:08:35  Required dependencies:
13:08:35   - git [OK found]

13:08:35  Connection:
13:08:35    s3_staging_dir: s3://cm-dbt-20241213/athena_query_result/
13:08:35    work_group: None
13:08:35    region_name: ap-northeast-1
13:08:35    database: awsdatacatalog
13:08:35    schema: dbt_20241213
13:08:35    poll_interval: 1.0
13:08:35    aws_profile_name: None
13:08:35    aws_access_key_id: None
13:08:35    endpoint_url: None
13:08:35    s3_data_dir: s3://cm-dbt-20241213/tables/
13:08:35    s3_data_naming: schema_table_unique
13:08:35    s3_tmp_table_dir: None
13:08:35    debug_query_state: False
13:08:35    seed_s3_upload_args: None
13:08:35    lf_tags_database: None
13:08:35    spark_work_group: None
13:08:35  Registered adapter: athena=1.8.4
13:08:38    Connection test: [OK connection ok]

13:08:38  All checks passed!
データベースの作成
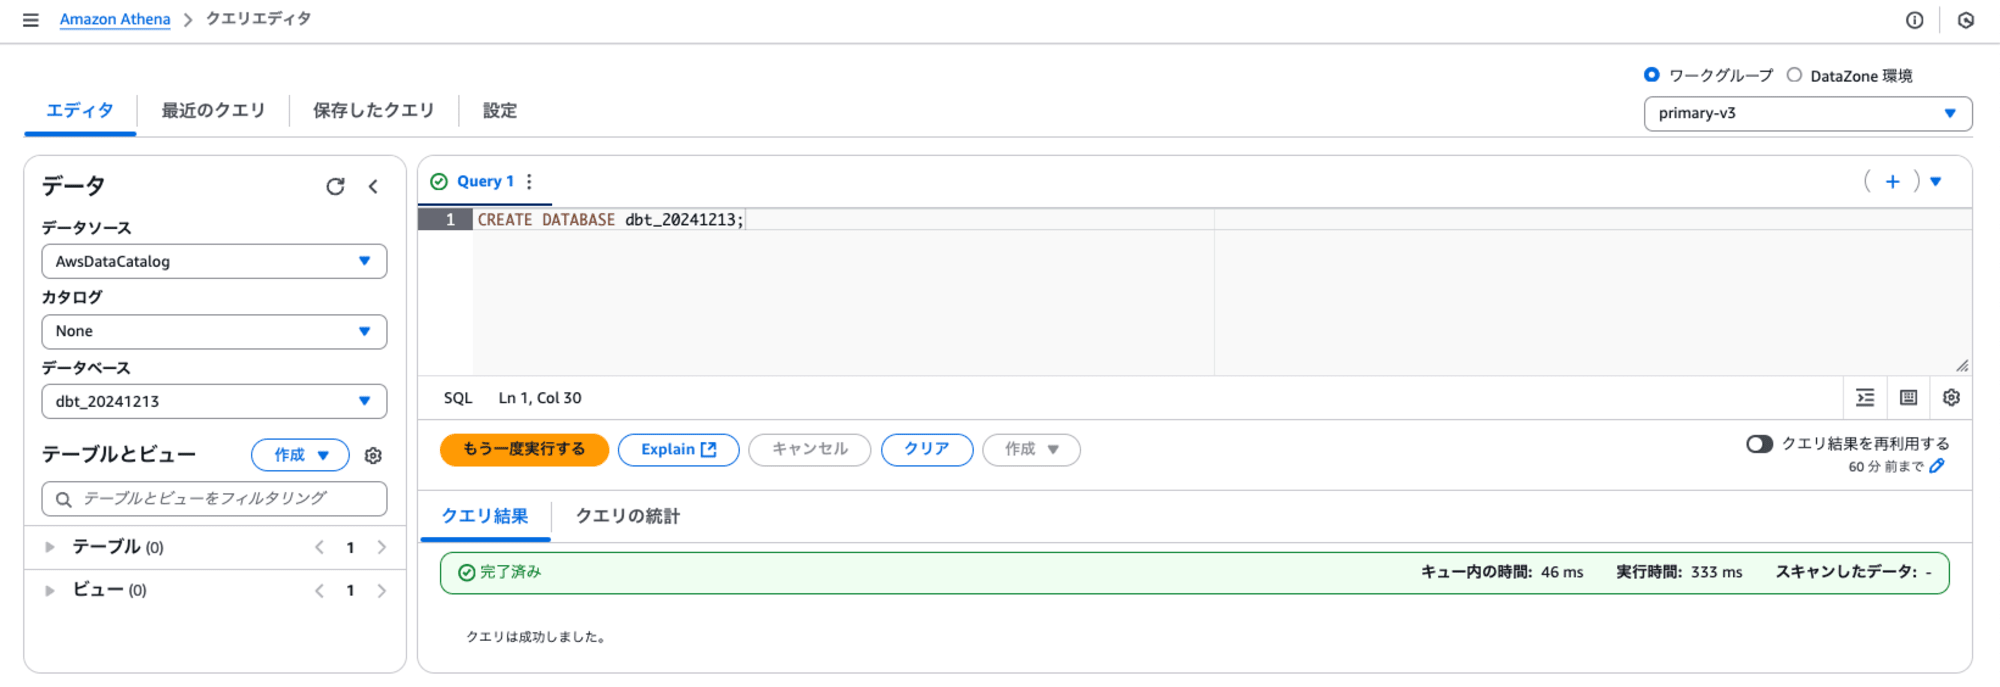
ハンズオンで用いる Amazon Athena のデータベースを用意します。データベースは既存のものでも構いませんが、今回は新規でデータベースを作成しました。このデータベースは、後に設定で指定します。
CREATE DATABASE dbt_20241213;|

dbtハンズオン
dbtの処理の流れ
dbt run コマンドを実行すると以下の順に実行します。
dbt_project.ymlに従いdbtの実行に必要なファイルの場所や定義情報に基づきmodelsディレクトリを探索して、実行するSQLの依存関係からDAG(Directed Acyclic Graph: 有向非巡回グラフ)を作成する- my_second_dbt_modelモデルは、my_first_dbt_modelモデルに依存しているため、その逆の順番に実行することになる
- モデルの実態はテーブル(やビュー)であり、存在しない場合は、
schema.ymlに基づきテーブルやそれに関連するスキーマを作成する
profiles.ymlから接続情報を取得する
dbtの実行
dbt run コマンドを実行して、モデルを作成し、dbt test コマンドを実行して作成したモデルを検証します。
モデルの作成
dbt run
実行例:
[cloudshell-user@ip-10-134-21-79 prj_athena]$ dbt run
13:11:53  Running with dbt=1.9.0
13:11:54  Registered adapter: athena=1.8.4
13:11:54  Unable to do partial parsing because saved manifest not found. Starting full parse.
13:11:57  Found 2 models, 4 data tests, 455 macros
13:11:57
13:11:57  Concurrency: 1 threads (target='dev')
13:11:57
13:11:59  1 of 2 START sql table model dbt_20241213.my_first_dbt_model ................... [RUN]
13:12:03  1 of 2 OK created sql table model dbt_20241213.my_first_dbt_model .............. [OK 2 in 4.42s]
13:12:03  2 of 2 START sql view model dbt_20241213.my_second_dbt_model ................... [RUN]
13:12:06  2 of 2 OK created sql view model dbt_20241213.my_second_dbt_model .............. [OK -1 in 2.83s]
13:12:06
13:12:06  Finished running 1 table model, 1 view model in 0 hours 0 minutes and 8.84 seconds (8.84s).
13:12:06
13:12:06  Completed successfully
13:12:06
13:12:06  Done. PASS=2 WARN=0 ERROR=0 SKIP=0 TOTAL=2
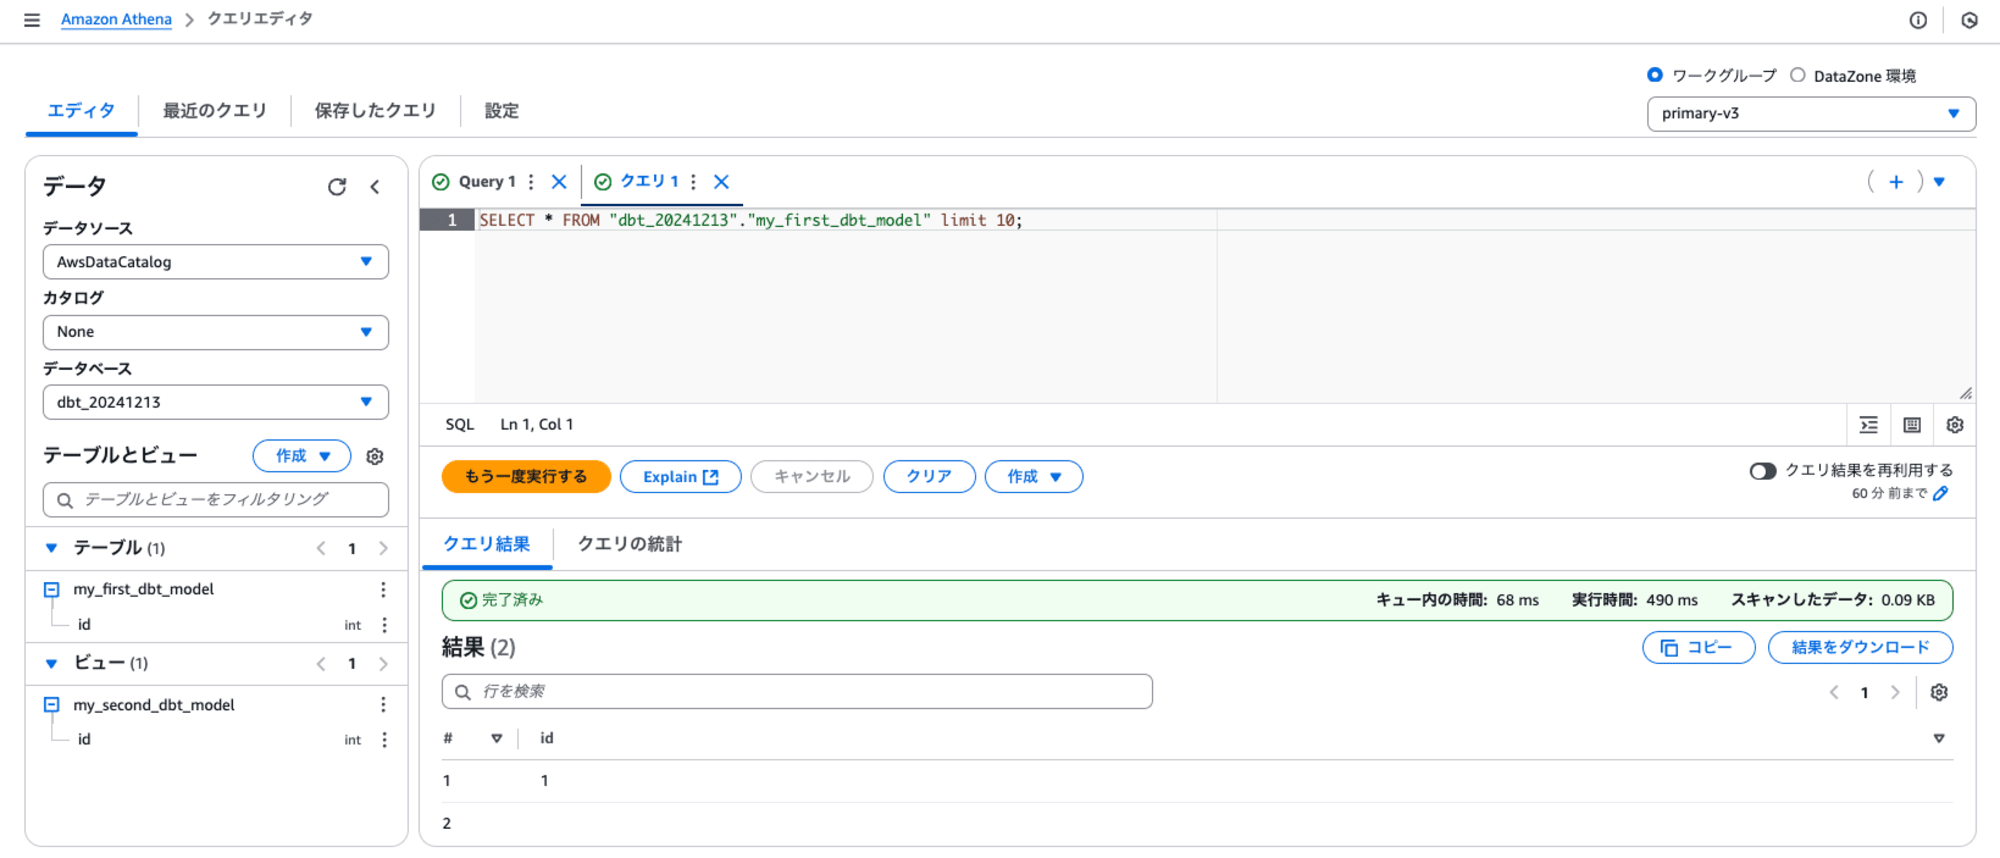
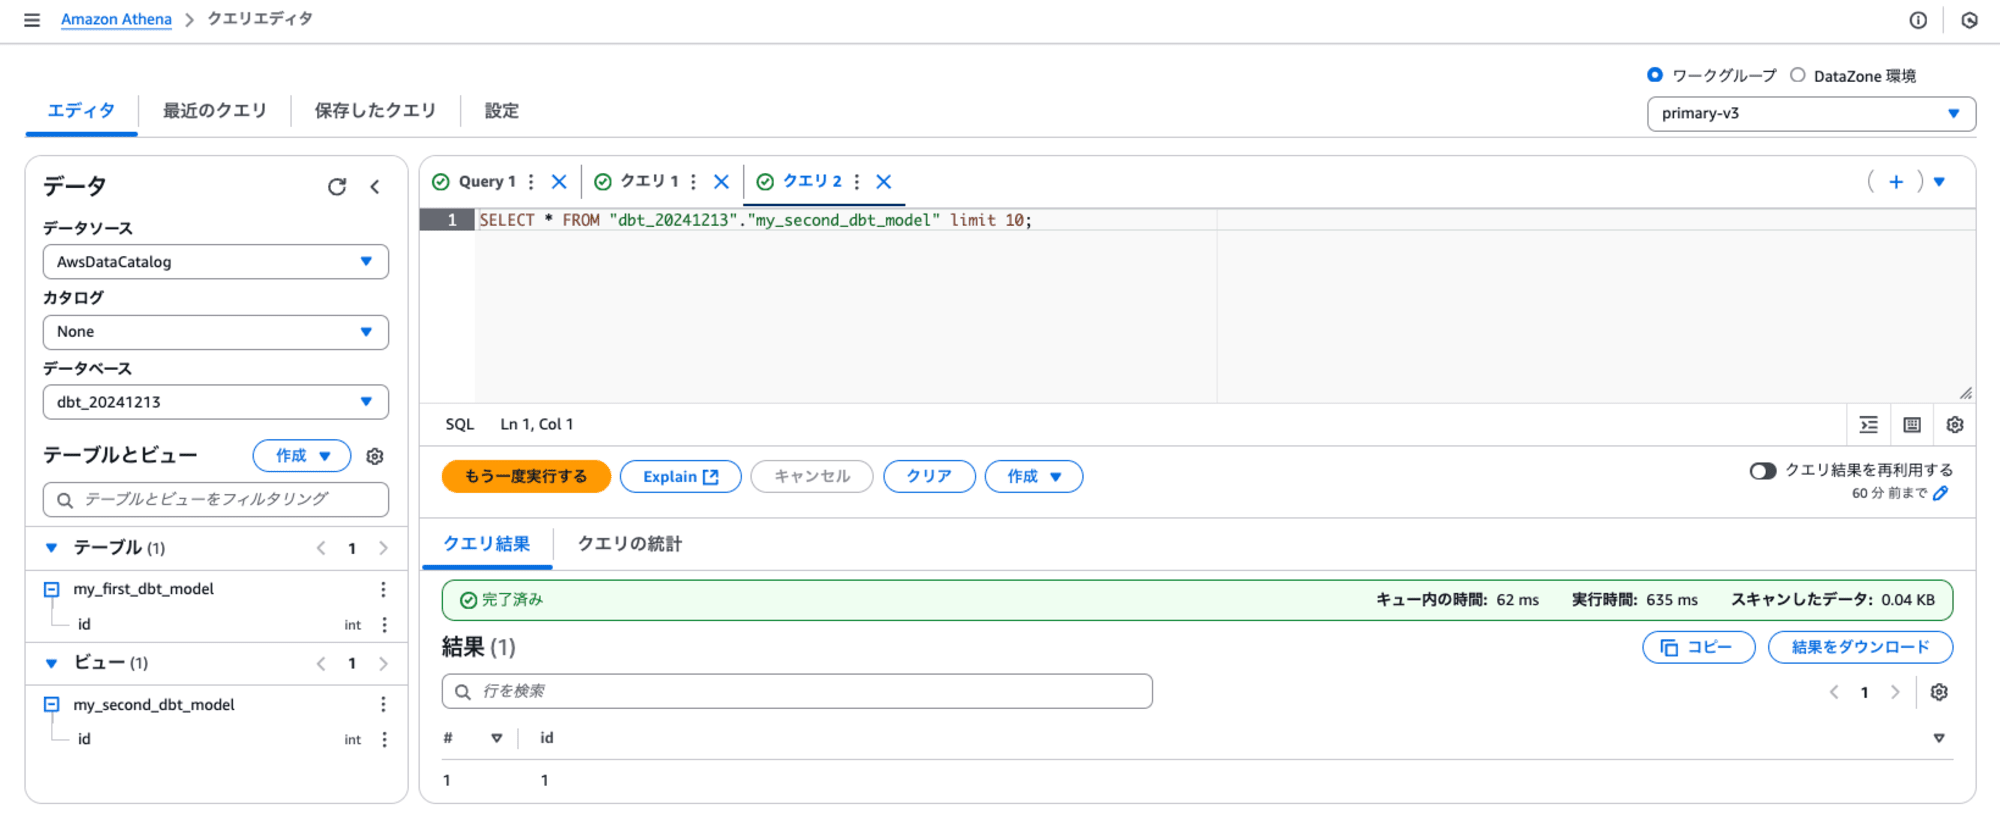
my_first_dbt_modelテーブルとmy_second_dbt_modelビューが作成されたことが確認できます。


モデルのテスト
dbt test
実行例:
[cloudshell-user@ip-10-134-21-79 prj_athena]$ dbt test
13:15:53  Running with dbt=1.9.0
13:15:54  Registered adapter: athena=1.8.4
13:15:55  Found 2 models, 4 data tests, 455 macros
13:15:55
13:15:55  Concurrency: 1 threads (target='dev')
13:15:55
13:15:56  1 of 4 START test not_null_my_first_dbt_model_id ............................... [RUN]
13:15:58  1 of 4 FAIL 1 not_null_my_first_dbt_model_id ................................... [FAIL 1 in 1.72s]
13:15:58  2 of 4 START test not_null_my_second_dbt_model_id .............................. [RUN]
13:15:59  2 of 4 PASS not_null_my_second_dbt_model_id .................................... [PASS in 1.50s]
13:15:59  3 of 4 START test unique_my_first_dbt_model_id ................................. [RUN]
13:16:01  3 of 4 PASS unique_my_first_dbt_model_id ....................................... [PASS in 1.82s]
13:16:01  4 of 4 START test unique_my_second_dbt_model_id ................................ [RUN]
13:16:03  4 of 4 PASS unique_my_second_dbt_model_id ...................................... [PASS in 2.60s]
13:16:03
13:16:03  Finished running 4 data tests in 0 hours 0 minutes and 8.71 seconds (8.71s).
13:16:04
13:16:04  Completed with 1 error, 0 partial successes, and 0 warnings:
13:16:04
13:16:04  Failure in test not_null_my_first_dbt_model_id (models/example/schema.yml)
13:16:04    Got 1 result, configured to fail if != 0
13:16:04
13:16:04    compiled code at target/compiled/prj_athena/models/example/schema.yml/not_null_my_first_dbt_model_id.sql
13:16:04
13:16:04  Done. PASS=3 WARN=0 ERROR=1 SKIP=0 TOTAL=4
モデルの修正して、モデルの再作成・再テスト
データの誤りを修正してみます。source_dataインナービューには、nullのデータを含んでいるため、dbt test がエラーとなりました。最後の行のコメントを外します。
vi models/example/my_first_dbt_model.sql
/*
    Welcome to your first dbt model!
    Did you know that you can also configure models directly within SQL files?
    This will override configurations stated in dbt_project.yml

    Try changing "table" to "view" below
*/

{{ config(materialized='table') }}

with source_data as (

    select 1 as id
    union all
    select null as id

)

select *
from source_data

/*
    Uncomment the line below to remove records with null `id` values
*/
-- ↓↓↓ コメントを外す ↓↓↓
where id is not null
モデルの作成とテストを再実行します。
dbt run
dbt test
再実行例:
[cloudshell-user@ip-10-134-21-79 prj_athena]$ dbt run
13:18:52  Running with dbt=1.9.0
13:18:53  Registered adapter: athena=1.8.4
13:18:54  Found 2 models, 4 data tests, 455 macros
13:18:54
13:18:54  Concurrency: 1 threads (target='dev')
13:18:54
13:18:56  1 of 2 START sql table model dbt_20241213.my_first_dbt_model ................... [RUN]
13:19:04  1 of 2 OK created sql table model dbt_20241213.my_first_dbt_model .............. [OK 1 in 8.19s]
13:19:04  2 of 2 START sql view model dbt_20241213.my_second_dbt_model ................... [RUN]
13:19:07  2 of 2 OK created sql view model dbt_20241213.my_second_dbt_model .............. [OK -1 in 2.73s]
13:19:07
13:19:07  Finished running 1 table model, 1 view model in 0 hours 0 minutes and 12.47 seconds (12.47s).
13:19:07
13:19:07  Completed successfully
13:19:07
13:19:07  Done. PASS=2 WARN=0 ERROR=0 SKIP=0 TOTAL=2

[cloudshell-user@ip-10-134-21-79 prj_athena]$ dbt test
13:19:32  Running with dbt=1.9.0
13:19:33  Registered adapter: athena=1.8.4
13:19:34  Found 2 models, 4 data tests, 455 macros
13:19:34
13:19:34  Concurrency: 1 threads (target='dev')
13:19:34
13:19:35  1 of 4 START test not_null_my_first_dbt_model_id ............................... [RUN]
13:19:37  1 of 4 PASS not_null_my_first_dbt_model_id ..................................... [PASS in 1.79s]
13:19:37  2 of 4 START test not_null_my_second_dbt_model_id .............................. [RUN]
13:19:38  2 of 4 PASS not_null_my_second_dbt_model_id .................................... [PASS in 1.47s]
13:19:38  3 of 4 START test unique_my_first_dbt_model_id ................................. [RUN]
13:19:40  3 of 4 PASS unique_my_first_dbt_model_id ....................................... [PASS in 1.69s]
13:19:40  4 of 4 START test unique_my_second_dbt_model_id ................................ [RUN]
13:19:41  4 of 4 PASS unique_my_second_dbt_model_id ...................................... [PASS in 1.46s]
13:19:41
13:19:41  Finished running 4 data tests in 0 hours 0 minutes and 7.52 seconds (7.52s).
13:19:41
13:19:41  Completed successfully
13:19:41
13:19:41  Done. PASS=4 WARN=0 ERROR=0 SKIP=0 TOTAL=4
dbtドキュメント作成
dbt docs generate を実行するとデータカタログやデータリネージを参照できるシングルページアプリケーションが生成されます。
dbt docs generate
実行例:
[cloudshell-user@ip-10-134-21-79 prj_athena]$ dbt docs generate
13:20:18  Running with dbt=1.9.0
13:20:19  Registered adapter: athena=1.8.4
13:20:20  Found 2 models, 4 data tests, 455 macros
13:20:20
13:20:20  Concurrency: 1 threads (target='dev')
13:20:20
13:20:21  Building catalog
13:20:23  Catalog written to /home/cloudshell-user/dbt/prj_athena/target/catalog.json
生成されたドキュメントは以下の通りです。
[cloudshell-user@ip-10-134-21-79 prj_athena]$ ll /home/cloudshell-user/dbt/prj_athena/target/
total 2688
-rw-r--r--. 1 cloudshell-user cloudshell-user    1276 Dec 13 13:21 catalog.json
drwxr-xr-x. 3 cloudshell-user cloudshell-user    4096 Dec 13 13:11 compiled
-rw-r--r--. 1 cloudshell-user cloudshell-user    6534 Dec 13 13:21 graph.gpickle
-rw-r--r--. 1 cloudshell-user cloudshell-user     626 Dec 13 13:21 graph_summary.json
-rw-r--r--. 1 cloudshell-user cloudshell-user 1709115 Dec 13 13:22 index.html
-rw-r--r--. 1 cloudshell-user cloudshell-user  496738 Dec 13 13:21 manifest.json
-rw-r--r--. 1 cloudshell-user cloudshell-user  500259 Dec 13 13:18 partial_parse.msgpack
drwxr-xr-x. 3 cloudshell-user cloudshell-user    4096 Dec 13 13:12 run
-rw-r--r--. 1 cloudshell-user cloudshell-user    6343 Dec 13 13:21 run_results.json
-rw-r--r--. 1 cloudshell-user cloudshell-user     253 Dec 13 13:21 semantic_manifest.json
dbtドキュメント参照
参照できませんが、参考まで。ポート8080でウェブサーバーが起動して、参照できるようになります。
dbt docs serve
実行例:
[cloudshell-user@ip-10-134-21-79 prj_athena]$ dbt docs serve
13:22:55  Running with dbt=1.9.0
Serving docs at 8080
To access from your browser, navigate to: http://localhost:8080

Press Ctrl+C to exit.
最後に
環境構築のプロセスは、CloudShellの起動、必要なパッケージのインストール、そしてAmazon Athenaへの接続という順序で進められます。また、環境のクリーンアップが非常に簡単で、「AWS CloudShell ホームディレクトリの削除」オプションを使用するだけで数秒で完了することも大きな利点です。これにより、環境構築に失敗した場合でも迅速にリトライできるほか、長期間未使用の環境も自動的にクリーンアップされるため、リソースの効率的な管理が可能となります。
AWS CloudShellを活用することで、dbtクライアント環境を迅速かつ効率的に構築でき、dbtも手軽にお試しいただけることを体験していただけたと思います。


