Amazon Timestream for InfluxDB 3 CoreとInfluxDB 3 ExplorerをCloudFormationで構築してみた

データ事業本部のueharaです。
今回は、Amazon Timestream for InfluxDB 3 CoreとInfluxDB 3 ExplorerをCloudFormationで構築し、Explorerからデータの投入とクエリを行ってみたいと思います。
はじめに
Amazon Timestream for InfluxDBは、InfluxDBをAWS上で利用できるフルマネージドサービスです。
InfluxDB 3では、Apache Arrow、Apache DataFusion、Apache Parquetをベースとした列指向のアーキテクチャが採用され、SQLとInfluxQLによるクエリがサポートされています。
一方、InfluxDB 3にはInfluxDB 2のような組み込みのWeb UIがありません。Web UIを利用する場合は、InfluxDataが提供する InfluxDB 3 Explorer を別途用意する必要があります。
今回は、次の内容を確認します。
- Amazon Timestream for InfluxDB 3 Coreをプライベートサブネットに作成
- プライベートサブネットのEC2上でInfluxDB 3 Explorerを起動
- AWS Systems Manager Session ManagerのポートフォワーディングでExplorerへ接続
- ExplorerからInfluxDB 3へ接続
- ExplorerのUIからサンプルデータを投入し、SQLでクエリ
環境構築にはCloudFormationを利用します。
構成
今回の構成は以下の通りです。
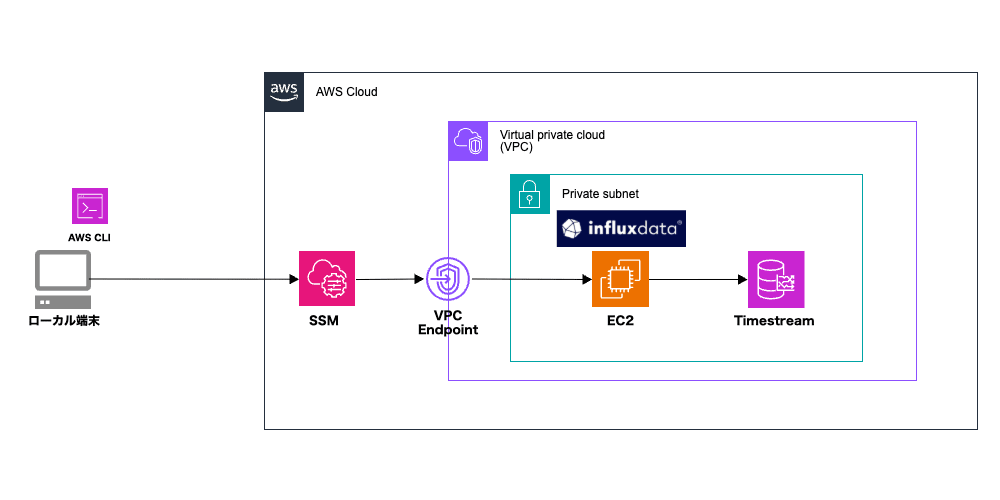
ローカルPCからEC2へのSSH接続や、EC2へのパブリックIPの付与は行いません。
ローカルPCからSSM Session Managerのポートフォワーディングを開始し、EC2のループバックアドレスで待ち受けるExplorerへ接続します。
ローカルPCのブラウザ
  └─ http://localhost:8888
       └─ SSMポートフォワーディング
            └─ EC2上のInfluxDB 3 Explorer(127.0.0.1:8888)
                 └─ HTTPS/TCP 8086
                      └─ Timestream for InfluxDB 3 Core
セキュリティグループは、InfluxDB 3側でExplorerのセキュリティグループを送信元としたTCP 8086のみを許可します。
ExplorerはEC2の 127.0.0.1:8888 にのみ公開するため、Explorer用セキュリティグループにインバウンドルールは設定しません。
事前準備
事前に以下を用意しておきます。
- VPC
- 異なるAZにある2つのプライベートサブネット
- 各プライベートサブネットに関連付くルートテーブル
- 各ルートテーブルに関連付けたAmazon S3 Gateway Endpoint
- ローカルPCのAWS CLI
- ローカルPCのSession Manager Plugin
今回は、EC2がDockerパッケージやExplorerのコンテナイメージを取得できるよう、プライベートサブネットからNAT Gatewayを経由してインターネットへ接続できるようにしています。
また、Timestream for InfluxDB 3のプライベートクラスターを作成する場合、DBで使用するサブネットのルートテーブルにS3 Gateway Endpointを関連付ける必要があります。
※ 0.0.0.0/0 をNAT Gatewayへ向けていても、S3 Gateway Endpointの代わりにはなりません。
なお、InfluxDB 3 Coreは単一ノードですが、クラスターの作成時には異なるAZのサブネットを最低2つ指定する必要があることにご留意下さい。(2つのサブネットを指定しても、Coreのノードが2つ作成されるわけではありません)
CloudFormationテンプレートの作成
今回使用するCloudFormationテンプレートは以下の通りです。
influxdb3-explorer-poc.yaml
AWSTemplateFormatVersion: "2010-09-09"
Description: >
  Creates a private single-node Timestream for InfluxDB 3 Core cluster and
  hosts InfluxDB 3 Explorer on a private EC2 instance. Administrators access
  Explorer through an SSM port-forwarding session.

Parameters:
  VpcId:
    Type: AWS::EC2::VPC::Id
    Description: VPC containing the private subnet and Timestream for InfluxDB 3.

  PrivateSubnetId:
    Type: AWS::EC2::Subnet::Id
    Description: >
      First private subnet for the InfluxDB 3 cluster and the Explorer EC2
      instance. It must have access to Systems Manager and to the
      container/package repositories.

  PrivateSubnetId2:
    Type: AWS::EC2::Subnet::Id
    Description: >
      Second private subnet for the InfluxDB 3 cluster. It must be in a
      different Availability Zone from PrivateSubnetId.

  ExplorerInstanceType:
    Type: String
    Default: t3.small
    Description: EC2 instance type used to run InfluxDB 3 Explorer.
    AllowedValues:
      - t3.micro
      - t3.small
      - t3.medium
      - t3.large

  InfluxDbClusterName:
    Type: String
    Default: influxdb3-poc
    Description: Name of the Timestream for InfluxDB 3 Core cluster.
    MinLength: 3
    MaxLength: 40
    AllowedPattern: ^[a-zA-Z][a-zA-Z0-9]*(-[a-zA-Z0-9]+)*$

  InfluxDbInstanceType:
    Type: String
    Default: db.influx.large
    Description: Instance class for the single-node InfluxDB 3 Core cluster.
    AllowedValues:
      - db.influx.medium
      - db.influx.large
      - db.influx.xlarge
      - db.influx.2xlarge
      - db.influx.4xlarge
      - db.influx.8xlarge
      - db.influx.12xlarge
      - db.influx.16xlarge
      - db.influx.24xlarge

  LatestAmiId:
    Type: AWS::SSM::Parameter::Value<AWS::EC2::Image::Id>
    Default: /aws/service/ami-amazon-linux-latest/al2023-ami-kernel-default-x86_64
    Description: SSM public parameter for the Amazon Linux 2023 AMI.

  ExplorerImage:
    Type: String
    Default: influxdata/influxdb3-ui:1.9.0
    Description: InfluxDB 3 Explorer container image.

  ExplorerMode:
    Type: String
    Default: admin
    AllowedValues:
      - admin
      - query
    Description: >
      Explorer operation mode. Use query with a read-only token when
      administrative functions are unnecessary.

Resources:
  ExplorerInstanceRole:
    Type: AWS::IAM::Role
    Properties:
      Description: Allows the Explorer EC2 instance to connect to Systems Manager.
      AssumeRolePolicyDocument:
        Version: "2012-10-17"
        Statement:
          - Effect: Allow
            Principal:
              Service:
                - ec2.amazonaws.com
            Action:
              - sts:AssumeRole
      ManagedPolicyArns:
        - arn:aws:iam::aws:policy/AmazonSSMManagedInstanceCore
      Tags:
        - Key: Name
          Value: influxdb3-explorer-poc

  ExplorerInstanceProfile:
    Type: AWS::IAM::InstanceProfile
    Properties:
      Roles:
        - Ref: ExplorerInstanceRole

  ExplorerSecurityGroup:
    Type: AWS::EC2::SecurityGroup
    Properties:
      GroupDescription: "InfluxDB 3 Explorer accessed through SSM Session Manager"
      VpcId:
        Ref: VpcId
      SecurityGroupEgress:
        - IpProtocol: "-1"
          CidrIp: 0.0.0.0/0
          Description: PoC outbound access
      Tags:
        - Key: Name
          Value: influxdb3-explorer-poc

  InfluxDbSecurityGroup:
    Type: AWS::EC2::SecurityGroup
    Properties:
      GroupDescription: "Private InfluxDB 3 cluster allowing Explorer on TCP 8086"
      VpcId:
        Ref: VpcId
      SecurityGroupEgress:
        - IpProtocol: "-1"
          CidrIp: 0.0.0.0/0
          Description: PoC outbound access
      Tags:
        - Key: Name
          Value: influxdb3-poc

  InfluxDbIngressFromExplorer:
    Type: AWS::EC2::SecurityGroupIngress
    Properties:
      Description: Allow InfluxDB 3 Explorer to connect over TLS.
      GroupId:
        Ref: InfluxDbSecurityGroup
      IpProtocol: tcp
      FromPort: 8086
      ToPort: 8086
      SourceSecurityGroupId:
        Ref: ExplorerSecurityGroup

  InfluxDbCluster:
    Type: AWS::Timestream::InfluxDBCluster
    DependsOn:
      - InfluxDbIngressFromExplorer
    Properties:
      Name:
        Ref: InfluxDbClusterName
      DbInstanceType:
        Ref: InfluxDbInstanceType
      DbParameterGroupIdentifier: InfluxDBV3Core
      NetworkType: IPV4
      Port: 8086
      PubliclyAccessible: false
      VpcSecurityGroupIds:
        - Ref: InfluxDbSecurityGroup
      VpcSubnetIds:
        - Ref: PrivateSubnetId
        - Ref: PrivateSubnetId2
      Tags:
        - Key: Name
          Value:
            Ref: InfluxDbClusterName
        - Key: Purpose
          Value: InfluxDB3PoC

  ExplorerInstance:
    Type: AWS::EC2::Instance
    Properties:
      ImageId:
        Ref: LatestAmiId
      InstanceType:
        Ref: ExplorerInstanceType
      IamInstanceProfile:
        Ref: ExplorerInstanceProfile
      MetadataOptions:
        HttpEndpoint: enabled
        HttpTokens: required
        HttpPutResponseHopLimit: 1
      NetworkInterfaces:
        - AssociatePublicIpAddress: false
          DeleteOnTermination: true
          DeviceIndex: "0"
          GroupSet:
            - Ref: ExplorerSecurityGroup
          SubnetId:
            Ref: PrivateSubnetId
      BlockDeviceMappings:
        - DeviceName: /dev/xvda
          Ebs:
            DeleteOnTermination: true
            Encrypted: true
            VolumeSize: 20
            VolumeType: gp3
      UserData:
        Fn::Base64:
          Fn::Sub: |
            #!/bin/bash
            set -euxo pipefail
            exec > >(tee /var/log/influxdb3-explorer-user-data.log | logger -t user-data -s 2>/dev/console) 2>&1

            dnf install -y docker openssl
            systemctl enable --now docker

            install -d -m 0700 -o 1500 -g 1500 /opt/influxdb3-explorer/db
            install -d -m 0700 /etc/influxdb3-explorer

            SESSION_SECRET_KEY=$(openssl rand -hex 32)
            printf 'SESSION_SECRET_KEY=%s\n' "$SESSION_SECRET_KEY" \
              > /etc/influxdb3-explorer/explorer.env
            chmod 0600 /etc/influxdb3-explorer/explorer.env

            docker pull "${ExplorerImage}"
            docker run --detach \
              --name influxdb3-explorer \
              --publish 127.0.0.1:8888:8080 \
              --volume /opt/influxdb3-explorer/db:/db:rw \
              --env-file /etc/influxdb3-explorer/explorer.env \
              --restart unless-stopped \
              "${ExplorerImage}" \
              --mode="${ExplorerMode}"
      Tags:
        - Key: Name
          Value: influxdb3-explorer-poc
        - Key: Purpose
          Value: InfluxDB3Explorer

Outputs:
  ExplorerInstanceId:
    Description: Target instance ID for the SSM port-forwarding session.
    Value:
      Ref: ExplorerInstance

  ExplorerSecurityGroupId:
    Description: Security group attached to the Explorer EC2 instance.
    Value:
      Ref: ExplorerSecurityGroup

  InfluxDbClusterId:
    Description: Service-generated identifier of the InfluxDB 3 cluster.
    Value:
      Fn::GetAtt:
        - InfluxDbCluster
        - Id

  InfluxDbClusterArn:
    Description: ARN of the InfluxDB 3 cluster.
    Value:
      Fn::GetAtt:
        - InfluxDbCluster
        - Arn

  InfluxDbSecurityGroupId:
    Description: Security group attached to the InfluxDB 3 cluster.
    Value:
      Ref: InfluxDbSecurityGroup

  InfluxDbEndpoint:
    Description: Private endpoint of the InfluxDB 3 cluster.
    Value:
      Fn::GetAtt:
        - InfluxDbCluster
        - Endpoint

  InfluxDbServerUrl:
    Description: URL to register under Explorer Configure > Servers.
    Value:
      Fn::Sub:
        - https://${Endpoint}:8086
        - Endpoint:
            Fn::GetAtt:
              - InfluxDbCluster
              - Endpoint

  InfluxAuthParametersSecretArn:
    Description: >
      Secrets Manager ARN containing the initial InfluxDB authorization
      parameters generated by the service.
    Value:
      Fn::GetAtt:
        - InfluxDbCluster
        - InfluxAuthParametersSecretArn

  StartPortForwardingCommand:
    Description: Run this command locally, and then open http://localhost:8888.
    Value:
      Fn::Sub: >-
        aws ssm start-session
        --target ${ExplorerInstance}
        --document-name AWS-StartPortForwardingSession
        --parameters '{"portNumber":["8888"],"localPortNumber":["8888"]}'

  ExplorerUrl:
    Description: Local URL available while the SSM session is running.
    Value: http://localhost:8888
作成する主なリソースは以下の通りです。
- Timestream for InfluxDB 3 Coreクラスター
- Explorer実行用EC2
- EC2用IAMロールとインスタンスプロファイル
- Explorer用セキュリティグループ
- InfluxDB 3用セキュリティグループ
Explorer用EC2のUser Dataでは、Dockerをインストールした後にInfluxDB 3 Explorer 1.9.0をadminモードで起動しています。
docker run --detach \
  --name influxdb3-explorer \
  --publish 127.0.0.1:8888:8080 \
  --volume /opt/influxdb3-explorer/db:/db:rw \
  --env-file /etc/influxdb3-explorer/explorer.env \
  --restart unless-stopped \
  influxdata/influxdb3-ui:1.9.0 \
  --mode=admin
ホスト側の待ち受けを 127.0.0.1:8888 に限定しているため、VPC内の別リソースからExplorerへ直接アクセスすることもできません。
デプロイ
テンプレートをCloudFormationへアップロードし、スタックを作成します。
今回は以下のパラメータを設定しました。
| パラメータ | 設定値 | 説明 |
|---|---|---|
VpcId |
既存VPCのID | InfluxDB 3とExplorerを配置するVPC |
PrivateSubnetId |
1つ目のプライベートサブネットID | ExplorerとInfluxDB 3を配置するサブネット |
PrivateSubnetId2 |
2つ目のプライベートサブネットID | InfluxDB 3で使用する、1つ目とは異なるAZのサブネット |
ExplorerInstanceType |
t3.small |
Explorerを実行するEC2のインスタンスタイプ |
InfluxDbClusterName |
influxdb3-poc |
InfluxDB 3 Coreのクラスター名 |
InfluxDbInstanceType |
db.influx.large |
InfluxDB 3 CoreのDBインスタンスタイプ |
LatestAmiId |
デフォルト値 | Amazon Linux 2023のAMIを取得するSSMパラメータ |
ExplorerImage |
influxdata/influxdb3-ui:1.9.0 |
Explorerのコンテナイメージ |
ExplorerMode |
admin |
Explorerの動作モード |
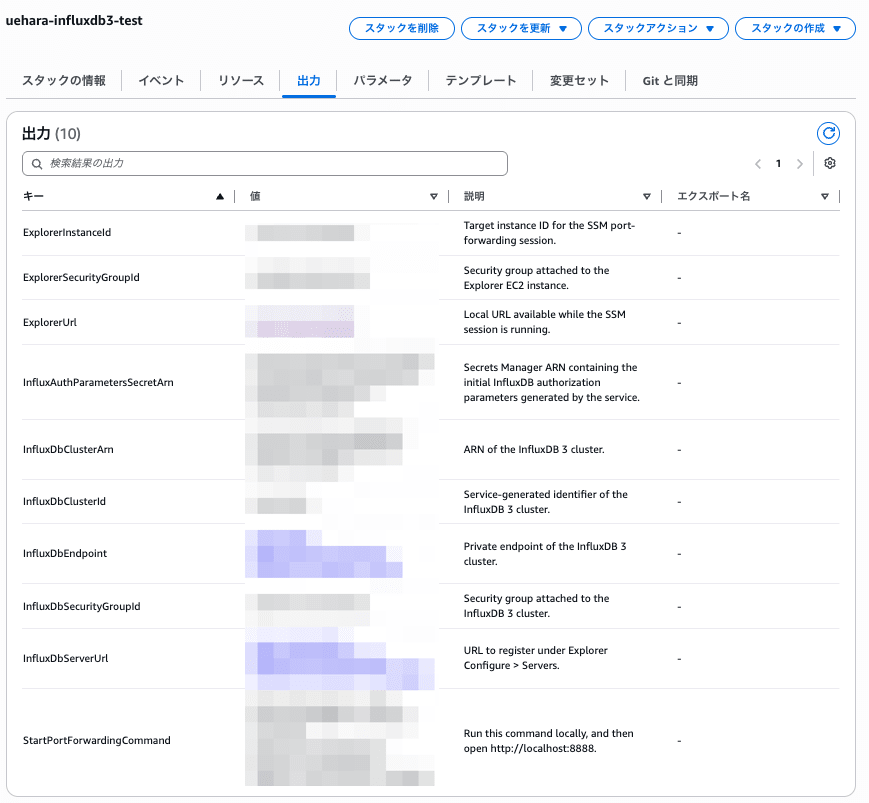
作成が完了すると、次のような出力が得られます。
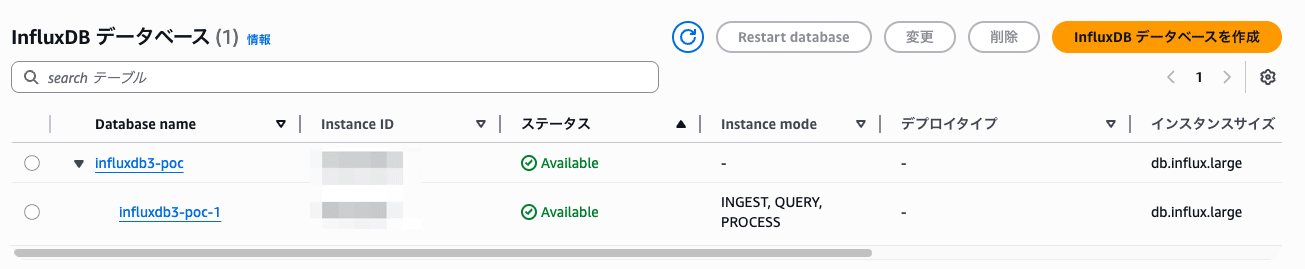
Timestream for InfluxDBのコンソールでも、Coreクラスターのステータスが『Available』になっていることを確認します。
Explorerへ接続
Session Manager Pluginのインストール
SSMのポートフォワーディングには、ローカルPCへAWS CLIとは別にSession Manager Pluginをインストールする必要があります。
未インストールの場合は、以下などを参考にインストールして下さい。
ポートフォワーディングの開始
CloudFormationの出力 StartPortForwardingCommand に表示されるコマンドを、ローカルPCで実行します。
$ aws ssm start-session \
  --target <EXPLORER_EC2_INSTANCE_ID> \
  --document-name AWS-StartPortForwardingSession \
  --parameters '{
    "portNumber":["8888"],
    "localPortNumber":["8888"]
  }'
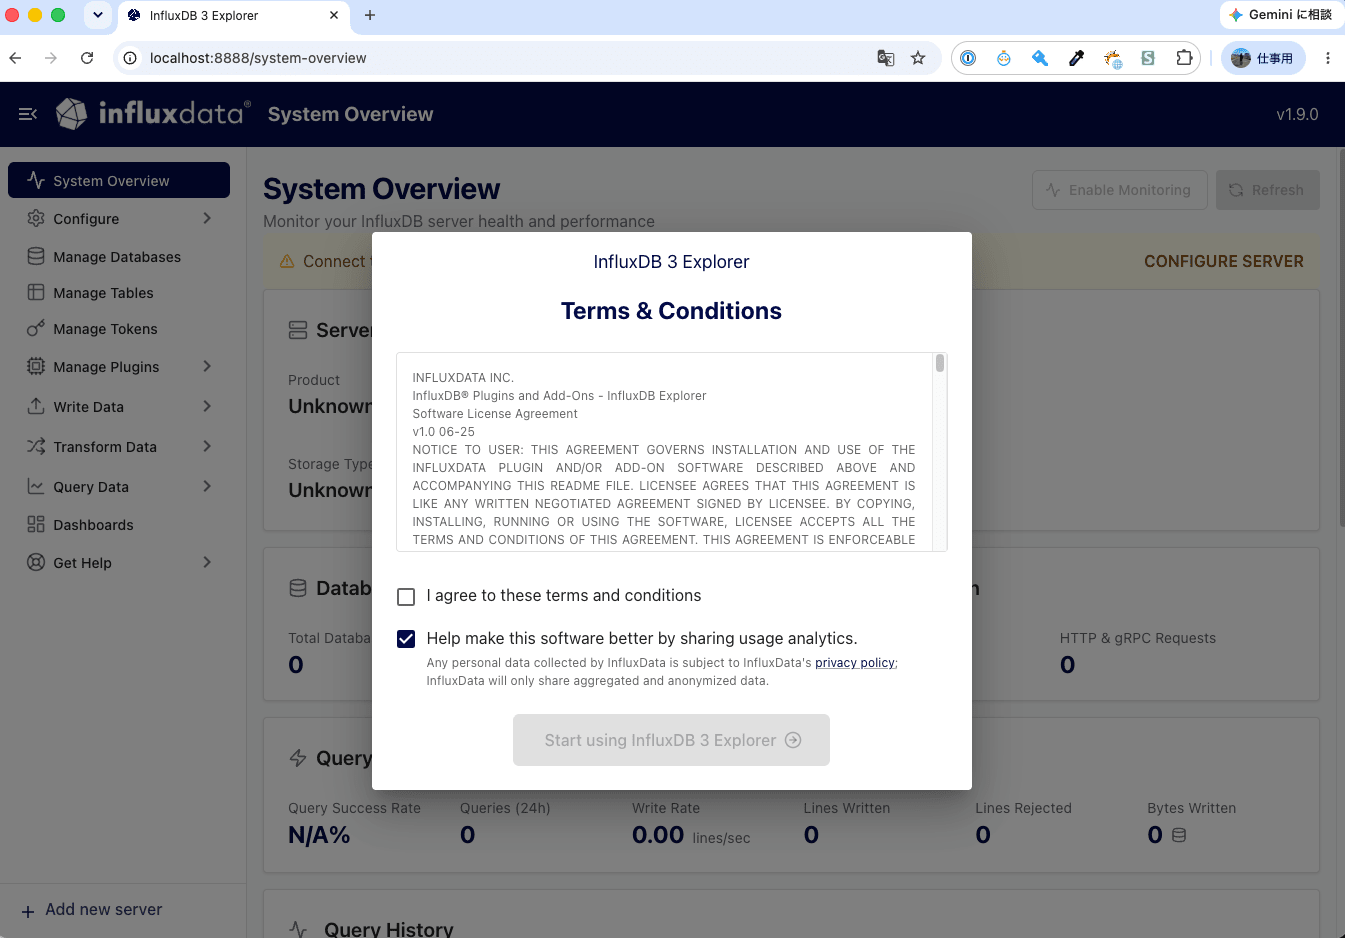
セッションが開始されたら、ブラウザから以下へアクセスします。
http://localhost:8888
Explorerの画面が表示されれば、SSMポートフォワーディングによる接続は成功です。
このポートフォワーディングは、次の経路だけを作成します。
ローカルPCのlocalhost:8888
  └─ EC2のlocalhost:8888
       └─ Explorer
InfluxDB 3のDB APIへ直接ポートフォワーディングしているわけではない点に注意して下さい。
ExplorerからInfluxDB 3へ接続
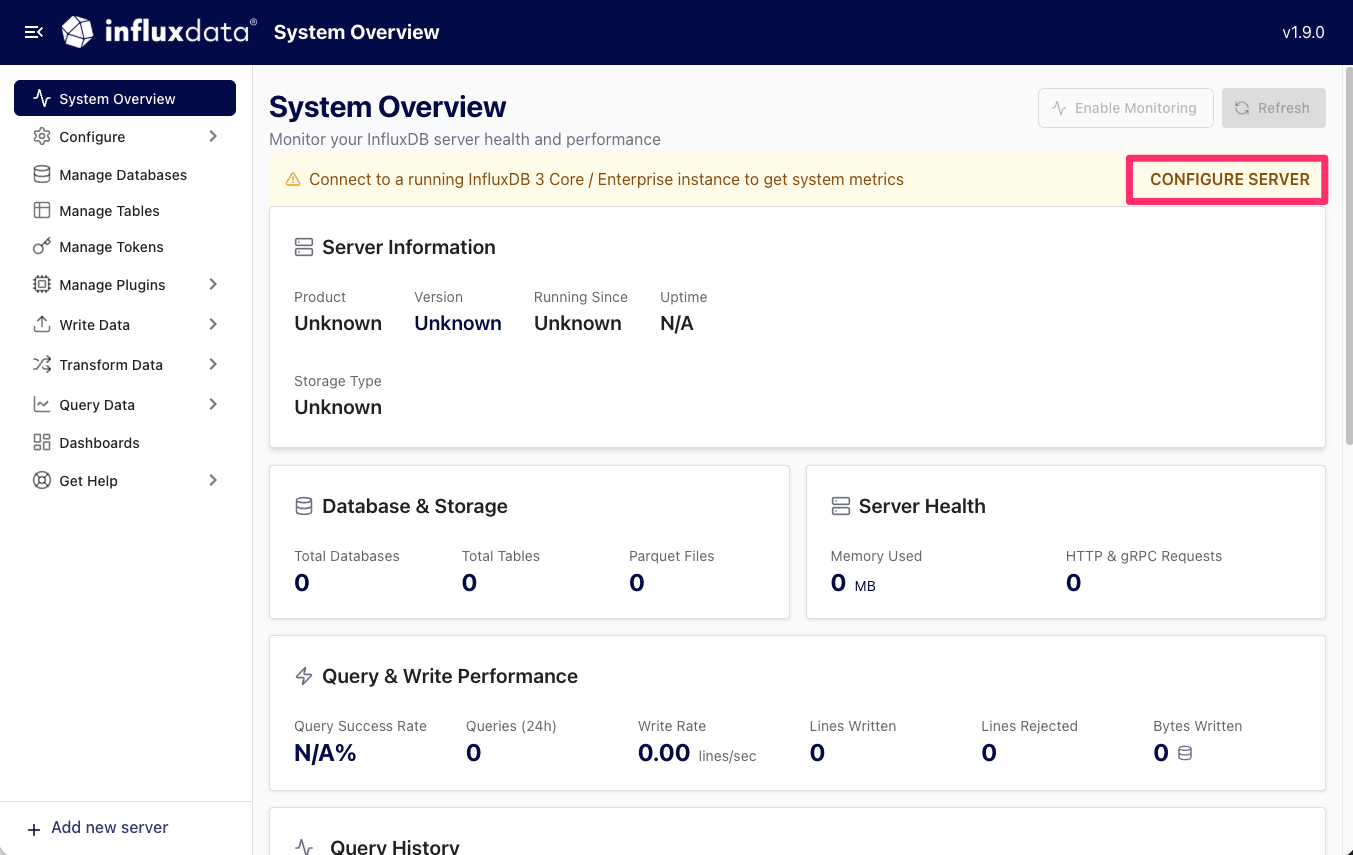
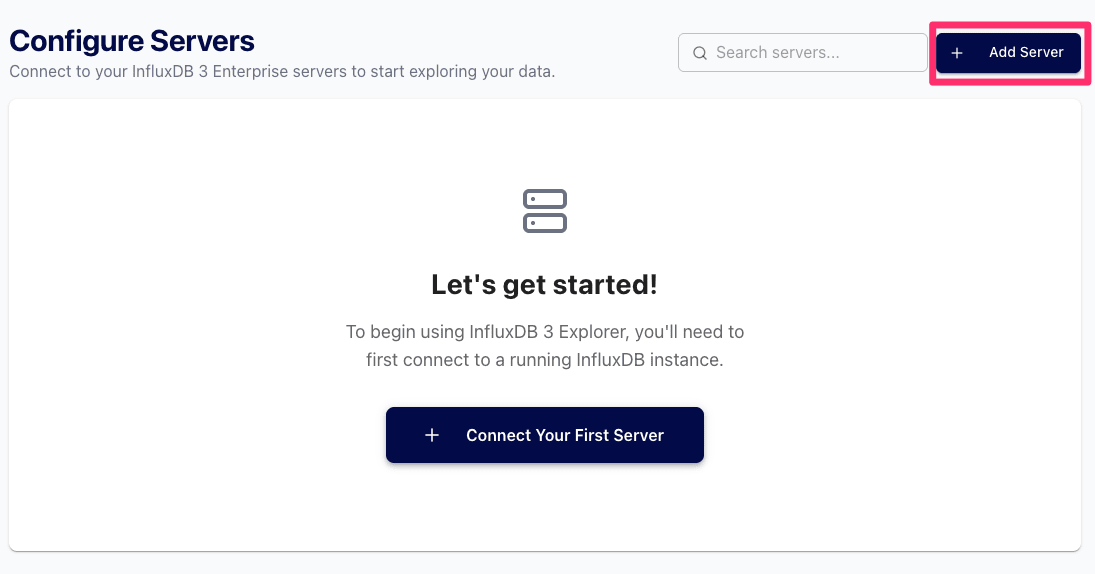
Explorerを開いたら、『CONFIGURE SERVER』を押下します。
次に『Add Server』ボタンを押下します。
以下の値を設定します。
- Server Name:任意の名前
- Server URL:CloudFormation出力の
InfluxDbServerUrl - Token:Secrets Managerに保存された管理者トークン
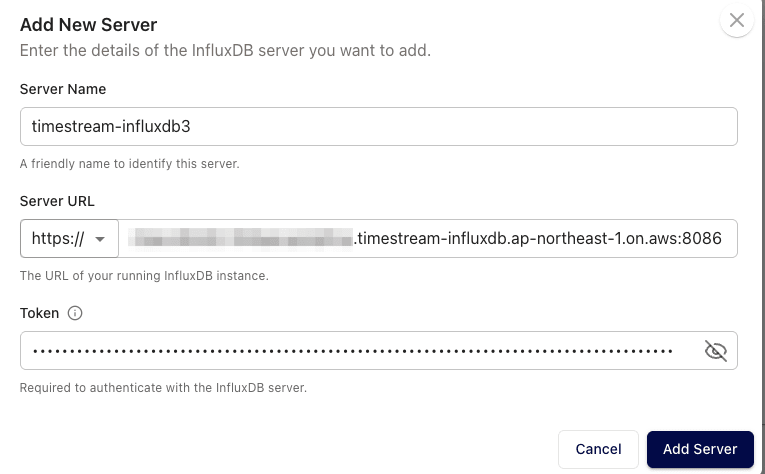
Server URLは次の形式です。
https://<InfluxDB 3のエンドポイント>:8086
Tokenは、CloudFormation出力の InfluxAuthParametersSecretArn が示すSecrets ManagerのSecretから取得します。
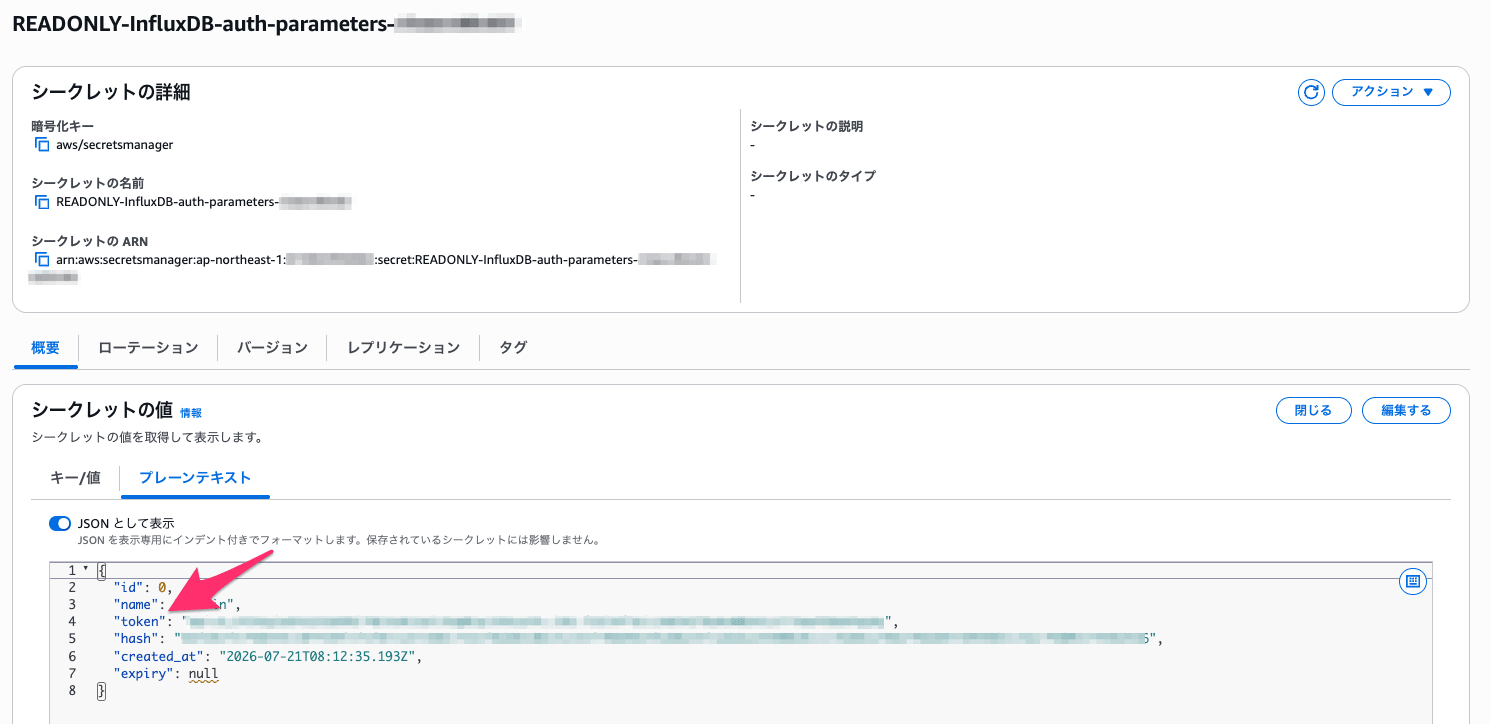
Secret名には READONLY- という文字列が含まれていますが、これはトークンが読み取り専用という意味ではありません。
Secrets Manager上のSecretは、InfluxDB作成時に生成された認証情報の読み取り専用コピーです。Secrets Manager上の値を変更または削除しても、InfluxDB側の認証情報は変更されないという意味になります。
今回は管理者トークンを使用しているため、Explorerからのデータ書き込みや管理操作も可能です。
接続情報を入力した後『Add Server』を選択し、接続に成功するとExplorer上でInfluxDB 3の情報を確認できるようになります。
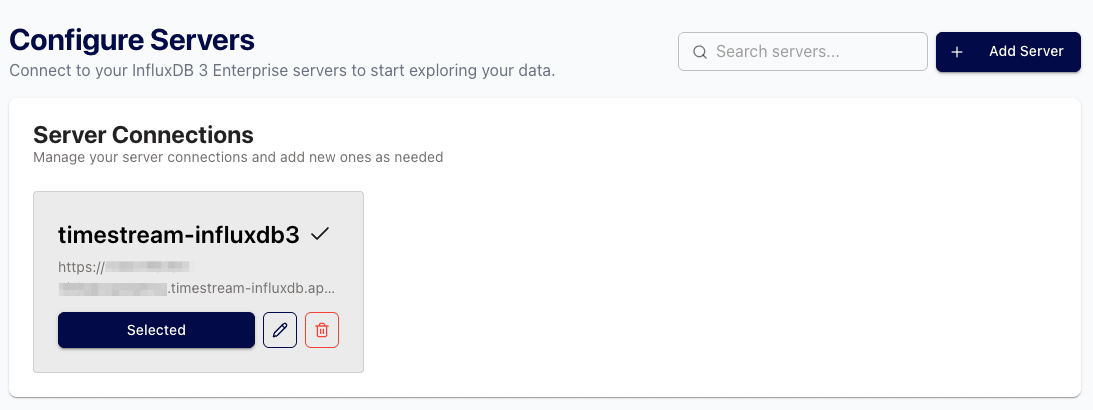
なお、今回の構成では認証が次の2段階に分かれています。
- Explorer画面へのアクセス:SSMを実行できるAWS IAM権限
- ExplorerからInfluxDB 3へのアクセス:InfluxDB 3のトークン
Explorer自体にはユーザーごとのログイン機能は無いためご留意下さい。
サンプルデータの投入
接続ができたので、ExplorerのUIからデータを投入します。
今回は『Write Data』 → 『Sample Data』と進みます。
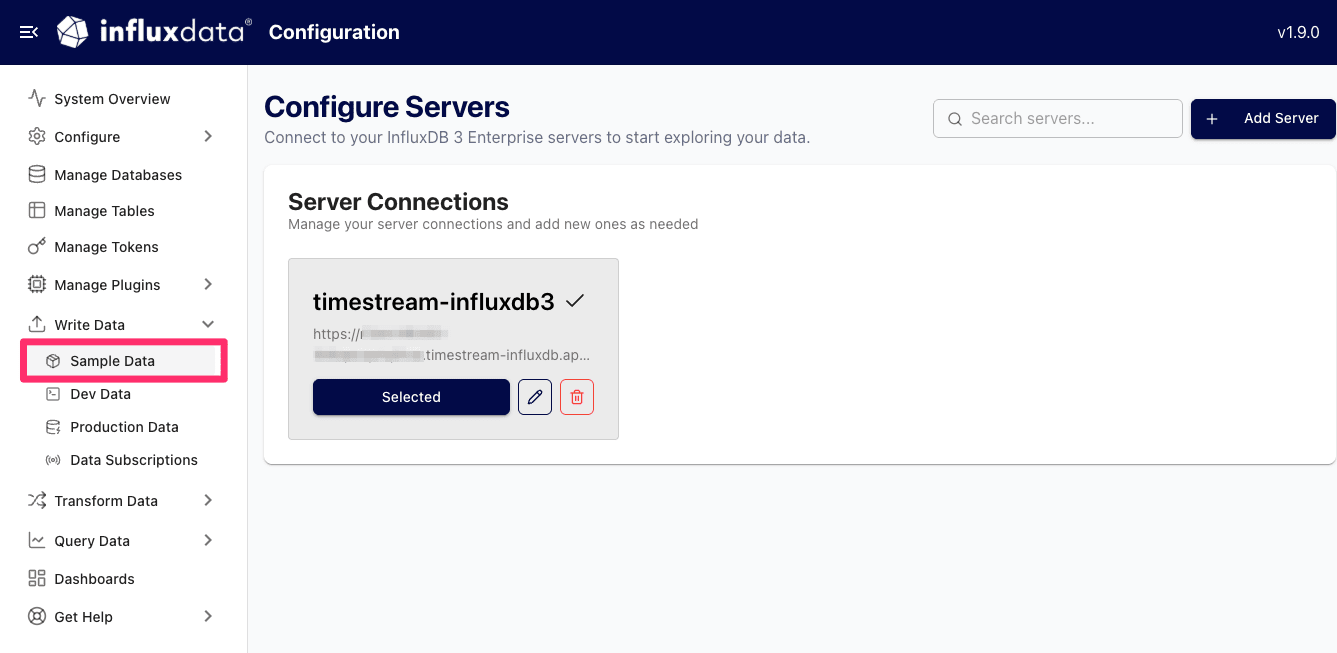
次に『Air Sensor』のサンプルデータを選択しました。
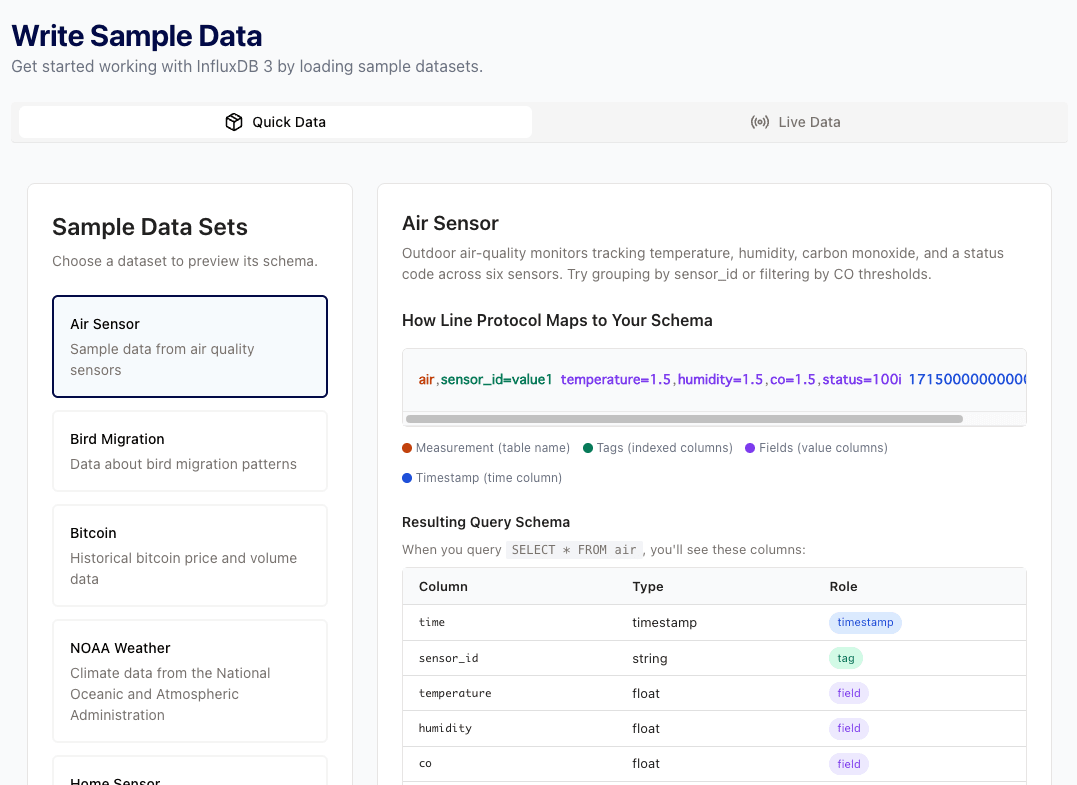
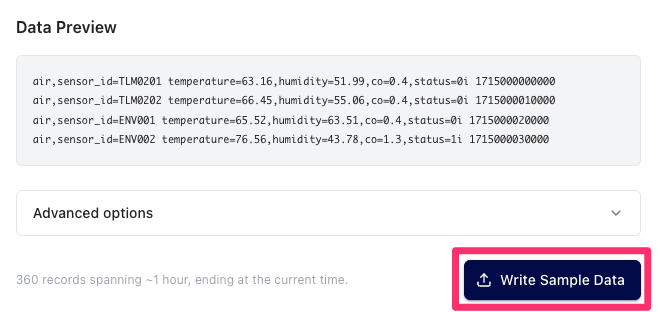
『Write Sample Data』を選択すると、データベースが作成され、サンプルデータが投入されます。
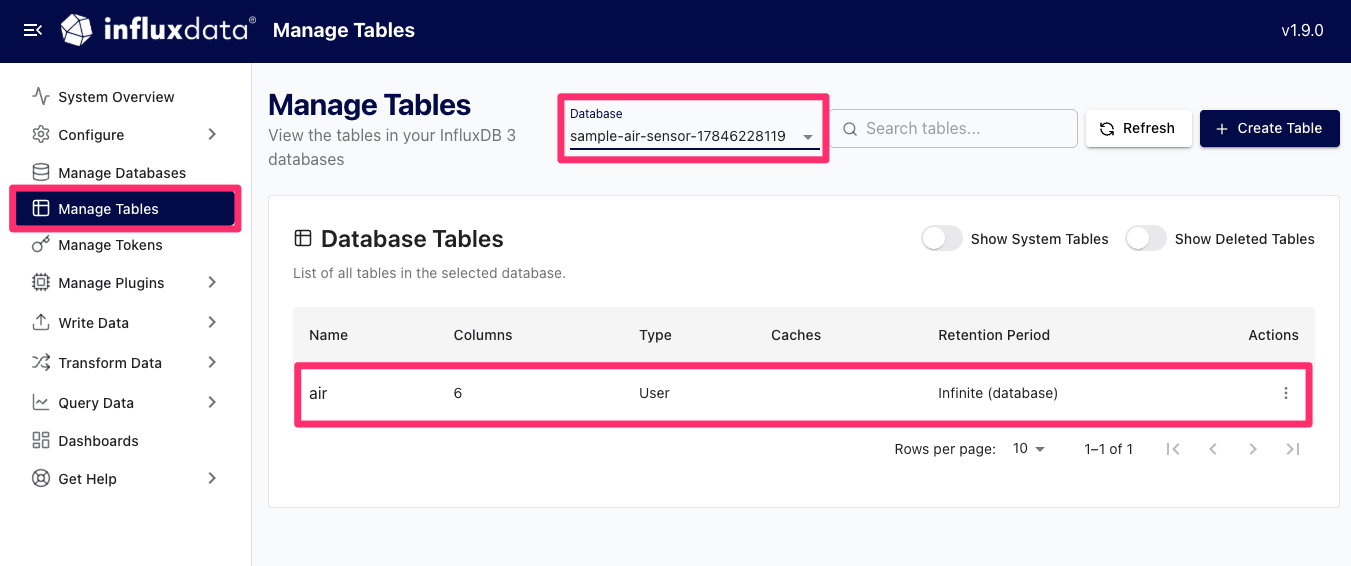
確認のため左側のタブから『Manage Tables』を選択すると、Air SensorのDBとテーブルが確認できました。
なお、Explorerではサンプルデータのほか、以下の方法でもデータを投入できます。
- Line Protocol
- CSVまたはJSON
- InfluxDB 3クライアントライブラリ
- Telegraf
SQLでクエリ
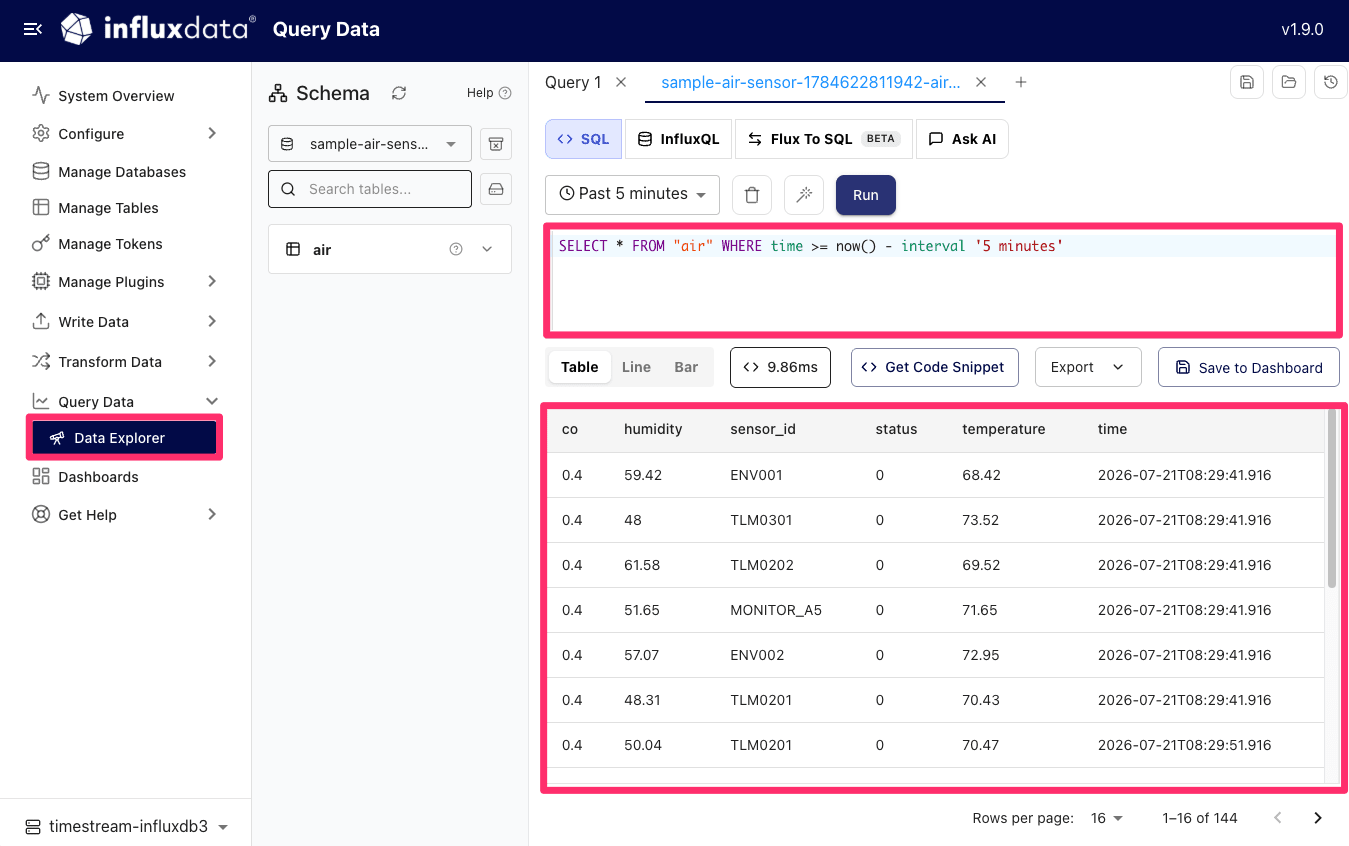
データを確認するため、『Query Data』 → 『Data Explorer』を開きます。
投入先のデータベースを選択し、今回は次のSQLを実行しました。
SELECT * FROM "air" WHERE time >= now() - interval '5 minutes';
以下のように、Air Sensorのサンプルデータを取得できました。
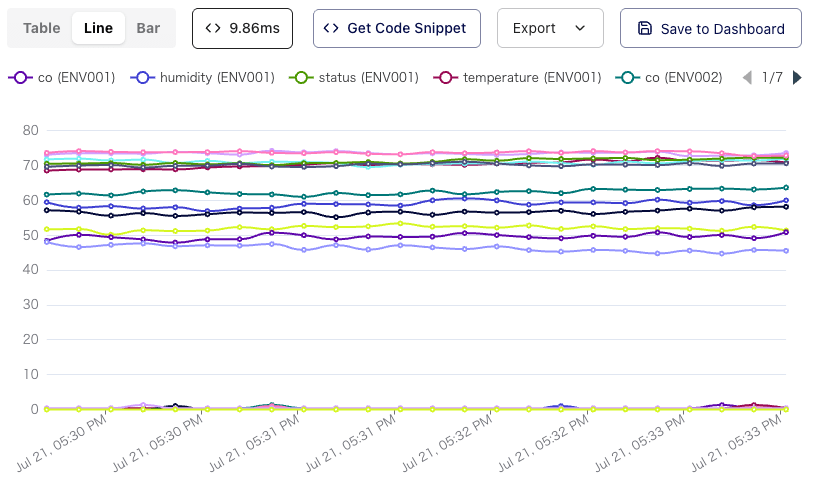
結果はテーブルのほか、折れ線グラフや棒グラフでも確認できます。
最後に
今回は、Amazon Timestream for InfluxDB 3 CoreとInfluxDB 3 ExplorerをCloudFormationで構築し、SSM経由でExplorerへ接続してみました。
InfluxDB 3には組み込みのWeb UIがありませんが、Explorerを利用することでデータの投入、SQLによるクエリ、可視化などをブラウザから操作できました。
プライベートクラスターでは、Coreでも2つのサブネットが必要な点や、NAT Gatewayとは別にS3 Gateway Endpointが必要な点に注意が必要です。
参考になりましたら幸いです。