![[TensorFlow] Deep MNIST for ExpertsチュートリアルをAWS GPUインスタンス上で実施する](https://devio2023-media.developers.io/wp-content/uploads/2015/11/tensor_flow-1.png)
[TensorFlow] Deep MNIST for ExpertsチュートリアルをAWS GPUインスタンス上で実施する
この記事は公開されてから1年以上経過しています。情報が古い可能性がありますので、ご注意ください。
はじめに
先日EC2の新しいインスタンスタイプとしてp2インスタンスが発表され、それに合わせてDeep Learning AMIが提供されました。
今回はこのDeep Learning AMIを用いてEC2インスタンスを起動し、その上でTensorFlowのDeep MNIST for Expertsチュートリアルのサンプルコードを動作させ、ローカル(MacBookPro Early 2015)とどれくらいパフォーマンスで差があるかを比較してみました。
Deep Learning AMIを用いたインスタンスの起動
まずはDeep Learning AMIを用いてEC2インスタンスを起動します。今回はUS EastリージョンのデフォルトVPC上のサブネット上にEC2インスタンスを一つ起動することにします。マーケットプレイスのAMIからEC2を起動する際にKeyPairとSecurityGroupを指定するように求められますのでそちらは事前に作成しておきます。
先程のリンク先のページ
のうち、右の方にある[Continue]ボタンをクリックします。
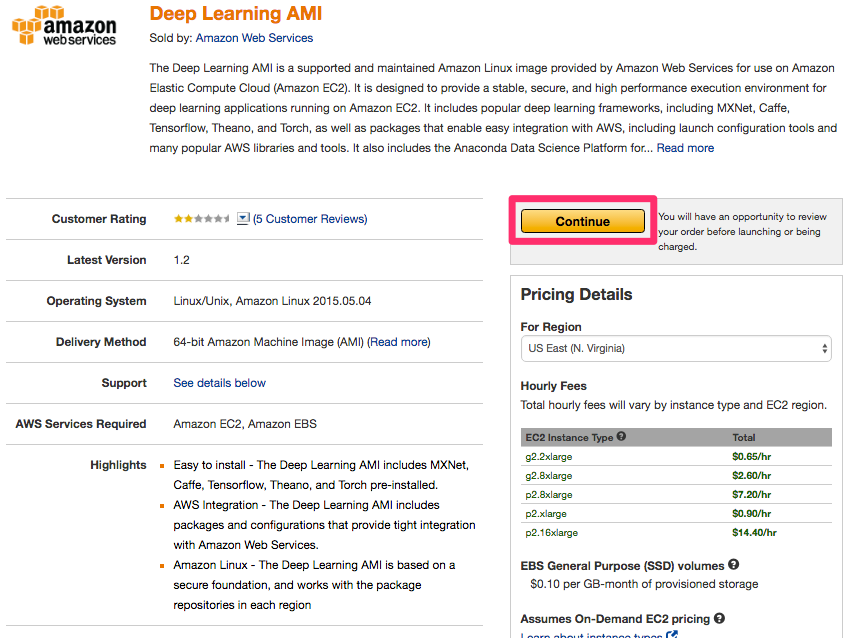
AWSコンソールにログインしていなかった場合はログインを促されますので、ログインを行い、次のような画面が表示されます。
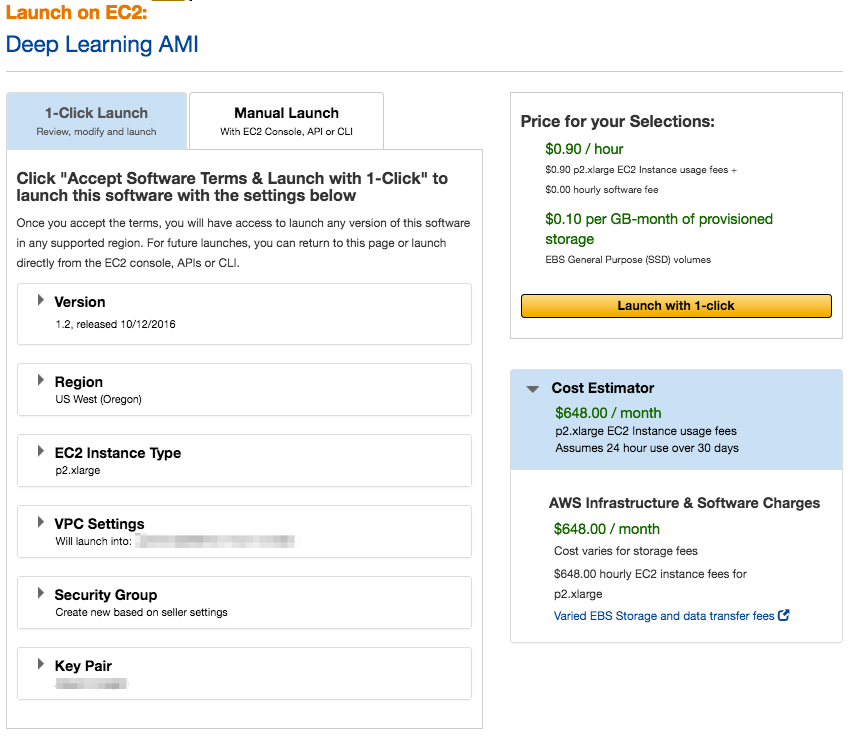
この画面ではEC2のインスタンスタイプ等を聞かれます。ここは以下のような設定にしておきます。
- Version: 1.2
- Region: US West (Oregon)
- EC2 Instance Type: p2.xlarge
- VPC Settings: US EastにあるデフォルトVPCとサブネット
- Security Group: 事前に作成したセキュリティグループ名
- Key Pair: 事前に作成したキーペア
[Launch with 1-click]ボタンを押して立ち上げを完了したら次のような画面が表示されます。
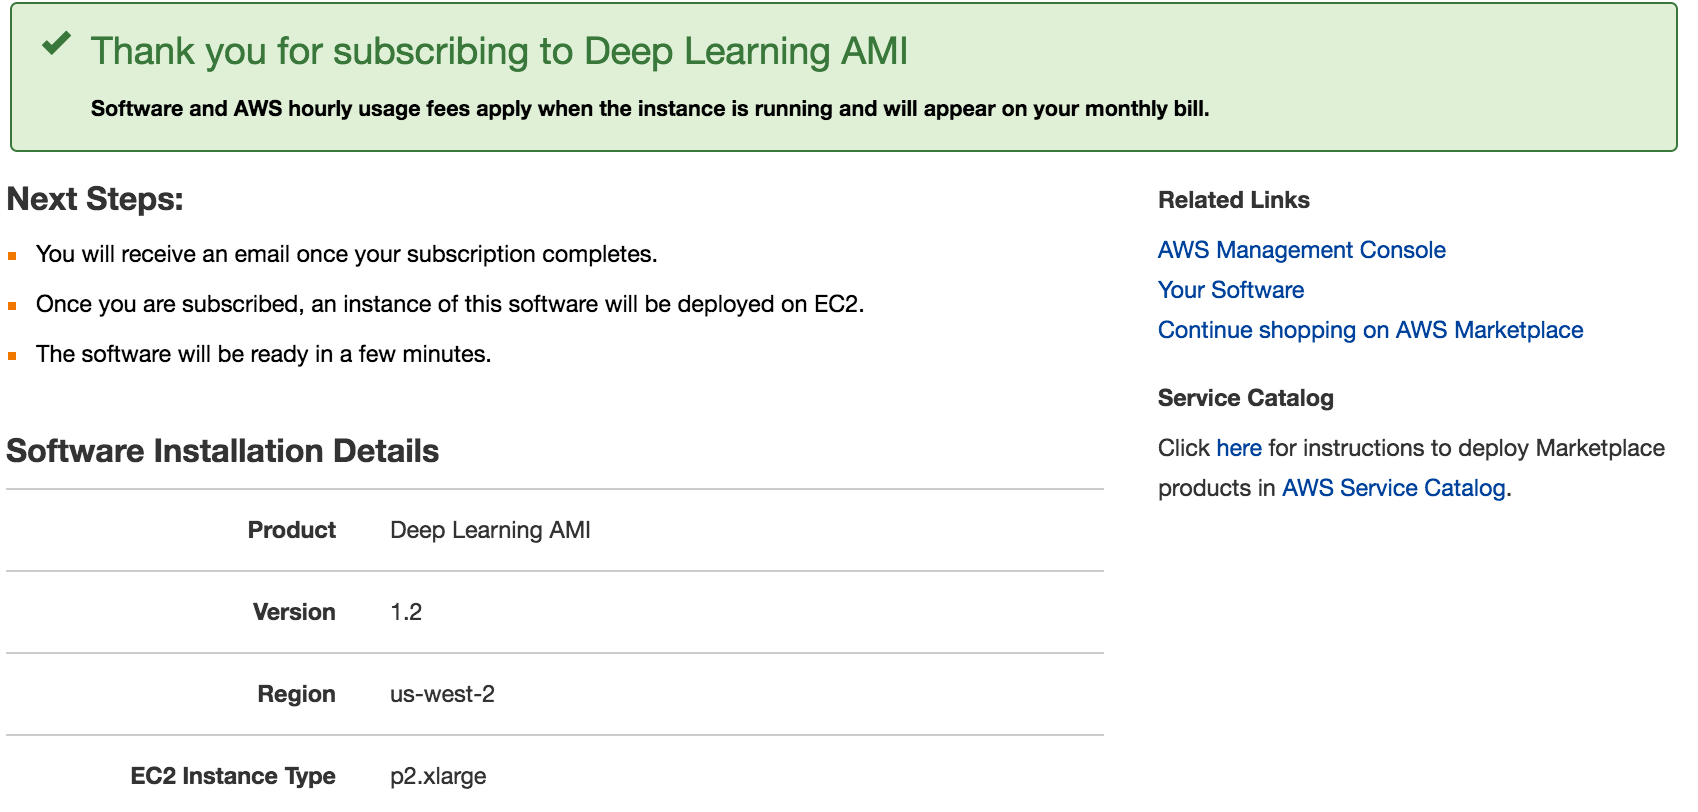
作成時に指定したSSHキーでログインし(パブリックDNSはEC2記載のものを指定)、以下のような画面が表示されます。
$ ssh -i ~/xxxxx.pem ec2-user@ec2-xxx-xxx-xxx-xxx.us-west-2.compute.amazonaws.com
=============================================================================
       __|  __|_  )
       _|  (     /   Deep Learning AMI for Amazon Linux
      ___|\___|___|

This is beta version of the Deep Learning AMI for Amazon Linux.

!!!!!!!!!!!!!!!!!!!!!!!!!!!!!!!!!!!!!!!!!!!!!!!!!!!!!!!!!!!!!!!!!!!!!!!!!!!!!
ATTENTION: PLEASE RUN THE STEPS IN THE "Prerequisites" SECTION OF THE README.
           THESE STEPS ARE NECESSARY FOR RUNNING THE DEEP LEARNING FRAMEWORKS.
!!!!!!!!!!!!!!!!!!!!!!!!!!!!!!!!!!!!!!!!!!!!!!!!!!!!!!!!!!!!!!!!!!!!!!!!!!!!!

The README file for the AMI ➜➜➜➜➜➜➜➜➜➜➜➜➜➜➜➜➜➜➜➜  /home/ec2-user/src/README.md
Tests for deep learning frameworks ➜➜➜➜➜➜➜➜➜➜➜➜   /home/ec2-user/src/bin
=============================================================================

7 package(s) needed for security, out of 75 available
Run "sudo yum update" to apply all updates.
Amazon Linux version 2016.09 is available.
Cudaライブラリのインストール
次にこのインスタンス内の~/src/README.mdにある手順に沿ってCUDAのライブラリをインストールします。
まずローカル環境でNVIDIAのcuDNNライブラリのページにアクセスしてください。
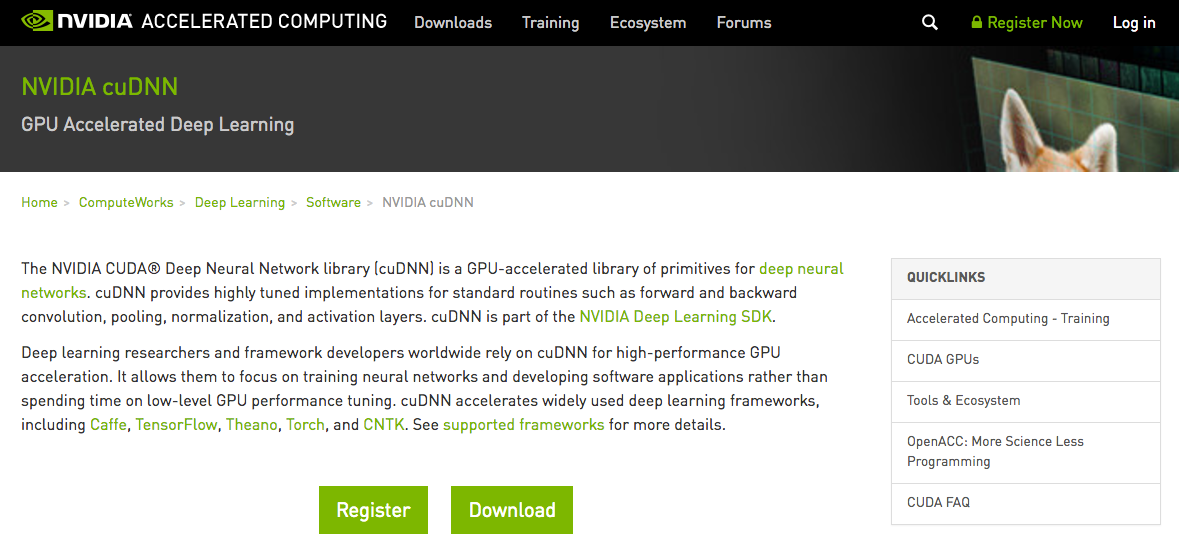
NVIDIA cuDNN | NVIDIA Developer
アカウントを作成し、ログインします。
ログイン後に表示されるページから[Download]→[Proceed to Downloads]ボタンをクリックしていき、「I Agree To the Terms of the cuDNN Software License Agreement」の文言付きのチェックボックスがあるページが表示されます。
そこにチェックを入れると、ダウンロード可能なライブラリのバージョン一覧が表示されます。(Download cuDNN v5.1, [August 10, 2016], for CUDA 8.0等)
バージョン一覧のなかから「Download cuDNN v5.1 for CUDA 7.5」を選択するとどのプラットフォーム向けのライブラリをダウンロードするか選択できますので、そこでは「cuDNN v5.1 Library for Linux」をクリックします。クリック後はダウンロードが開始されます。
ダウンロード後、先程AMIから起動したEC2の/tmp/cudnn.tgzにライブラリをコピーします
$ scp -i xxxx.pem ダウンロードしたcuDNNライブラリのローカルファイルパス ec2-user@ec2-xxx-xxx-xxx-xxx.us-west-2.compute.amazonaws.com:/tmp/cudnn.tgz
ライブラリをコピーした後はsshでもう一回先程のEC2にログインしますが、今度は実行に時間のかかるスクリプトを動作させる関係で以下のように30秒毎の応答確認をするような設定フラグを持たせてssh接続します。
$ ssh -i ~/xxxxx.pem -o ServerAliveInterval=30 ec2-user@ec2-xxx-xxx-xxx-xxx.us-west-2.compute.amazonaws.com
接続した後、備え付けのスクリプトを走らせます。
$ cd src
$ ./buildNvidiaCudaAndCudnn
スクリプトの実行には時間がかかります(10分弱)。しばらく待ったのち以下のような画面が出ればスクリプト実行成功です。
+------------------------------------------------------+
| NVIDIA-SMI 352.99     Driver Version: 352.99         |
|-------------------------------+----------------------+----------------------+
| GPU  Name        Persistence-M| Bus-Id        Disp.A | Volatile Uncorr. ECC |
| Fan  Temp  Perf  Pwr:Usage/Cap|         Memory-Usage | GPU-Util  Compute M. |
|===============================+======================+======================|
|   0  Tesla K80           Off  | 0000:00:1E.0     Off |                    0 |
| N/A   35C    P0    69W / 149W |     55MiB / 11519MiB |    100%      Default |
+-------------------------------+----------------------+----------------------+

+-----------------------------------------------------------------------------+
| Processes:                                                       GPU Memory |
|  GPU       PID  Type  Process name                               Usage      |
|=============================================================================|
|  No running processes found                                                 |
+-----------------------------------------------------------------------------+
Enabled persistence mode for GPU 0000:00:1E.0.
All done.
*****************************************************************
NVidia Driver, CUDA, and CUDNN Install Complete
*****************************************************************
インストールが完了したところでおもむろにpythonのインタプリタを立ち上げ import tensorflow as tfを実行すると以下のような出力を得て、TensorFlowがCudaのGPUライブラリと連携していることが分かります。
$ python
Python 2.7.12 (default, Sep  1 2016, 22:14:00)
[GCC 4.8.3 20140911 (Red Hat 4.8.3-9)] on linux2
Type "help", "copyright", "credits" or "license" for more information.
>>> import tensorflow as tf
I tensorflow/stream_executor/dso_loader.cc:108] successfully opened CUDA library libcublas.so.7.5 locally
I tensorflow/stream_executor/dso_loader.cc:108] successfully opened CUDA library libcudnn.so.5 locally
I tensorflow/stream_executor/dso_loader.cc:108] successfully opened CUDA library libcufft.so.7.5 locally
I tensorflow/stream_executor/dso_loader.cc:108] successfully opened CUDA library libcuda.so.1 locally
I tensorflow/stream_executor/dso_loader.cc:108] successfully opened CUDA library libcurand.so.7.5 locally
Deep MNIST for Expertsチュートリアル実行時間の比較
Deep MNIST for Expertsチュートリアルは畳み込みニューラルネットワーク(CNN)をMNISTデータ・セット(手書き数字のデータ・セット)に対して適用してモデルを作成するためのチュートリアルです。そのチュートリアルの記事に書かれたとおりのコードは以下の通りですが、これを今回はローカルと先ほど立ち上げたGPU環境で実行して、モデルの構築と予測精度の算出に掛かる時間を比較してみます。
TFMNIST.py
# -*- coding: utf-8 -*-
#! /usr/bin/env python

import tensorflow as tf
from tensorflow.examples.tutorials.mnist import input_data
import time

mnist = input_data.read_data_sets("MNIST_data/", one_hot=True)

x = tf.placeholder(tf.float32, [None, 784])
W = tf.Variable(tf.zeros([784, 10]))
b = tf.Variable(tf.zeros([10]))

y = tf.nn.softmax(tf.matmul(x, W) + b)
y_ = tf.placeholder(tf.float32, [None, 10])

sess = tf.Session()

def weight_variable(shape):
    initial = tf.truncated_normal(shape, stddev=0.1)
    return tf.Variable(initial)

def bias_variable(shape):
    initial = tf.constant(0.1, shape=shape)
    return tf.Variable(initial)

def conv2d(x, W):
    return tf.nn.conv2d(x, W, strides=[1, 1, 1, 1], padding='SAME')

def max_pool_2x2(x):
    return tf.nn.max_pool(x, ksize=[1, 2, 2, 1], strides=[1, 2, 2, 1], padding='SAME')

W_conv1 = weight_variable([5, 5, 1, 32])
b_conv1 = bias_variable([32])

x_image = tf.reshape(x, [-1, 28, 28, 1])

h_conv1 = tf.nn.relu(conv2d(x_image, W_conv1) + b_conv1)
h_pool1 = max_pool_2x2(h_conv1)

W_conv2 = weight_variable([5, 5, 32, 64])
b_conv2 = bias_variable([64])

h_conv2 = tf.nn.relu(conv2d(h_pool1, W_conv2) + b_conv2)
h_pool2 = max_pool_2x2(h_conv2)

W_fc1 = weight_variable([7 * 7 * 64, 1024])
b_fc1 = bias_variable([1024])

h_pool2_flat = tf.reshape(h_pool2, [-1, 7 * 7 * 64])
h_fc1 = tf.nn.relu(tf.matmul(h_pool2_flat, W_fc1) + b_fc1)

keep_prob = tf.placeholder(tf.float32)
h_fc1_drop = tf.nn.dropout(h_fc1, keep_prob)

W_fc2 = weight_variable([1024, 10])
b_fc2 = bias_variable([10])

y_conv = tf.nn.softmax(tf.matmul(h_fc1_drop, W_fc2) + b_fc2)

cross_entropy = tf.reduce_mean(-tf.reduce_sum(y_ * tf.log(y_conv), reduction_indices=[1]))
train_step = tf.train.AdamOptimizer(1e-4).minimize(cross_entropy)
correct_prediction = tf.equal(tf.argmax(y_conv, 1), tf.argmax(y_, 1))
accuracy = tf.reduce_mean(tf.cast(correct_prediction, tf.float32))
sess.run(tf.initialize_all_variables())

start_time = time.time()

for i in range(2000):
    batch = mnist.train.next_batch(50)
    if i % 100 == 0:
        train_accuracy = accuracy.eval(session=sess, feed_dict = {
            x: batch[0], y_: batch[1], keep_prob: 1.0})
        print("step %d, training accuracy %g" %(i, train_accuracy))
    train_step.run(session=sess, feed_dict={x: batch[0], y_: batch[1], keep_prob: 0.5})

print("test accuracy%g" % accuracy.eval(session=sess, feed_dict={x: mnist.test.images, y_: mnist.test.labels, keep_prob: 1.0}))

print("--- %s seconds ---" % (time.time() - start_time))
これは手書き数字の画像ベクトルを入力データとしてそれに紐付く教師データである数字のラベルをもとにCNNのモデルを構築し、その精度を確認するコードです。理論的な側面やコード内容の詳細については本記事では解説を避けます。
ローカル環境(Mac)
まずはローカルマシンの環境
- MacBookPro 2015 Early
- OS X 10.11.6
- CPU: Core i7 3.1 GHz
- GPU: Intel Iris Graphics 6100
で先程のコードを実行してみます。
$ python TFMNIST.py
Extracting MNIST_data/train-images-idx3-ubyte.gz
Extracting MNIST_data/train-labels-idx1-ubyte.gz
Extracting MNIST_data/t10k-images-idx3-ubyte.gz
Extracting MNIST_data/t10k-labels-idx1-ubyte.gz
step 0, training accuracy 0.06
step 100, training accuracy 0.76
step 200, training accuracy 0.92
step 300, training accuracy 0.86
step 400, training accuracy 1
step 500, training accuracy 0.96
step 600, training accuracy 0.86
step 700, training accuracy 1
step 800, training accuracy 0.94
step 900, training accuracy 0.9
step 1000, training accuracy 0.98
step 1100, training accuracy 0.94
step 1200, training accuracy 0.98
step 1300, training accuracy 1
step 1400, training accuracy 0.98
step 1500, training accuracy 0.96
step 1600, training accuracy 0.98
step 1700, training accuracy 0.98
step 1800, training accuracy 0.96
step 1900, training accuracy 0.94
test accuracy0.9747
--- 410.093044996 seconds ---
約410秒かかっています
GPU環境(p2.xlarge EC2)
続いて先程構築したGPU環境
- AWS p2.xlarge EC2 instance
- Amazon Linux version 2016.09
- Intel Xeon E5-2686v4
- NVIDIA Tesla K80
に対してコードをコピーして
$ scp -i ~/xxxx.pem ./TFMNIST.py ec2-user@ec2-xxx-xxx-xxx-xxx.us-west-2.compute.amazonaws.com:~/sample/TFMNIST.py
TFMNIST.py
リモートGPU環境で実行します
$ python TFMNIST.py
I tensorflow/stream_executor/dso_loader.cc:108] successfully opened CUDA library libcublas.so.7.5 locally
I tensorflow/stream_executor/dso_loader.cc:108] successfully opened CUDA library libcudnn.so.5 locally
I tensorflow/stream_executor/dso_loader.cc:108] successfully opened CUDA library libcufft.so.7.5 locally
I tensorflow/stream_executor/dso_loader.cc:108] successfully opened CUDA library libcuda.so.1 locally
I tensorflow/stream_executor/dso_loader.cc:108] successfully opened CUDA library libcurand.so.7.5 locally
Successfully downloaded train-images-idx3-ubyte.gz 9912422 bytes.
Extracting MNIST_data/train-images-idx3-ubyte.gz
Successfully downloaded train-labels-idx1-ubyte.gz 28881 bytes.
Extracting MNIST_data/train-labels-idx1-ubyte.gz
Successfully downloaded t10k-images-idx3-ubyte.gz 1648877 bytes.
Extracting MNIST_data/t10k-images-idx3-ubyte.gz
Successfully downloaded t10k-labels-idx1-ubyte.gz 4542 bytes.
Extracting MNIST_data/t10k-labels-idx1-ubyte.gz
I tensorflow/stream_executor/cuda/cuda_gpu_executor.cc:925] successful NUMA node read from SysFS had negative value (-1), but there must be at least one NUMA node, so returning NUMA node zero
I tensorflow/core/common_runtime/gpu/gpu_init.cc:102] Found device 0 with properties:
name: Tesla K80
major: 3 minor: 7 memoryClockRate (GHz) 0.8235
pciBusID 0000:00:1e.0
Total memory: 11.25GiB
Free memory: 11.13GiB
I tensorflow/core/common_runtime/gpu/gpu_init.cc:126] DMA: 0
I tensorflow/core/common_runtime/gpu/gpu_init.cc:136] 0:   Y
I tensorflow/core/common_runtime/gpu/gpu_device.cc:838] Creating TensorFlow device (/gpu:0) -> (device: 0, name: Tesla K80, pci bus id: 0000:00:1e.0)
step 0, training accuracy 0.04
step 100, training accuracy 0.76
step 200, training accuracy 0.9
step 300, training accuracy 0.9
step 400, training accuracy 0.96
step 500, training accuracy 0.94
step 600, training accuracy 0.86
step 700, training accuracy 1
step 800, training accuracy 0.94
step 900, training accuracy 0.94
step 1000, training accuracy 0.98
step 1100, training accuracy 0.98
step 1200, training accuracy 0.98
step 1300, training accuracy 0.98
step 1400, training accuracy 0.96
step 1500, training accuracy 0.96
step 1600, training accuracy 0.96
step 1700, training accuracy 0.98
step 1800, training accuracy 0.94
step 1900, training accuracy 0.98
test accuracy0.9751
--- 20.8974480629 seconds ---
約21秒で処理が完了しました!先程のローカル環境の実行時間と比較しておおよそ20倍もの違いがありますね!
まとめ
先日発表されたGPUインスタンスがどれくらいTensorFlow向けの用途として有用なのか実証してみましたが、チュートリアルのCNNのモデル構築と予測精度の算出でおおよそ20倍もの性能差がでることがわかりました。ローカルでのモデル構築に時間がかかりすぎてレイヤ数、ユニット数等のハイパーパラメータのチューニングが困難な時などには大変有用ですね。


