Tectonic Installer で始める Kubernetes【構築編】
この記事は公開されてから1年以上経過しています。情報が古い可能性がありますので、ご注意ください。
はじめに
つい先日(8/9)、AWS が CNCF のプラチナメンバーとして加入したというニュースがありました。 また、8/17 には CoreOS が Enterprise-ready Kubernetes である Tectonic の Microsoft Azure 対応などを発表しており、話題が尽きない分野のようです。以前に、kops というツールを利用し Kubernetes cluster を AWS 上に構築する記事を書きましたが、本記事では Tectonic Installer を利用して構築してみたいと思います。なお CoreOS アカウントを作成することで、10ノードまで無料の Tectonic ライセンスが提供されるため予め、ユーザ登録を行いライセンス(tectonic-license.txt)および Secret ファイル(config.json)を入手しておいてください。
検証環境について
本記事では、以下の環境で検証を実施しております。
$ sw_vers
ProductName:    Mac OS X
ProductVersion: 10.12.6
BuildVersion:   16G29
$ aws --version
aws-cli/1.11.110 Python/2.7.10 Darwin/16.7.0 botocore/1.5.73
事前準備
あらかじめ、以下をご用意しておいてください。
- Tectonic ライセンス(tectonic-license.txt)および Secret ファイル(config.json)
- Tectonic 環境を構築するリージョンで利用可能な EC2 SSH key pair
- Route53 Public Hosted Zone
- Google Chrome or Mozilla Firefox
- Tectonic installer
なお Tectonic installer は、以下のコマンドラインで入手できます。(利用するバージョンは、本記事執筆 2017/8/25 時点の最新版)
$ wget https://releases.tectonic.com/tectonic-1.7.1-tectonic.2.tar.gz
$ tar xzvf tectonic-1.7.1-tectonic.2.tar.gz
$ cd tectonic
Tectonic installer に関するその他の情報は、以下のドキュメントをご確認ください。
また、要件に関する詳細については、以下のドキュメントをご参照ください。
なお、本記事では最小構成(t2.medium の Manager 1ノード + Worker 1ノード、計2インスタンス) のクラスターを起動します。
Tectonic インストール用の一時的セキュリティ認証情報を取得する
環境構築用途の、tectonic-installer role を作成します。
$ wget https://coreos.com/tectonic/docs/latest/files/aws-policy.json
$ wget https://coreos.com/tectonic/docs/latest/files/aws-sts-trust-policy.json
$ vi aws-sts-trust-policy.json
"AWS": "arn:aws:iam::<TRUSTED-ACCOUNT-ID>:user/<TRUSTED-IAM-USER-NAME>" ←この行を修正する
$ aws iam create-role --role-name tectonic-installer --assume-role-policy-document file://`pwd`/aws-sts-trust-policy.json
$ aws iam put-role-policy --role-name tectonic-installer --policy-name TectonicInstallerPolicy --policy-document file://`pwd`/aws-policy.json
$ aws sts assume-role --role-arn=arn:aws:iam::<AWSアカウントID>:role/tectonic-installer --role-session-name tectonic-installer
AccessKeyId, SecretAccessKey および SessionToken を控えておいてください。
Tectonic インストーラーから環境を構築する
端末から以下のコマンドラインを実行することで、インストーラー(ブラウザ)が起動します。
$ ./tectonic-installer/darwin/installer
Starting Tectonic Installer on 127.0.0.1:4444
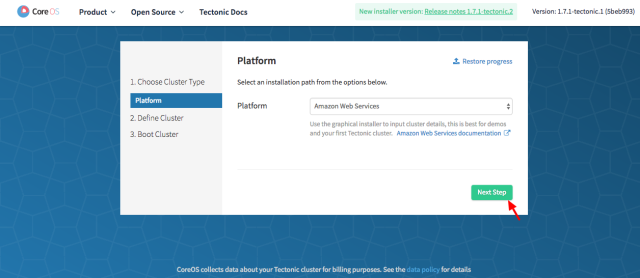
Platform は、AWS を利用するためそのまま Next Step ボタンをクリックします。
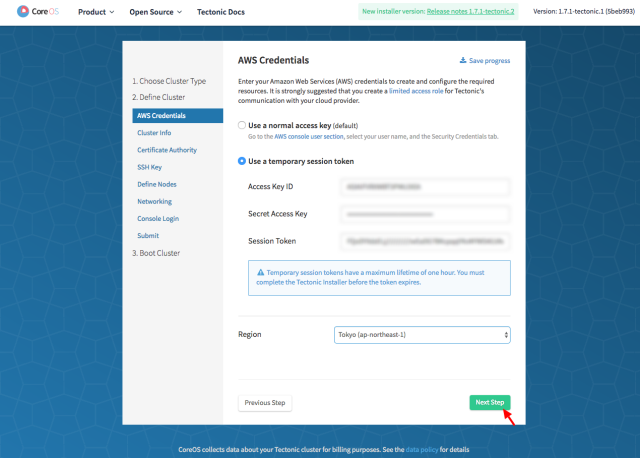
User a temporary session token のラジオボタンを選択します。
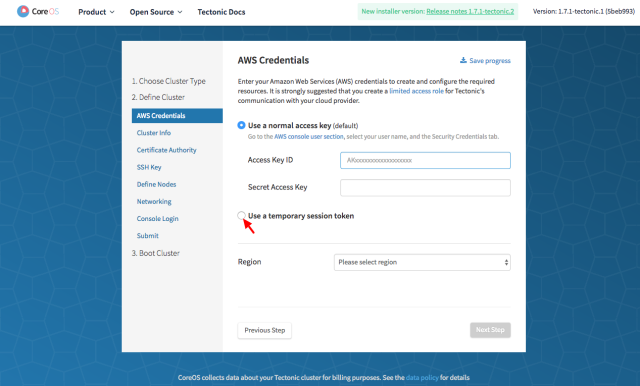
各項目に対して、先程取得したセキュリティ認証情報を入力し、利用するリージョンを選択してから Next Step をクリックします。
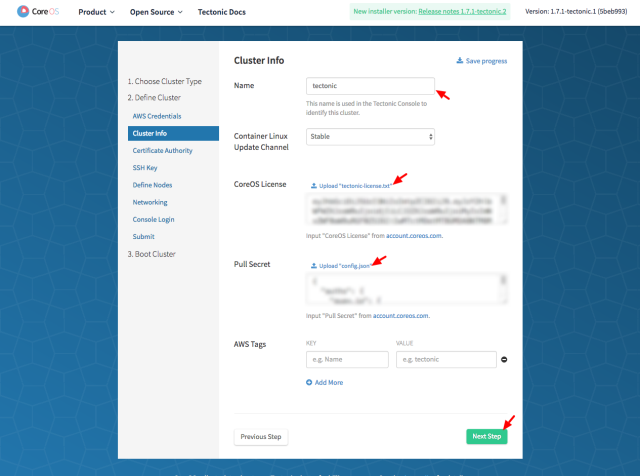
各項目に対して設定を行い、Next Step をクリックします。
| 項目 | 説明 |
|---|---|
| Name | クラスター名を入力 |
| Container Linux Update Channel | Stable,Beta,Alpha からチャンネルを選択 |
| CoreOS License | Upload "tectonic-license.txt" をクリックしてライセンスファイルをアップロード |
| Pull Secret | Upload "config.json" をクリックして Secret ファイルをアップロード |
| AWS Tags | Key,Value 形式で入力(任意) |
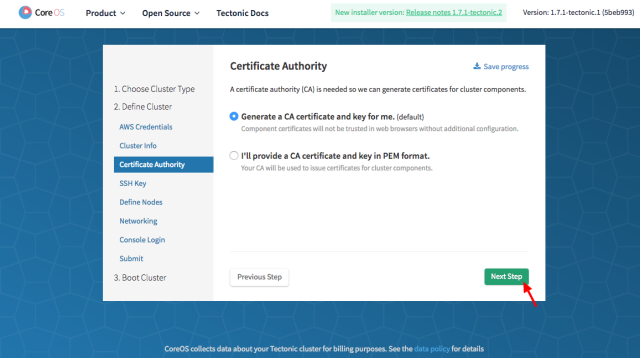
CA 証明書やキーを生成せずに自前の証明書などを利用するのであれば、ここで設定(CA Certificate および CA Private Key のアップロード)を行います。 本記事では、デフォルト設定のまま Next Step をクリックします。
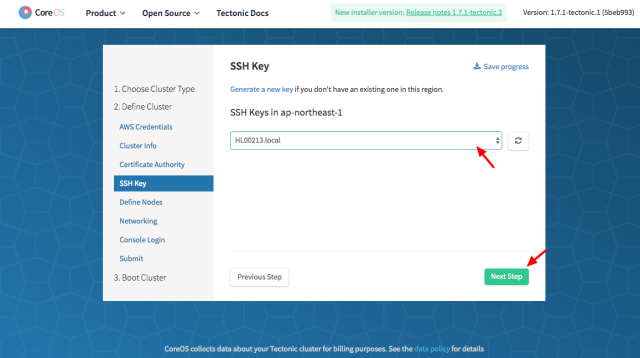
各ノードへ SSH 接続するために利用するキーペア名を選択し、Next Step をクリックします。
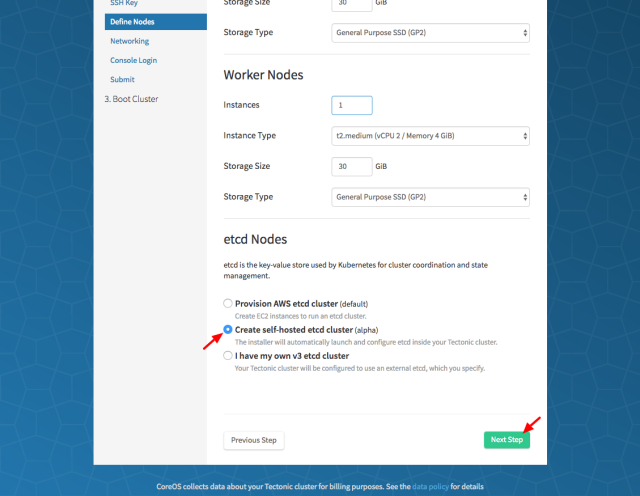
今回は、Master および Worker 共にインスタンス数を "1" に変更します。(デフォルト設定 3 が入力済み) 必要に応じて、Instance Type や Storage Size,Type など適宜変更してください。
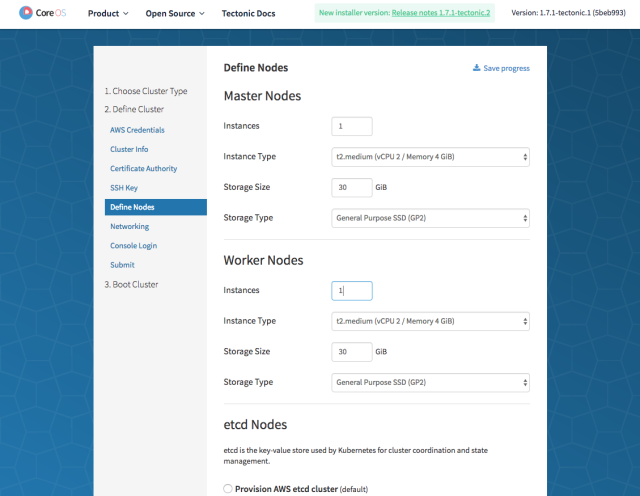
etcd ノードはデフォルトの設定を選択せずに "Create self-hosted etcd cluster" を選択しました。 デフォルト設定の場合、etcd cluster を構成するために更にEC2 インスタンスを起動する必要があります。 etcd cluster を構成する場合、以下のドキュメントを参照した方が良さそうです。
設定完了後、Next Step をクリックします。
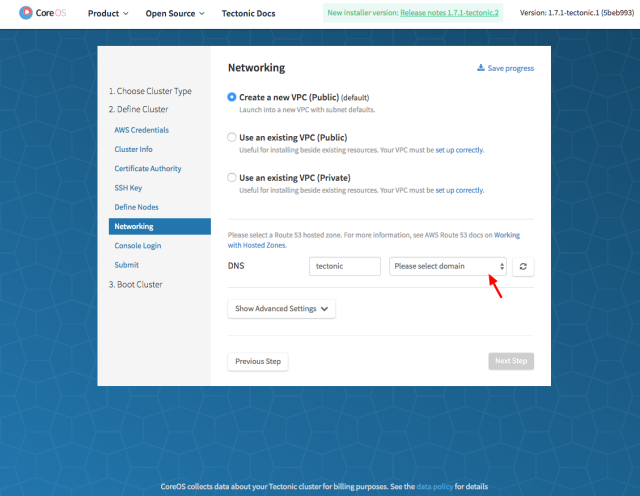
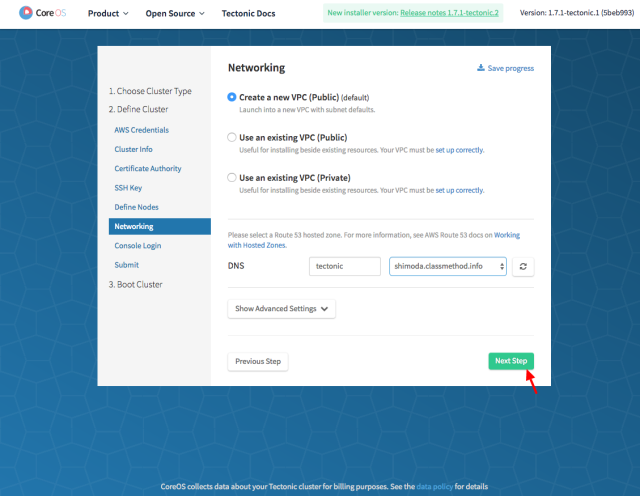
新たに VPC を作成するか、既存の VPC を利用するか選択します。本記事では、デフォルト設定を選択しました。 また、利用する Route53 hosted zone を選択し、必要があれば適宜サブドメインを修正してください。
Next Step をクリックします。
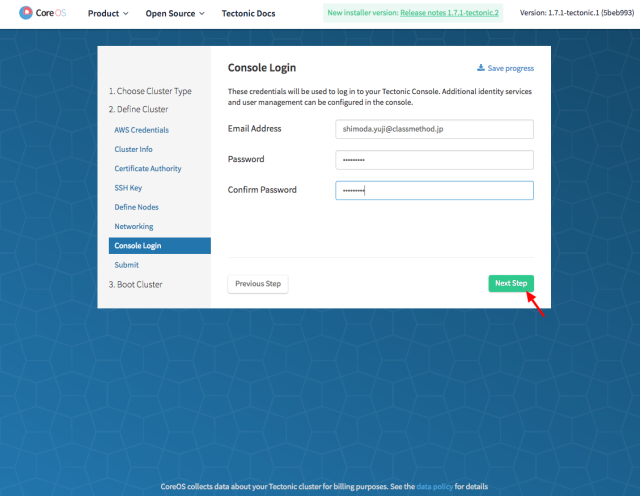
Tectonic Console にログインするための、Email アドレスとパスワードを入力し Next Step をクリックします。
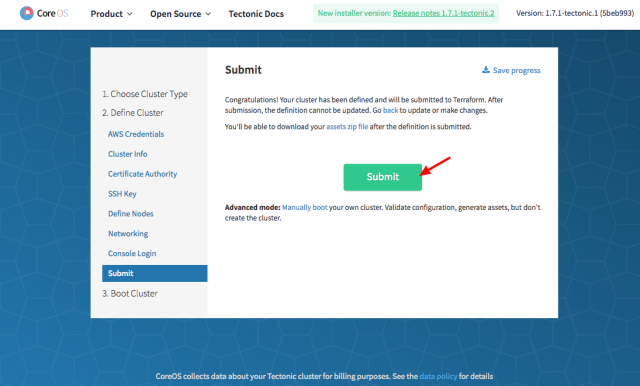
お疲れ様でした。構成は完了です。最後に、Submit をクリックし環境を構築していきます。 なお、環境の構築には10〜20分もしくはそれ以上の時間が必要なためコーヒーブレイクしても良いかと思われます。 #私の環境では、およそ10分程度で構築できました。
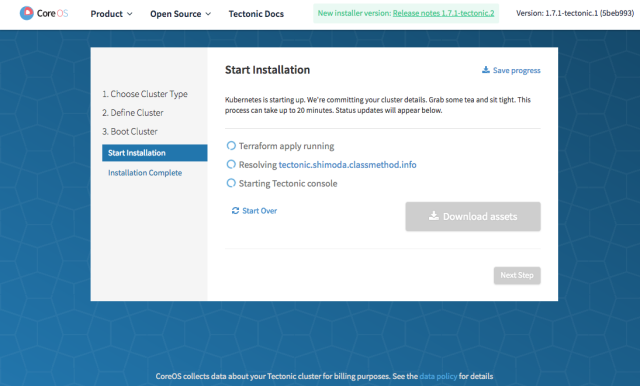
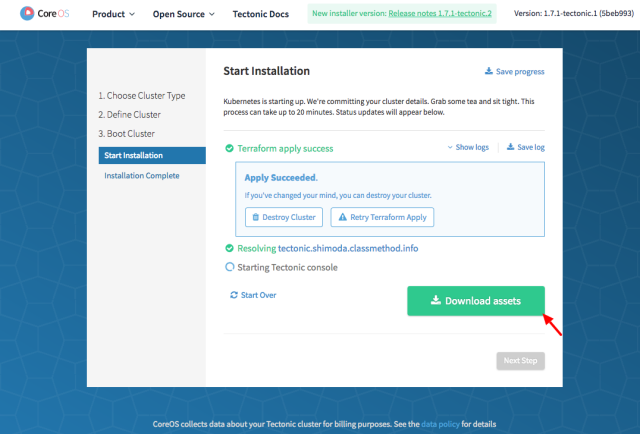
Terraform を利用して、環境が構築されていきます。
構築時のログも、画面に表示されます。
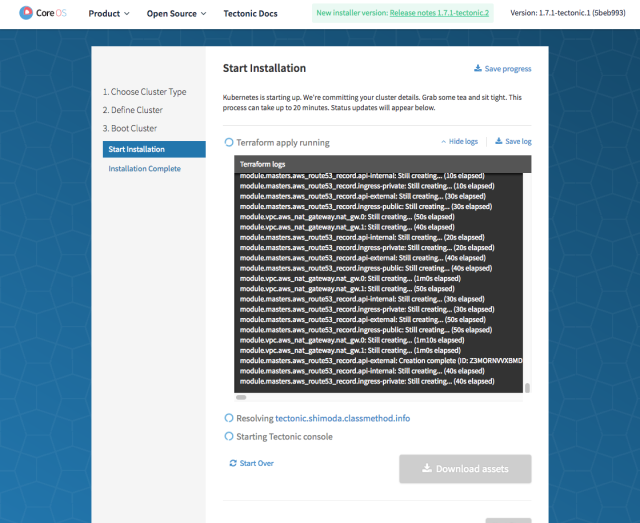
Download assets ボタンが有効化されたら、クリックして assets.zip ファイルをダウンロードしておいてください。
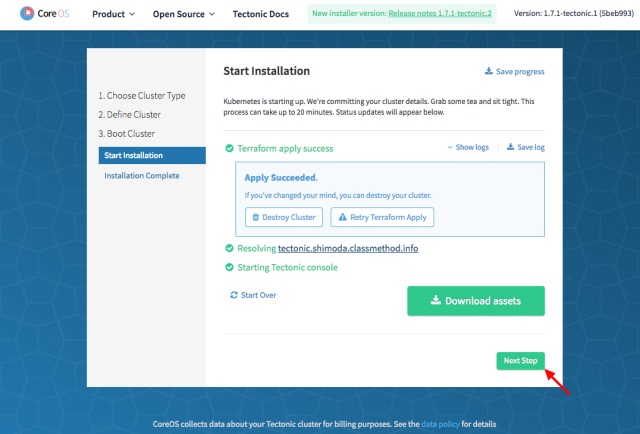
Next Step ボタンが有効化されたら、クリックしましょう。
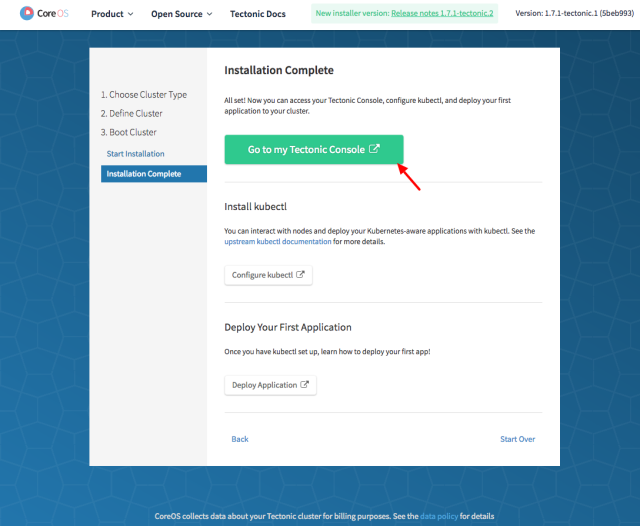
おめでとうございます。Tectonic 環境が構築されました。Go to my Tectonic Console ボタンをクリックして Tectonic Console へアクセスします。
環境構築時に設定した Tectonic Console にログインするための、Email アドレスとパスワードを入力しログインします。
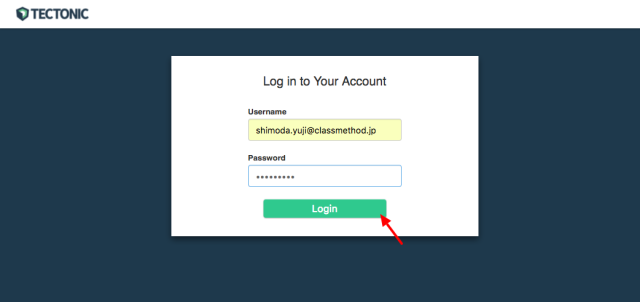
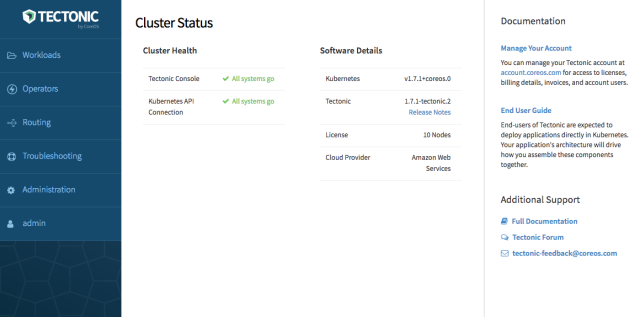
Tectonic Console が表示されました。
クラスターを削除する
クラスターを削除するには、tectonic-installer に含まれた terraform バイナリに PATH を通し、クラスター構築時にダウンロードした assets.zip を展開したディレクトリ配下で、terraform destroy を実行します。
$ cd tectonic-installer/darwin
$ export PATH=$(pwd):$PATH
$ cd ~/Downloads
$ unzip assets.zip
$ cd <展開先のディレクトリ>
$ terraform destroy
Do you really want to destroy?
  Terraform will delete all your managed infrastructure.
  There is no undo. Only 'yes' will be accepted to confirm.

  Enter a value: yes                       # yes を入力

provider.aws.region
  The region where AWS operations will take place. Examples
  are us-east-1, us-west-2, etc.

  Default: us-east-1
  Enter a value: ap-northeast-1 # 環境構築時に選択したリージョンを入力する
...
環境削除の検証時に、以下のエラーが発生していましたが、terraform destroy を再実行することで、削除処理は完了しました。
$ terraform destroy
Do you really want to destroy?
  Terraform will delete all your managed infrastructure.
  There is no undo. Only 'yes' will be accepted to confirm.

  Enter a value: yes

provider.aws.region
  The region where AWS operations will take place. Examples
  are us-east-1, us-west-2, etc.

  Default: us-east-1
  Enter a value: ap-northeast-1
...
module.vpc.aws_vpc.new_vpc: Destruction complete
Error applying plan:

1 error(s) occurred:

* module.workers.aws_iam_role.worker_role (destroy): 1 error(s) occurred:

* aws_iam_role.worker_role: timeout while waiting for state to become 'success' (timeout: 30s)

Terraform does not automatically rollback in the face of errors.
Instead, your Terraform state file has been partially updated with
any resources that successfully completed. Please address the error
above and apply again to incrementally change your infrastructure.
$ terraform destroy
Do you really want to destroy?
  Terraform will delete all your managed infrastructure.
  There is no undo. Only 'yes' will be accepted to confirm.

  Enter a value: yes

provider.aws.region
  The region where AWS operations will take place. Examples
  are us-east-1, us-west-2, etc.

  Default: us-east-1
  Enter a value: ap-northeast-1

aws_iam_role.worker_role: Refreshing state... (ID: aws-worker-role)

Destroy complete! Resources: 0 destroyed.
詳細については、以下のドキュメントを参照ください。
さいごに
本記事は、Tectonic Installer を利用した Tectonic(Kubernetes クラスター)環境の構築編となります。アプリケーションのデプロイ方法については、続編をご期待ください。