
Amazon Cognito Hosted UIで、認証ユーザーごとにアップロードするS3バケットのプレフィックスを分けてみた
この記事は公開されてから1年以上経過しています。情報が古い可能性がありますので、ご注意ください。
はじめに
Amazon Cognito Hosted UIを利用して、1つのS3バケットに対して、認証されたユーザーごとにアップロードするプレフィックスを分ける方法について解説します。この手法により、各ユーザーのファイルを効率的に管理することが可能になります。
構成としては以下の通りです。
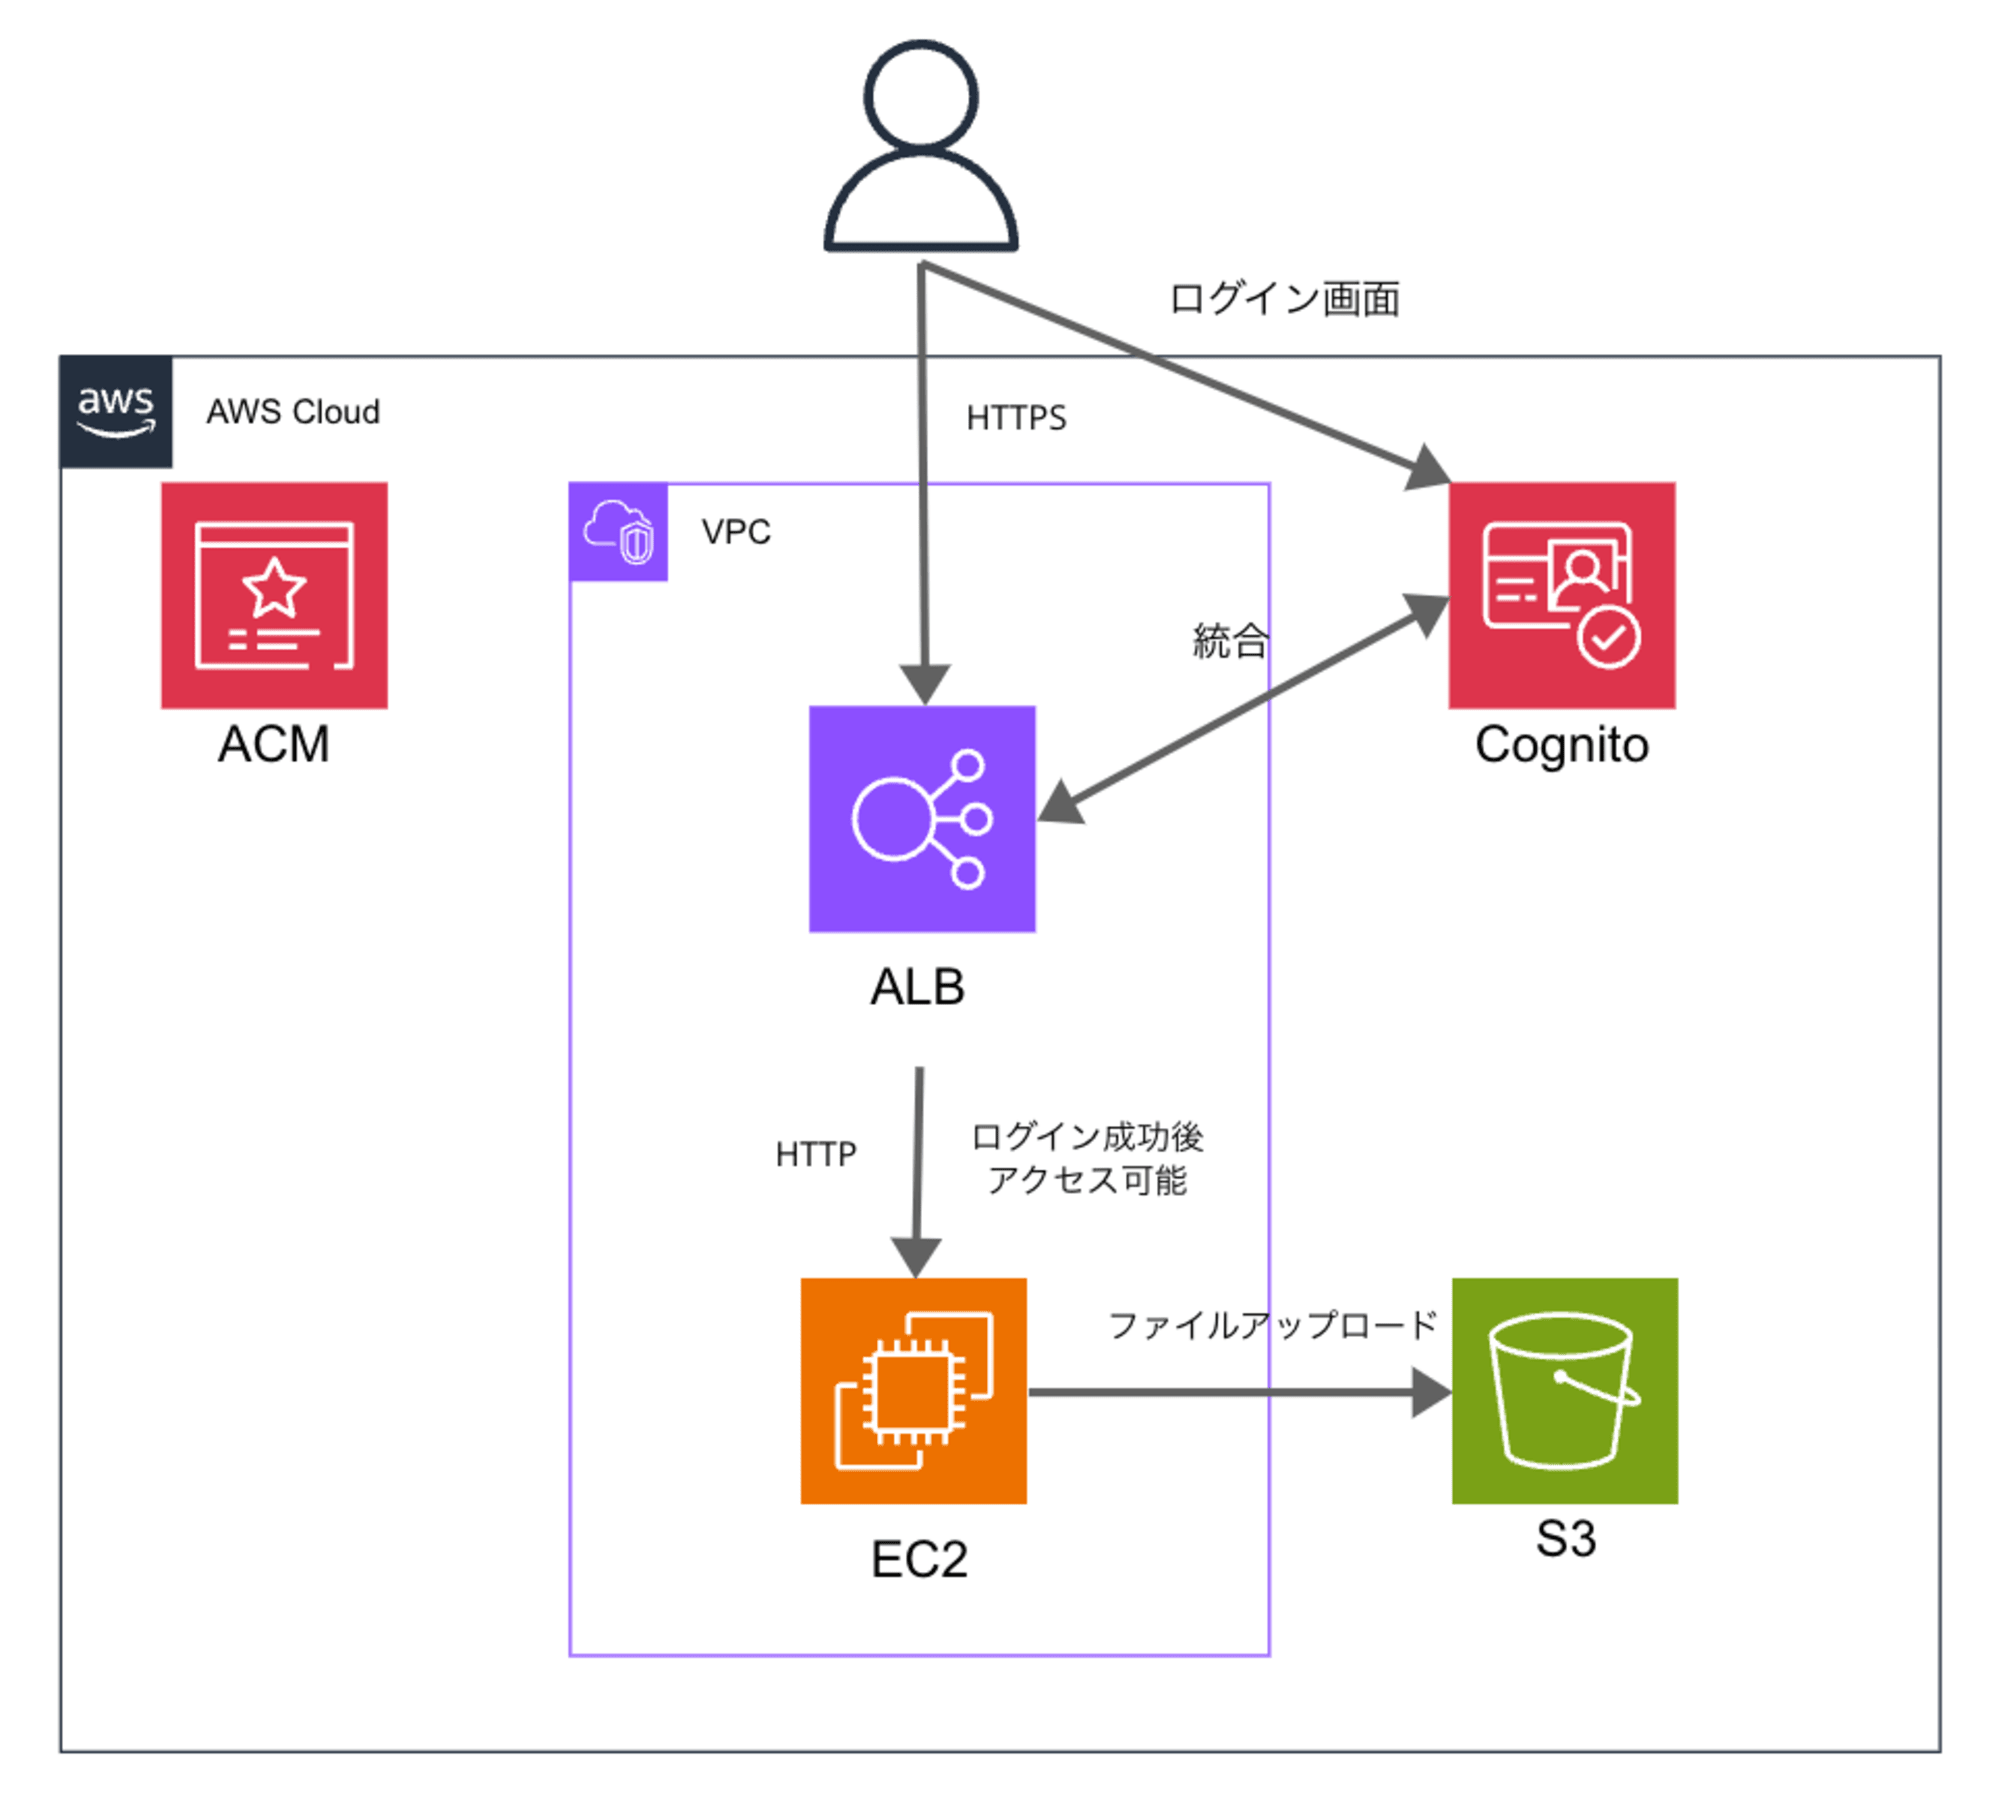
ALBがユーザーの認証に成功すると、EC2インスタンスへのリクエスト転送時に追加のHTTPヘッダーを含めます。このヘッダーにはx-amzn-oidc-identityが含まれており、これはユーザーの一意の識別子(ユーザーID)であり、Cognitoのsubクレームに相当します。
アプリケーションコードでは、このx-amzn-oidc-identityの値を利用して、S3バケット内でユーザーごとに固有のプレフィックス(ユーザーID)を生成し、そのプレフィックス配下にファイルをアップロードします。
EC2インスタンスに負荷がかかるため、アップロードするファイルのデータは軽量の想定です。
署名付きURLでクライアントから直接S3にファイルをアップロードする方式は、以下の記事をご参照ください。
前提条件
- EC2インスタンス起動済み
- Amazon Linux2023
- セキュリティグループのインバウンドルールは、ALBのセキュリティグループから、ポート3000を許可
- AWS Systems Manager セッションマネージャーで接続できるようマネージドインスタンス対応済み
- IAMロールには、AmazonS3FullAccessとAmazonSSMManagedInstanceCoreを適用
- Cognitoユーザープールの作成とALBの設定については、以下の記事を参照
- ALB + EC2の構成に、Amazon CognitoのHosted UIを利用し、多要素認証(MFA)を実装してみた
- ターゲットグループのルーティングとヘルスチェックは、ポート3000を指定
- ファイルアップロード用のS3バケットは、作成済み
EC2インスタンスに接続
セッションマネージャーで接続後、以下のコマンドを実行してアプリケーションのセットアップスクリプトを作成します。
sh-5.2$ cd /home/ssm-user

sh-5.2$ vim setup_app.sh
作成するスクリプト内容は以下の通りです。
このスクリプトは、必要なソフトウェアのインストール、アプリケーションファイルの作成、依存関係のインストール、そしてアプリケーションを起動します。
リージョンとS3バケット名は、自身の環境に合わせて変更ください。
#!/bin/bash

# 必要なソフトウェアのインストール
sudo yum update -y
sudo yum install -y nodejs npm git

# アプリケーションディレクトリの作成
mkdir -p /home/ssm-user/app
cd /home/ssm-user/app

# server.js の作成
cat << 'EOF' > server.js
const express = require('express');
const { S3Client, PutObjectCommand, ListObjectsV2Command } = require('@aws-sdk/client-s3');
const multer = require('multer');
const path = require('path');
const app = express();
const s3 = new S3Client({ region: 'ap-northeast-1' }); // リージョンを適切に設定
const upload = multer({ storage: multer.memoryStorage() });
const S3_BUCKET_NAME = "cm-hirai-cognito"; // ここに直接バケット名を設定

app.use(express.static(path.join(__dirname, 'public')));

app.post('/upload', upload.single('file'), async (req, res) => {
    if (!req.file) {
        return res.status(400).send('No file uploaded.');
    }
    const userId = req.headers['x-amzn-oidc-identity'];
    const params = {
        Bucket: S3_BUCKET_NAME,
        Key: `${userId}/${req.file.originalname}`,
        Body: req.file.buffer
    };
    try {
        const command = new PutObjectCommand(params);
        await s3.send(command);
        res.json({ message: 'File uploaded successfully' });
    } catch (error) {
        console.error('Error', error);
        res.status(500).json({ error: 'Failed to upload file' });
    }
});

app.get('/files', async (req, res) => {
    const userId = req.headers['x-amzn-oidc-identity'];
    const params = {
        Bucket: S3_BUCKET_NAME,
        Prefix: `${userId}/`
    };
    try {
        const command = new ListObjectsV2Command(params);
        const data = await s3.send(command);
        const files = data.Contents ? data.Contents.map(item => item.Key) : [];
        res.json({ files });
    } catch (error) {
        console.error('Error', error);
        res.status(500).json({ error: 'Failed to list files' });
    }
});

app.get('*', (req, res) => {
    res.sendFile(path.join(__dirname, 'public', 'index.html'));
});

const PORT = 3000;
app.listen(PORT, '0.0.0.0', () => console.log(`Server running on port ${PORT}`));
EOF

# public ディレクトリの作成
mkdir public

# index.html の作成
cat << EOF > public/index.html
<!DOCTYPE html>
<html lang="en">
<head>
    <meta charset="UTF-8">
    <meta name="viewport" content="width=device-width, initial-scale=1.0">
    <title>File Upload</title>
</head>
<body>
    <h1>File Upload</h1>
    <input type="file" id="fileInput">
    <button onclick="uploadFile()">Upload</button>
    <div id="message"></div>
    <h2>Your Files</h2>
    <ul id="fileList"></ul>
    <script src="/script.js"></script>
</body>
</html>
EOF

# script.js の作成
cat << EOF > public/script.js
async function uploadFile() {
    const fileInput = document.getElementById('fileInput');
    const messageDiv = document.getElementById('message');
    const file = fileInput.files[0];
    if (!file) {
        messageDiv.textContent = 'Please select a file first!';
        return;
    }
    const formData = new FormData();
    formData.append('file', file);
    try {
        const response = await fetch('/upload', {
            method: 'POST',
            body: formData,
            credentials: 'include'
        });
        if (!response.ok) {
            throw new Error('Upload failed');
        }
        const result = await response.json();
        messageDiv.textContent = result.message;
        listFiles(); // ファイルリストを更新
    } catch (error) {
        console.error('Error:', error);
        messageDiv.textContent = 'Upload failed';
    }
}

async function listFiles() {
    const fileList = document.getElementById('fileList');
    fileList.innerHTML = ''; // リストをクリア
    try {
        const response = await fetch('/files', {
            method: 'GET',
            credentials: 'include'
        });
        if (!response.ok) {
            throw new Error('Failed to fetch files');
        }
        const result = await response.json();
        result.files.forEach(file => {
            const listItem = document.createElement('li');
            listItem.textContent = file;
            fileList.appendChild(listItem);
        });
    } catch (error) {
        console.error('Error:', error);
        fileList.innerHTML = '<li>Failed to load files</li>';
    }
}

// ページロード時にファイルリストを表示
document.addEventListener('DOMContentLoaded', listFiles);
EOF

# package.json の作成
cat << EOF > package.json
{
  "name": "file-upload-app",
  "version": "1.0.0",
  "description": "File upload application with Express and S3",
  "main": "server.js",
  "scripts": {
    "start": "node server.js"
  },
  "dependencies": {
    "express": "^4.17.1",
    "@aws-sdk/client-s3": "^3.0.0",
    "multer": "^1.4.4-lts.1"
  }
}
EOF

# 依存関係のインストール
npm install

# アプリケーションの起動
node server.js
作成したスクリプトに実行権限を付与し、実行します。
sh-5.2$ chmod +x setup_app.sh

sh-5.2$ ./setup_app.sh

Last metadata expiration check: 0:02:41 ago on Wed Aug 28 07:34:39 2024.
Dependencies resolved.
Nothing to do.
Complete!

~中略~
added 186 packages, and audited 187 packages in 35s

15 packages are looking for funding
  run `npm fund` for details

found 0 vulnerabilities
npm notice
npm notice New minor version of npm available! 10.5.0 -> 10.8.2
npm notice Changelog: https://github.com/npm/cli/releases/tag/v10.8.2
npm notice Run npm install -g npm@10.8.2 to update!
npm notice
Server running on port 3000
これでアプリケーションが正常に起動しました。
もしEC2インスタンスを再起動した場合、セッションマネージャーで接続後、以下のコマンドでアプリケーションを再度起動できます。
sh-5.2$ node /home/ssm-user/app/server.js

Server running on port 3000
ユーザーIDの取得箇所
x-amzn-oidc-identityの値は、server.jsの以下の箇所で取得し、プレフィックスに使用しています。
    const userId = req.headers['x-amzn-oidc-identity'];
    const params = {
        Bucket: S3_BUCKET_NAME,
        Key: `${userId}/${req.file.originalname}`,
        Body: req.file.buffer
    };
アップロードしてみる
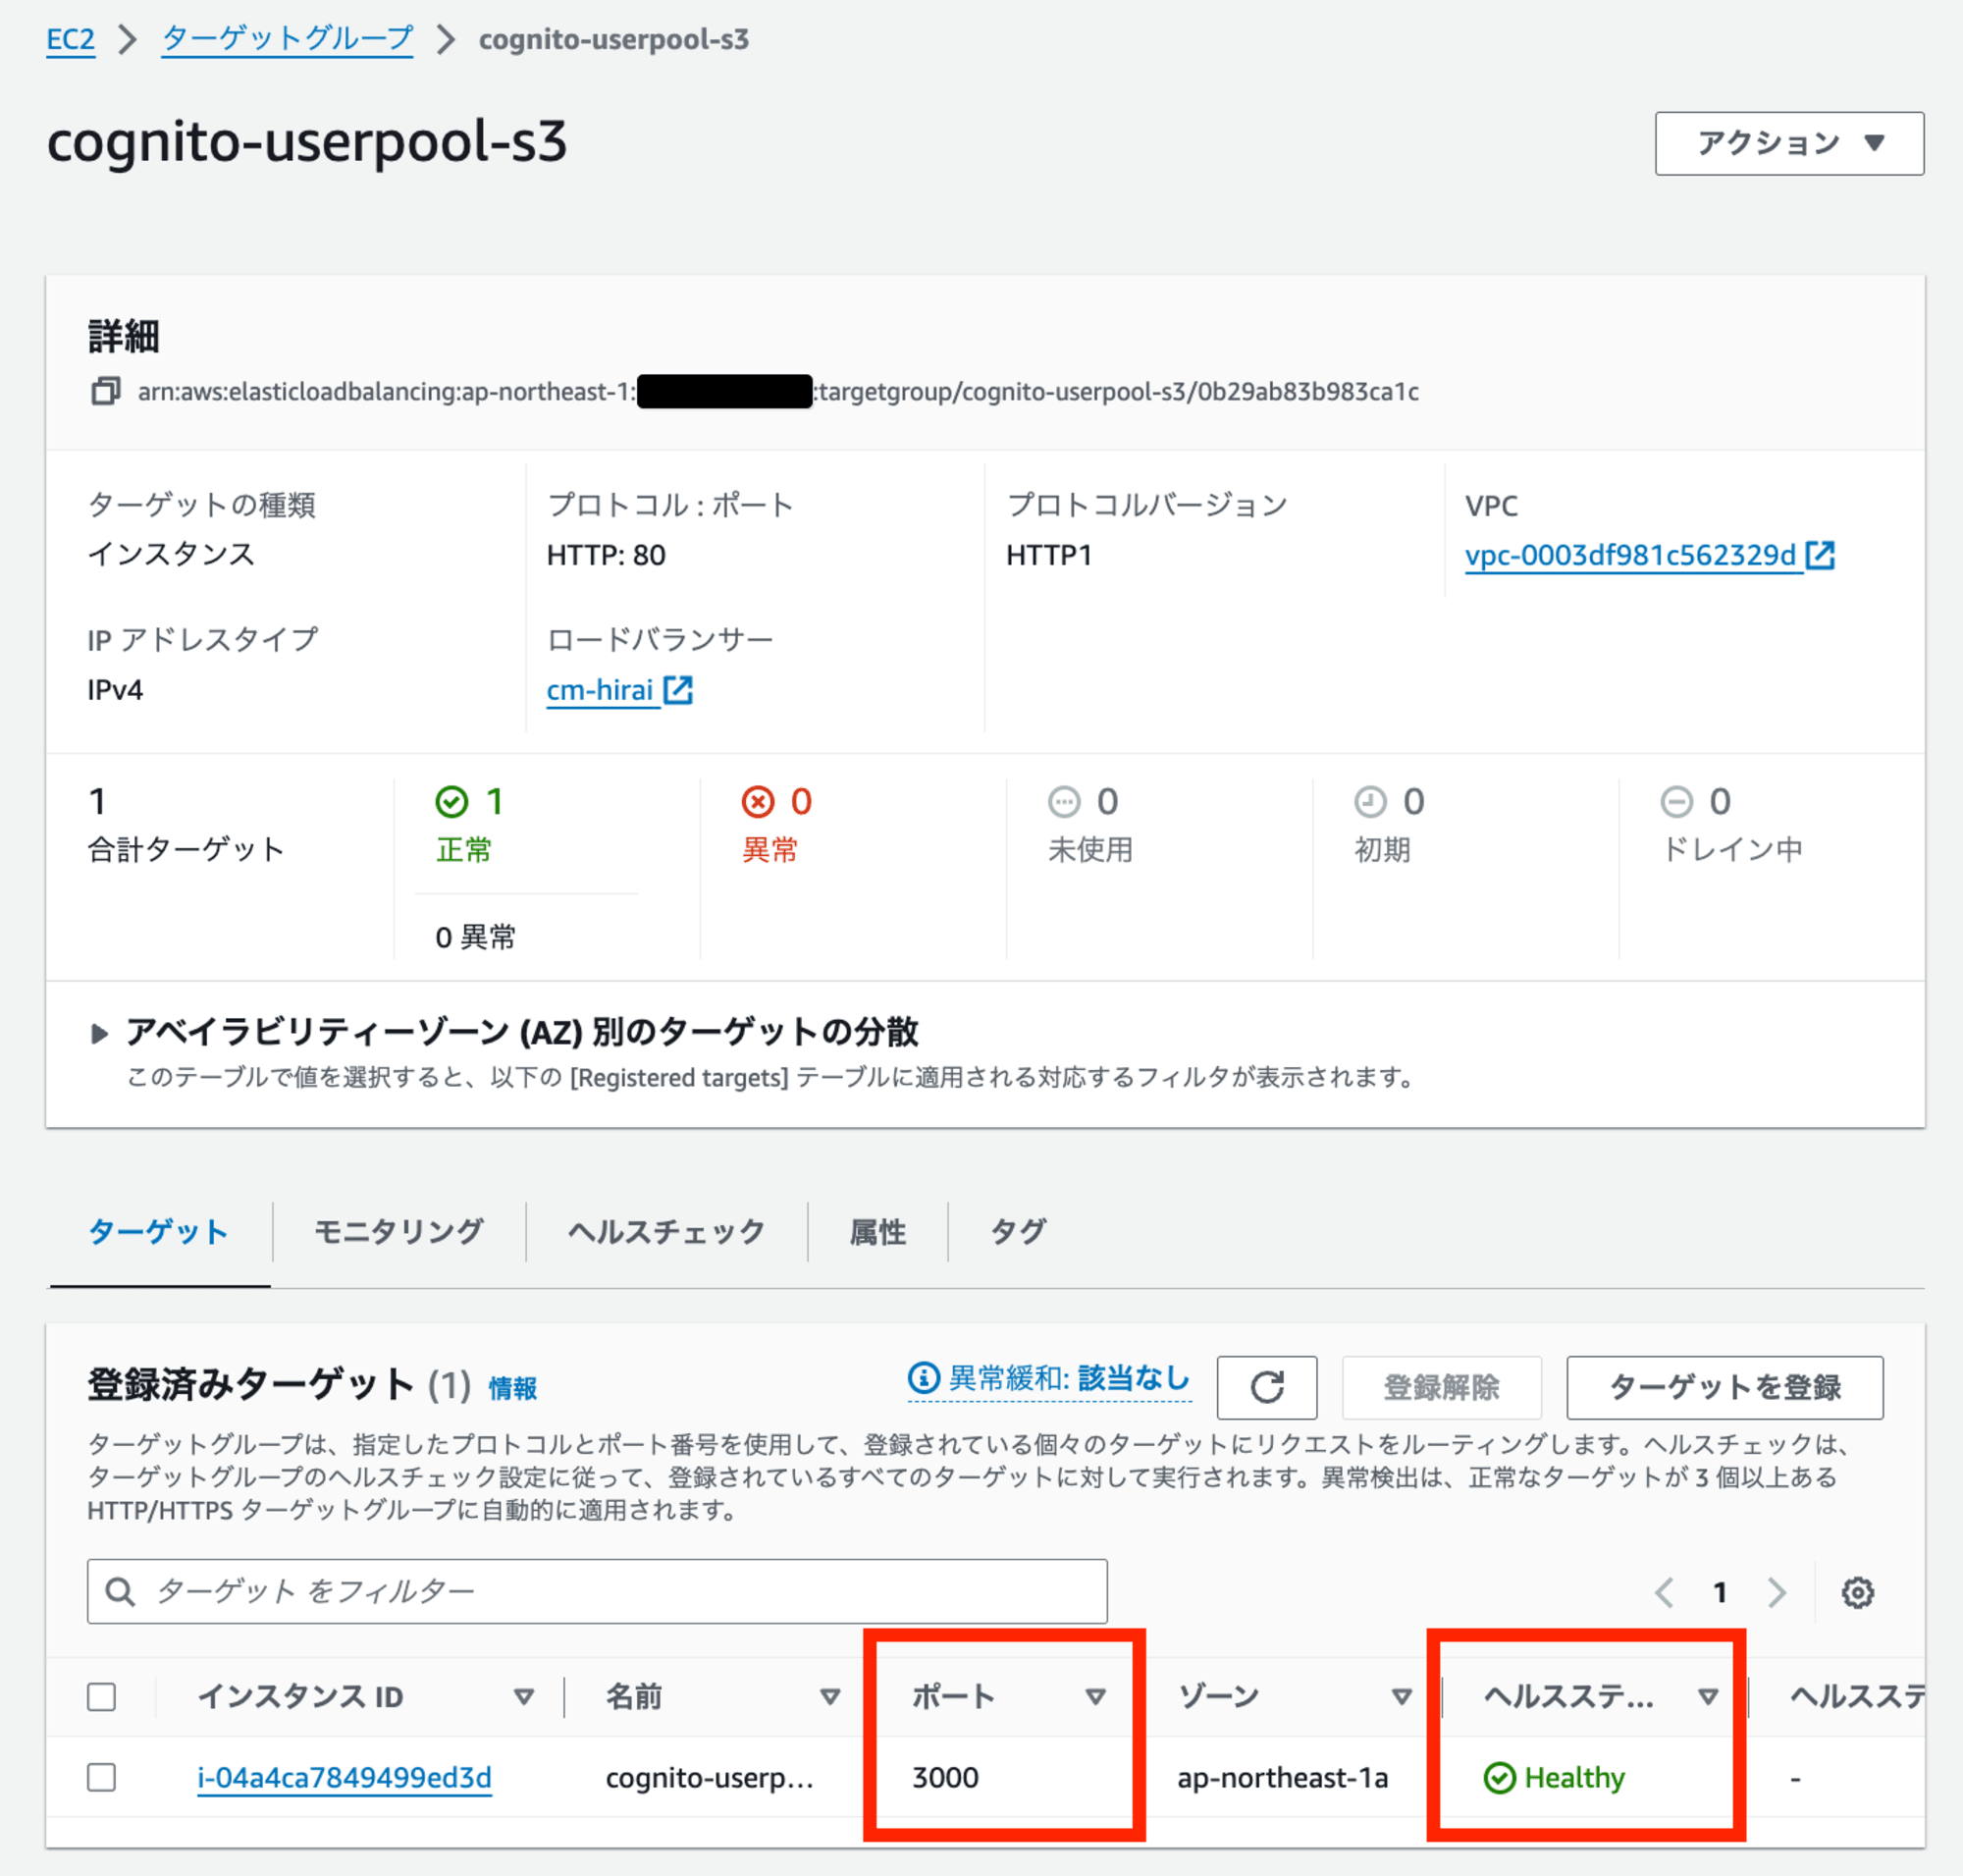
アプリケーション起動後、EC2インスタンスのヘルスチェックが成功していることを確認します。
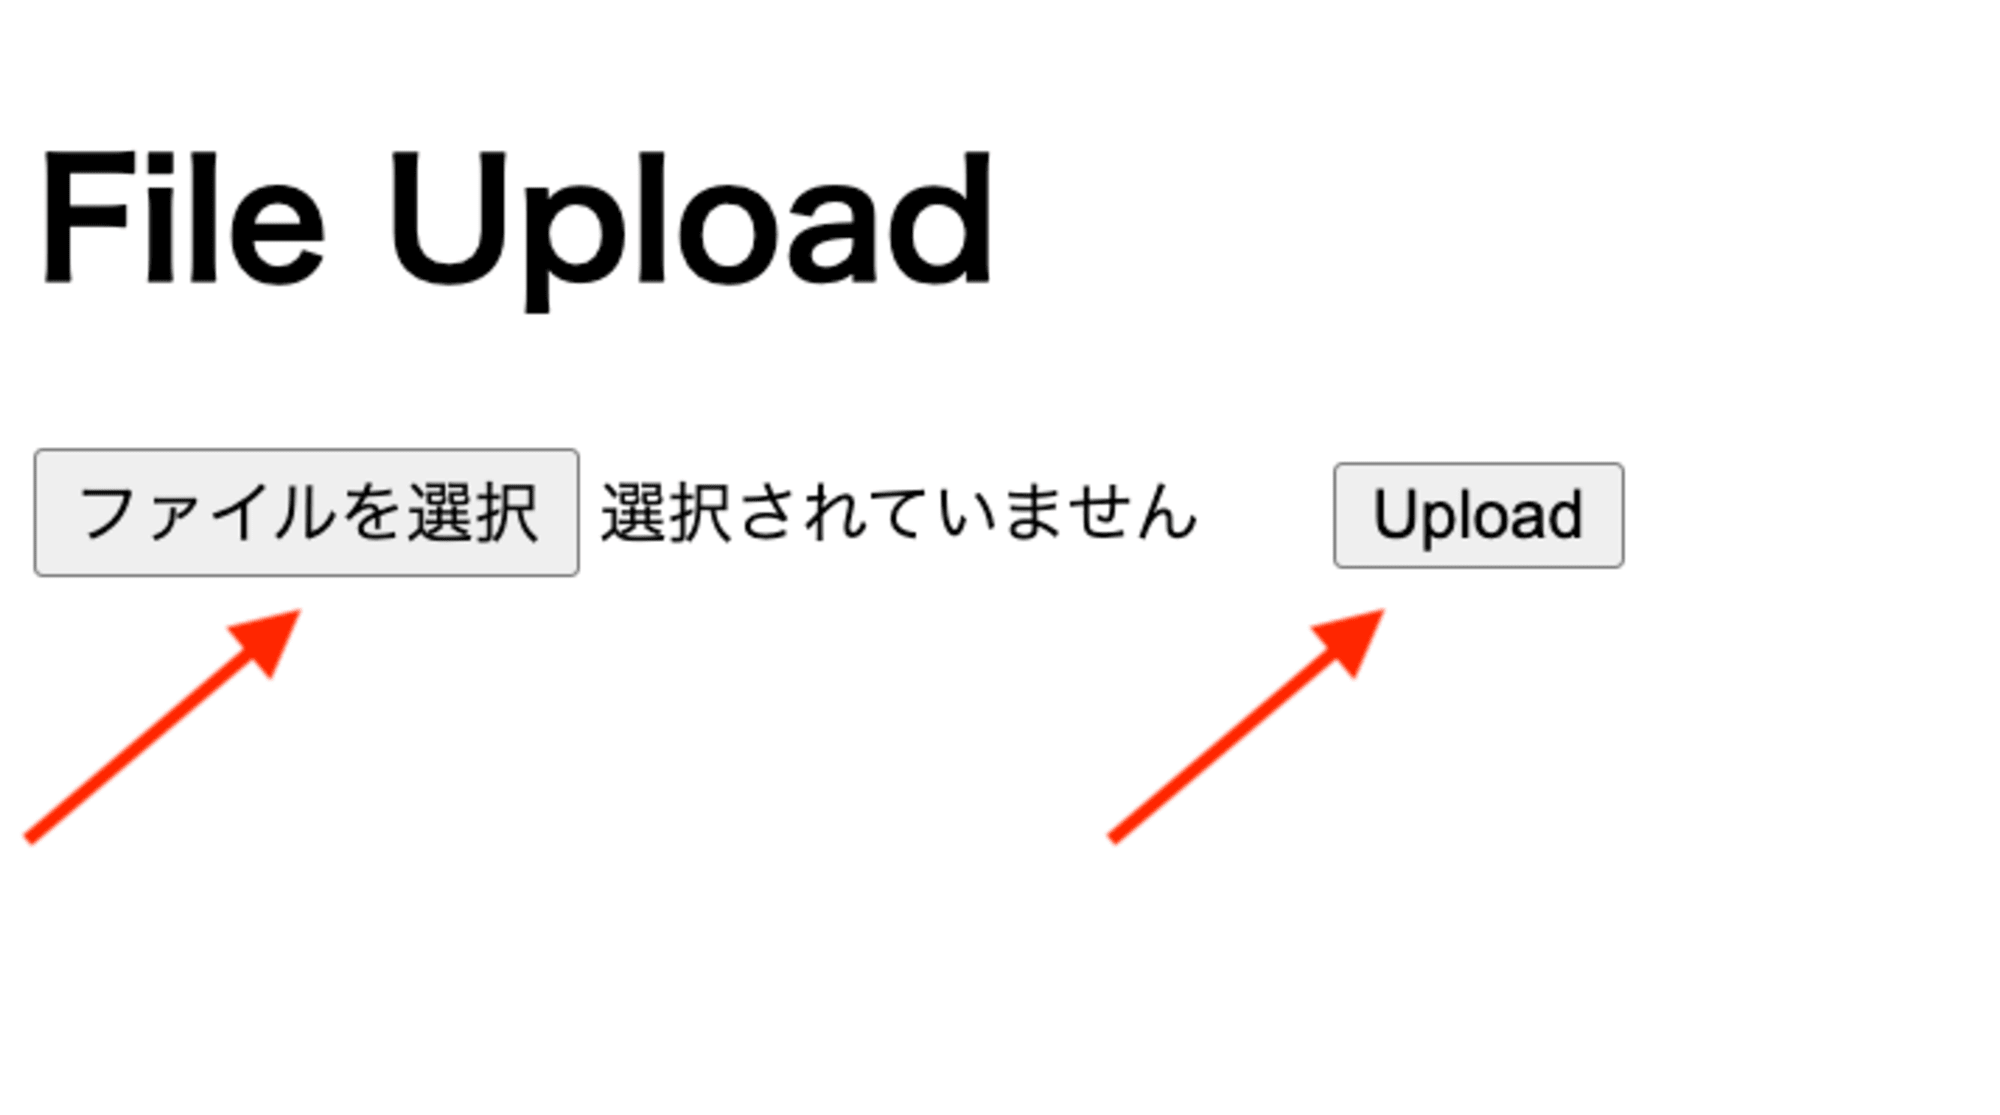
アプリケーションにアクセスします。Cognitoでサインイン後、以下の画面に遷移します。[ファイルを選択]から画像ファイルを選択し、[Upload]をクリックします。
アップロードが成功したことを確認できます。[Your Files]では、S3バケットに保存されたユーザー自身がアップロードしたファイルのみ表示されます。もちろん、再ログイン後もファイルは表示されます。
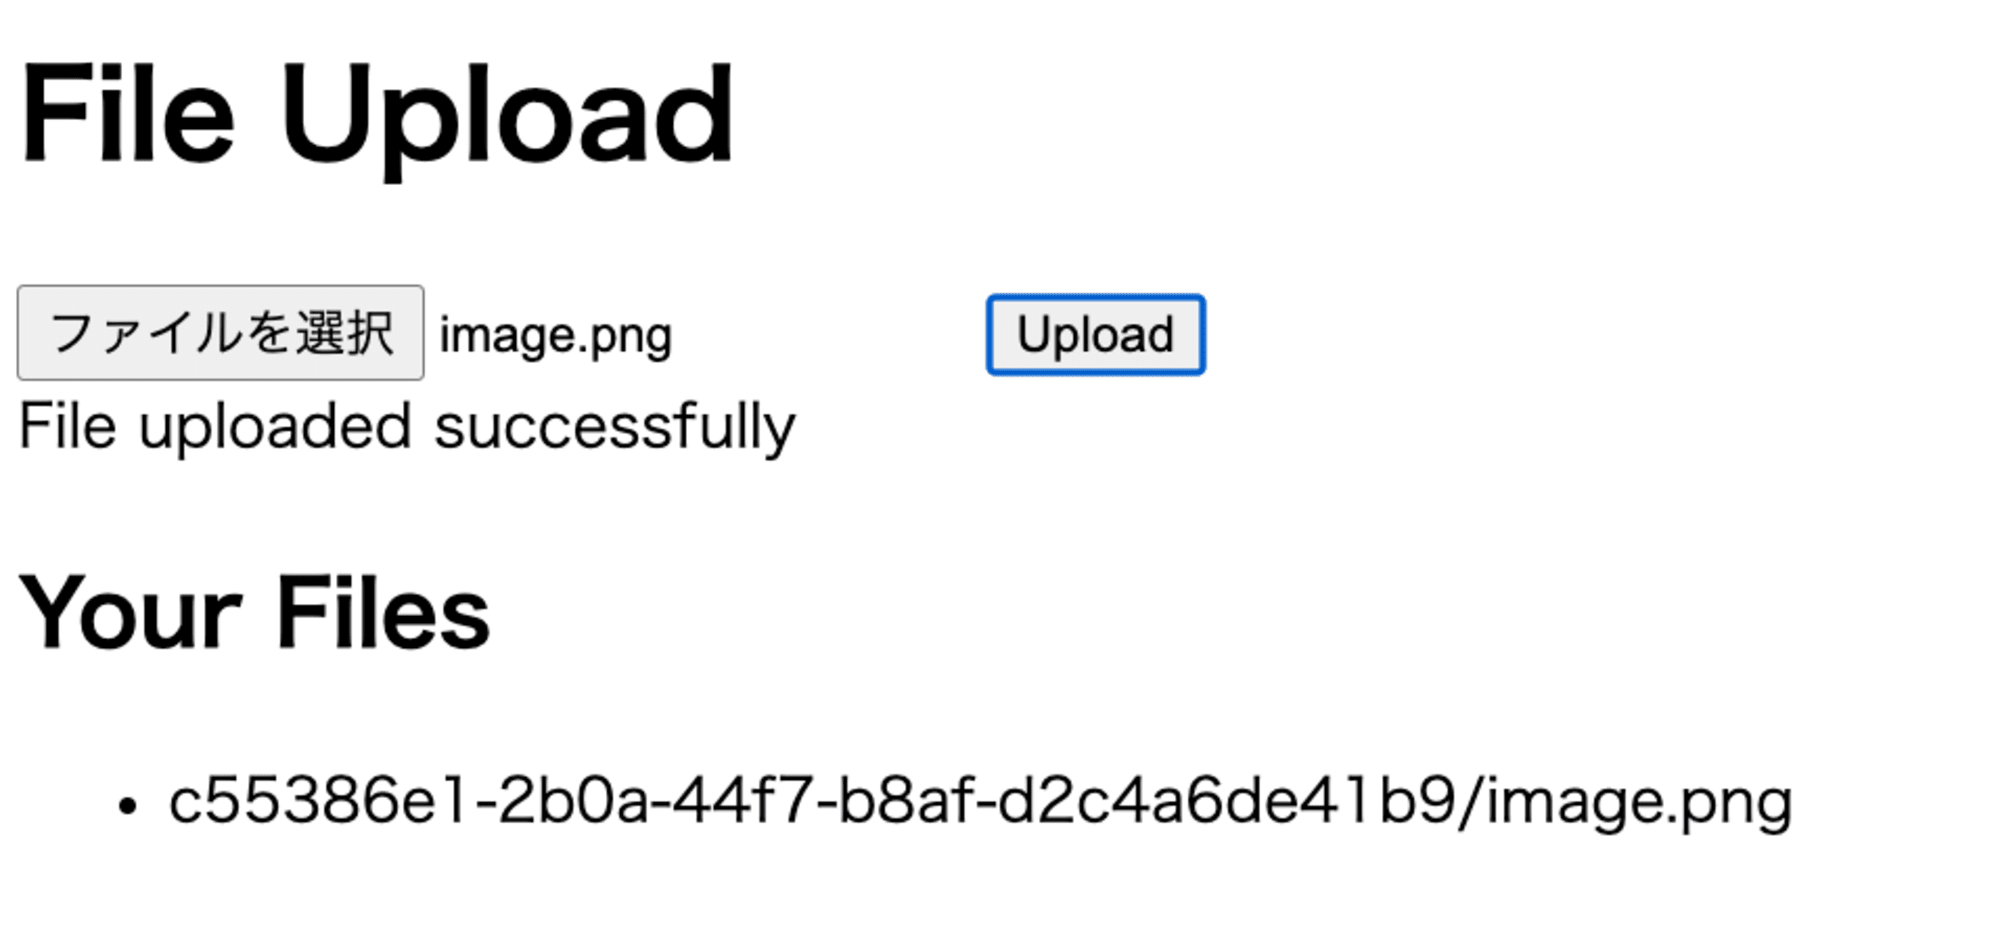
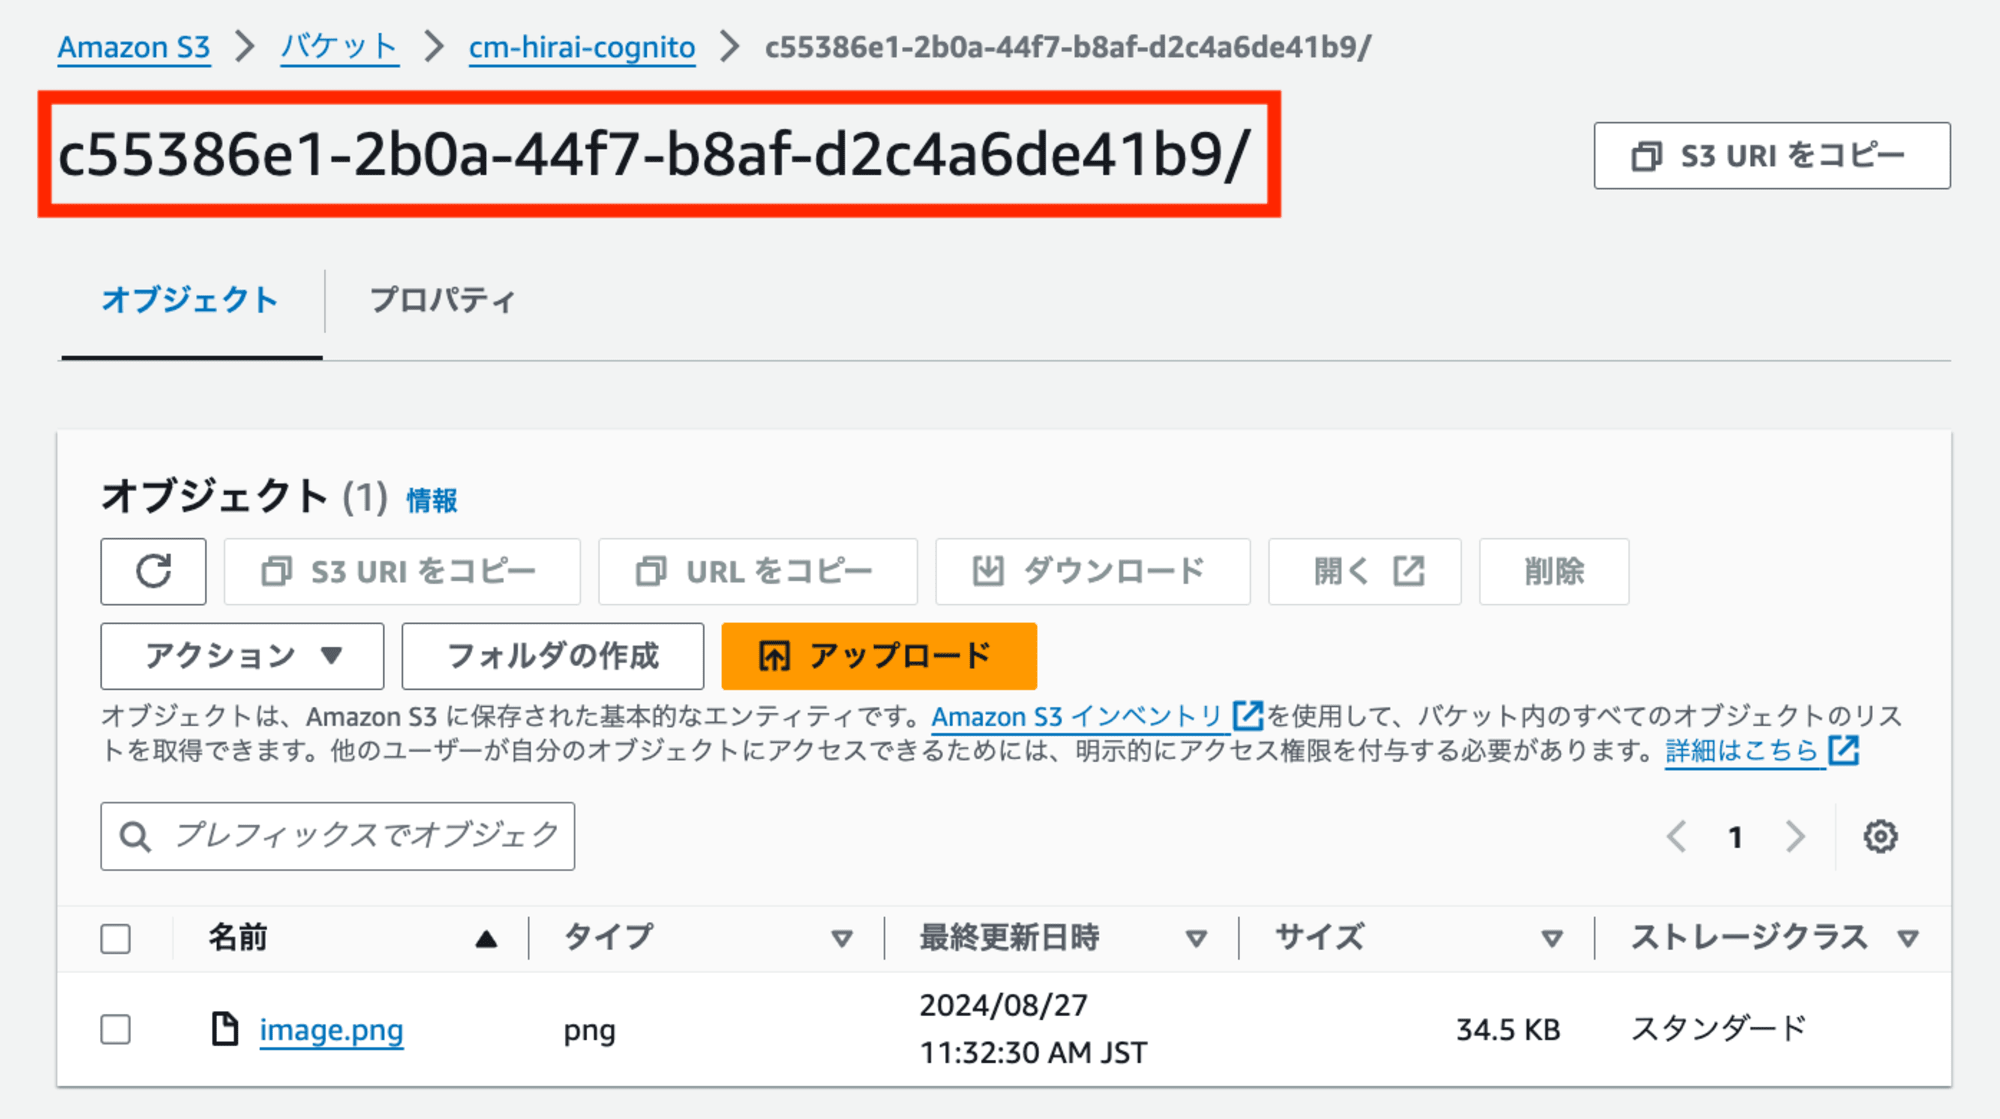
AWSマネジメントコンソールのS3バケットを確認すると、c55386e1-2b0a-44f7-b8af-d2c4a6de41b9がプレフィックスになっていることがわかります。
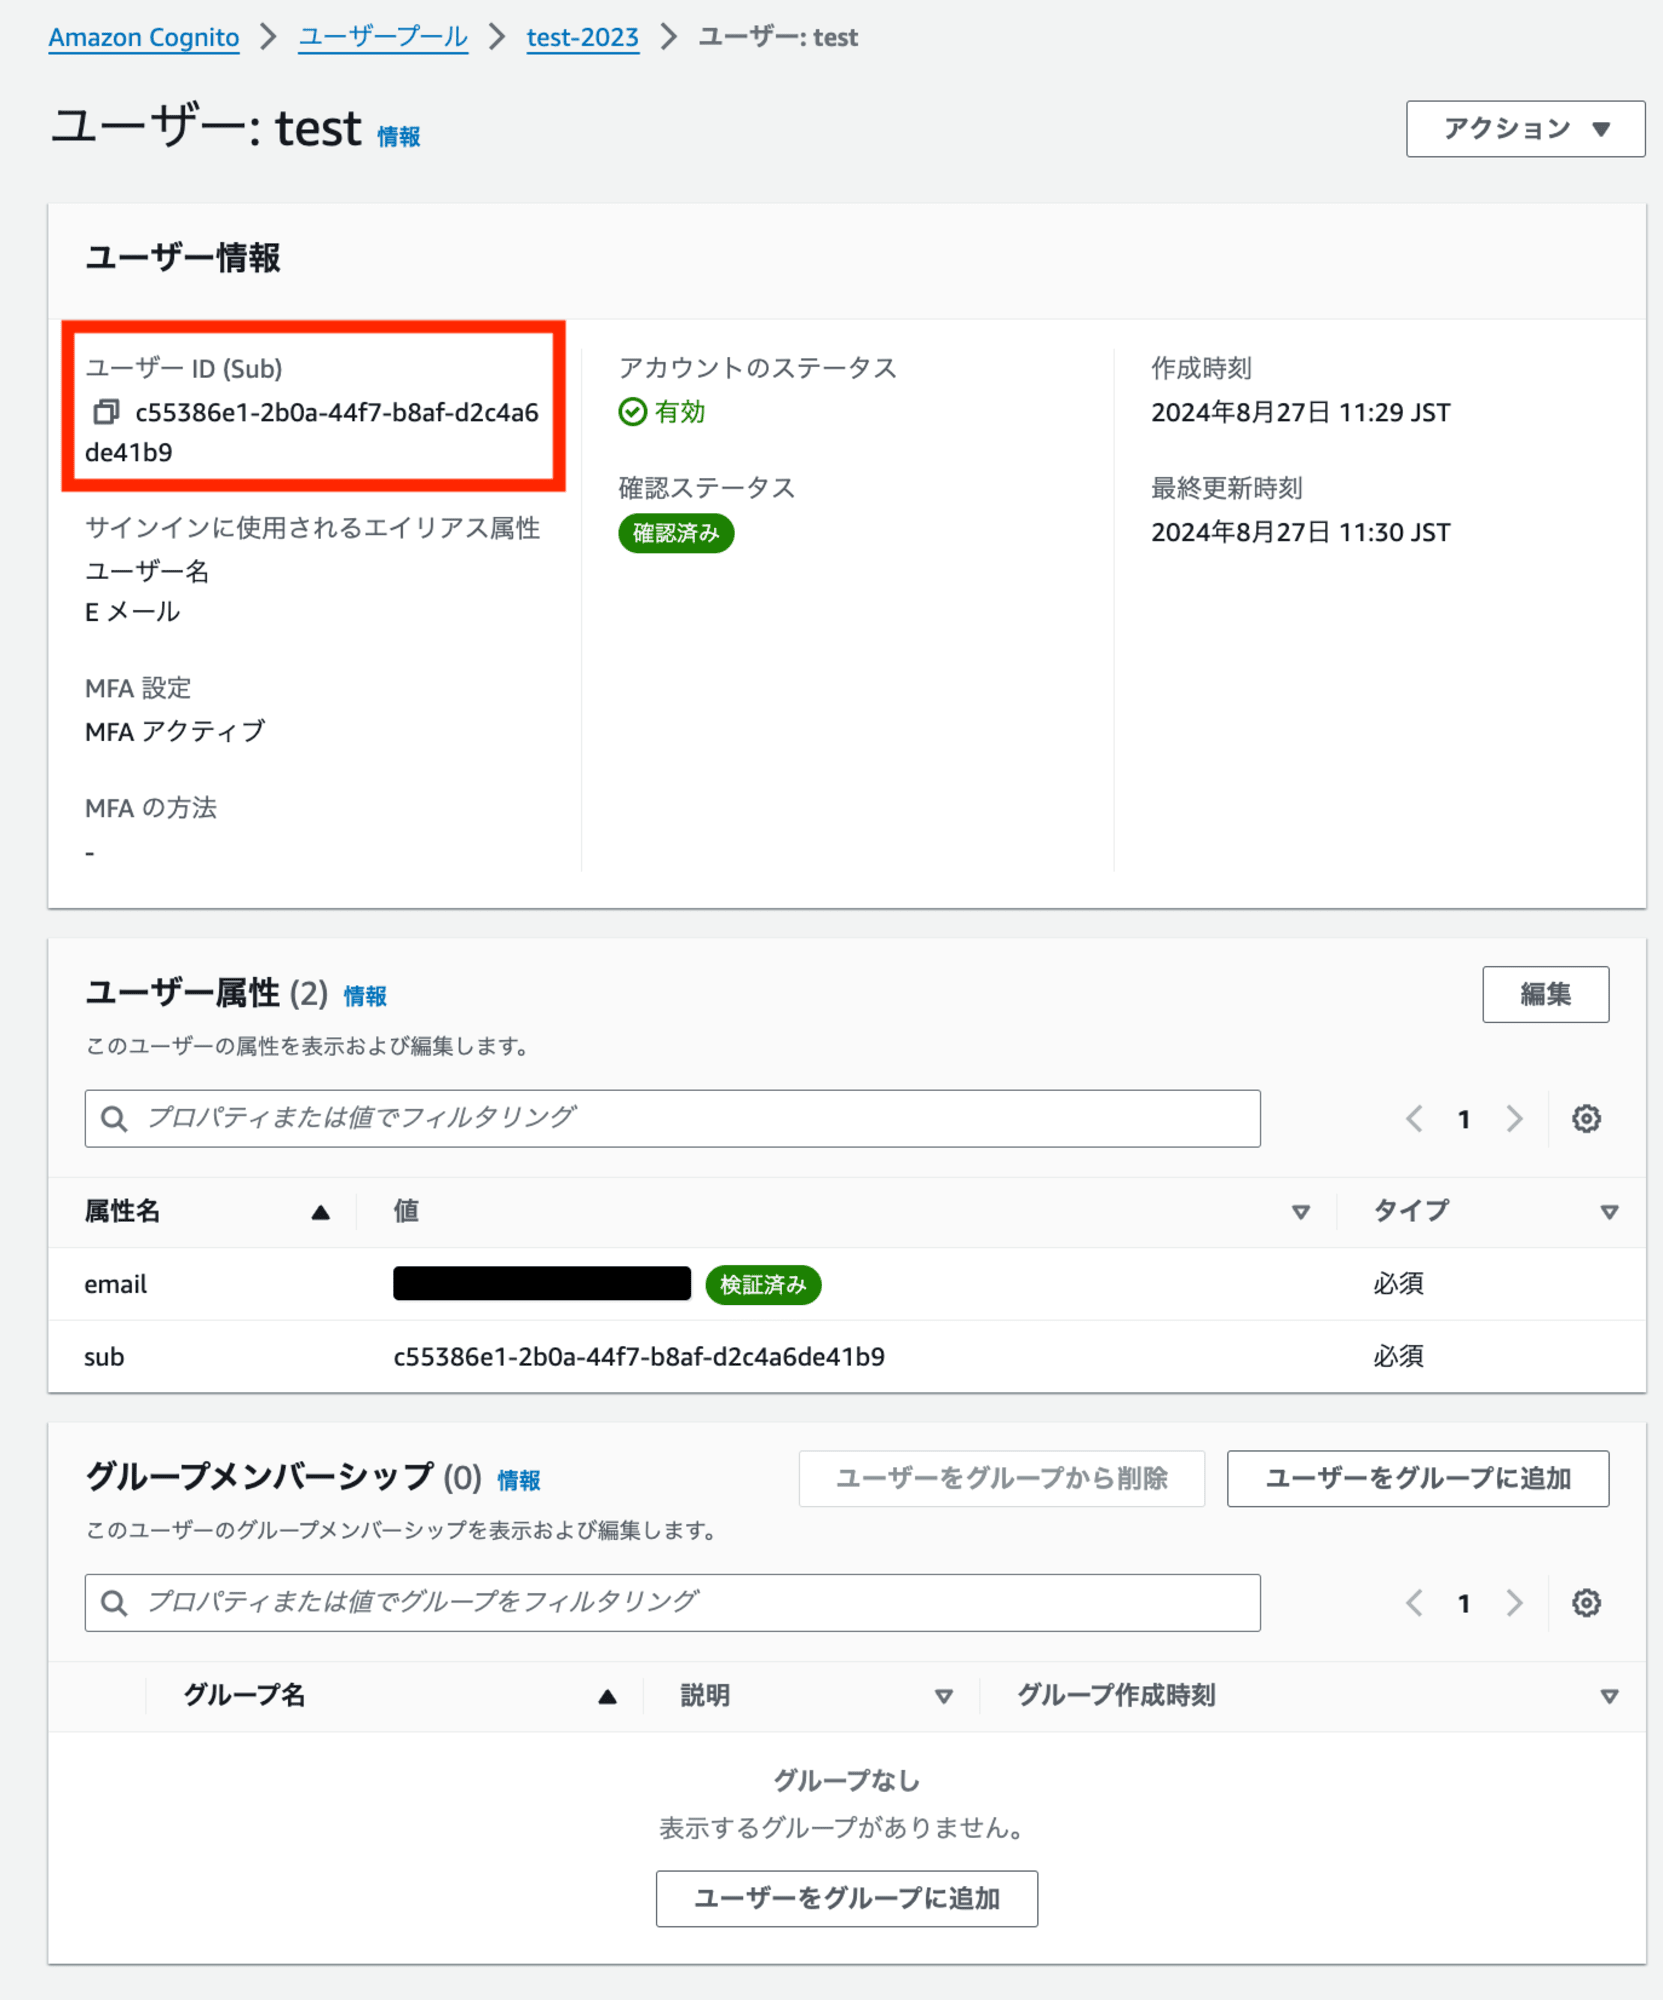
c55386e1-2b0a-44f7-b8af-d2c4a6de41b9は、Cognitoで認証されたユーザーIDです。AWSマネジメントコンソールのユーザープールのユーザー詳細から確認できます。
参考


