AWS IoT TwinMakerがAmazon Athena data connectorをサポートしていました
この記事は公開されてから1年以上経過しています。情報が古い可能性がありますので、ご注意ください。
こんにちは、CX事業本部 IoT事業部の若槻です。
先月(11/18)のAWS IoT TwinMakerのアップデートで、Amazon Athena data connectorがサポートされるようになりました。
- 原文:AWS IoT TwinMaker now supports data connector to Amazon Athena
- 日本語訳:AWS IoT TwinMaker が Amazon Athena へのデータコネクタのサポートを開始
AWS IoT TwinMaker の Amazon Athena データコネクタがすべてのユーザーに利用可能になりました。Amazon Athena は標準 SQL を使用して Amazon Simple Storage のデータを簡単に分析できるインタラクティブなクエリサービスです。Amazon Athena データコネクタは表形式データを Amazon Athena データストアから AWS IoT TwinMaker に接続し、コンテキストと個別の情報をデジタルツインに追加できるようにします。
メンテナンス記録、シフトスケジュール、電気料金などの表形式データをデジタルツインの機器に添付できるようになりました。オペレーターは単一のペインでアセットを管理できます。このデータコネクタは完全に AWS マネージド型です。データコネクタをデプロイし、エンティティに添付し、必要なデータをデジタルツインに取り込むだけで開始できます。
今までS3 bucketからデータを取得するcomponentを作成したい場合には以前のエントリで試したようにデータの取得およびリターンを実施するLambda関数を使う必要がありましたが、今回のアップデートでAthenaクエリ用のBase componentが用意されたため、componentの作成が容易になりました。
やってみた
Amazon Athena data connectorを実際に使ってみます。
準備
table作成
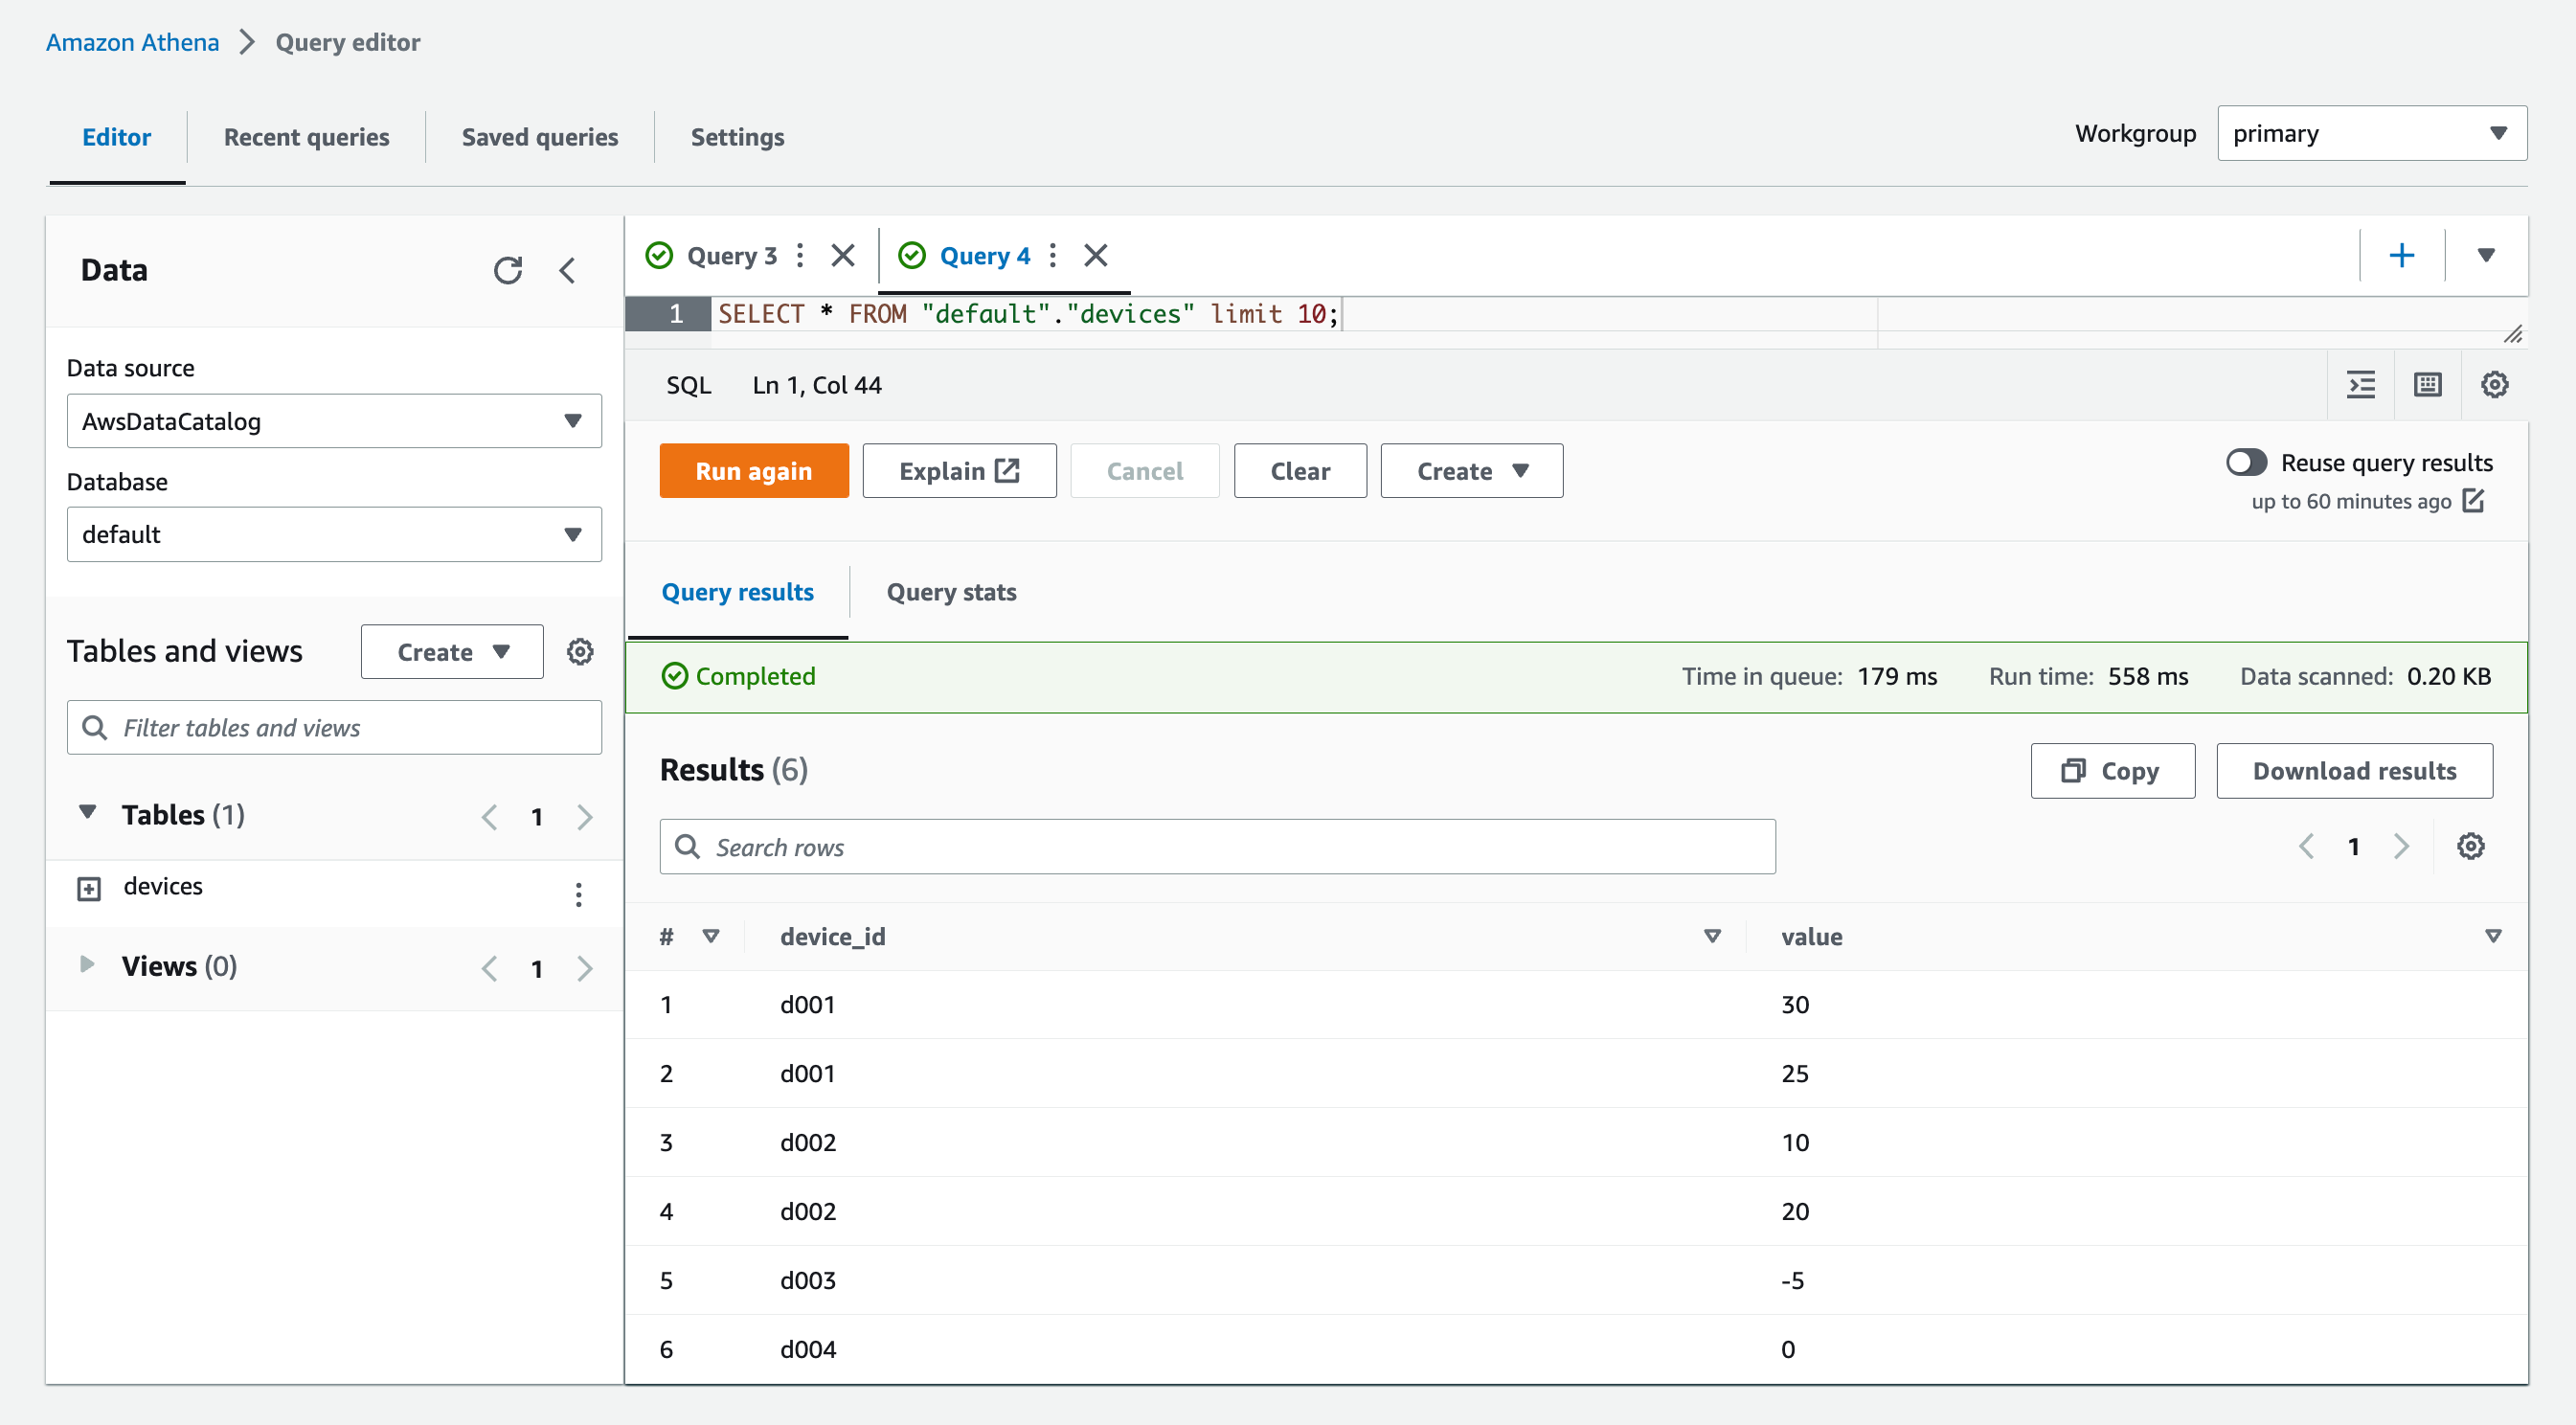
AthenaでクエリするGlue Tableおよびデータを作成しておきます。
CREATE EXTERNAL TABLE IF NOT EXISTS `default`.`devices` (`device_id` string, `value` int)
ROW FORMAT SERDE 'org.openx.data.jsonserde.JsonSerDe'
WITH SERDEPROPERTIES (
  'ignore.malformed.json' = 'FALSE',
  'dots.in.keys' = 'FALSE',
  'case.insensitive' = 'TRUE',
  'mapping' = 'TRUE'
)
STORED AS INPUTFORMAT 'org.apache.hadoop.mapred.TextInputFormat' OUTPUTFORMAT 'org.apache.hadoop.hive.ql.io.HiveIgnoreKeyTextOutputFormat'
LOCATION 's3://20220104-athena-component-twinmaker/data/'
TBLPROPERTIES ('classification' = 'json');
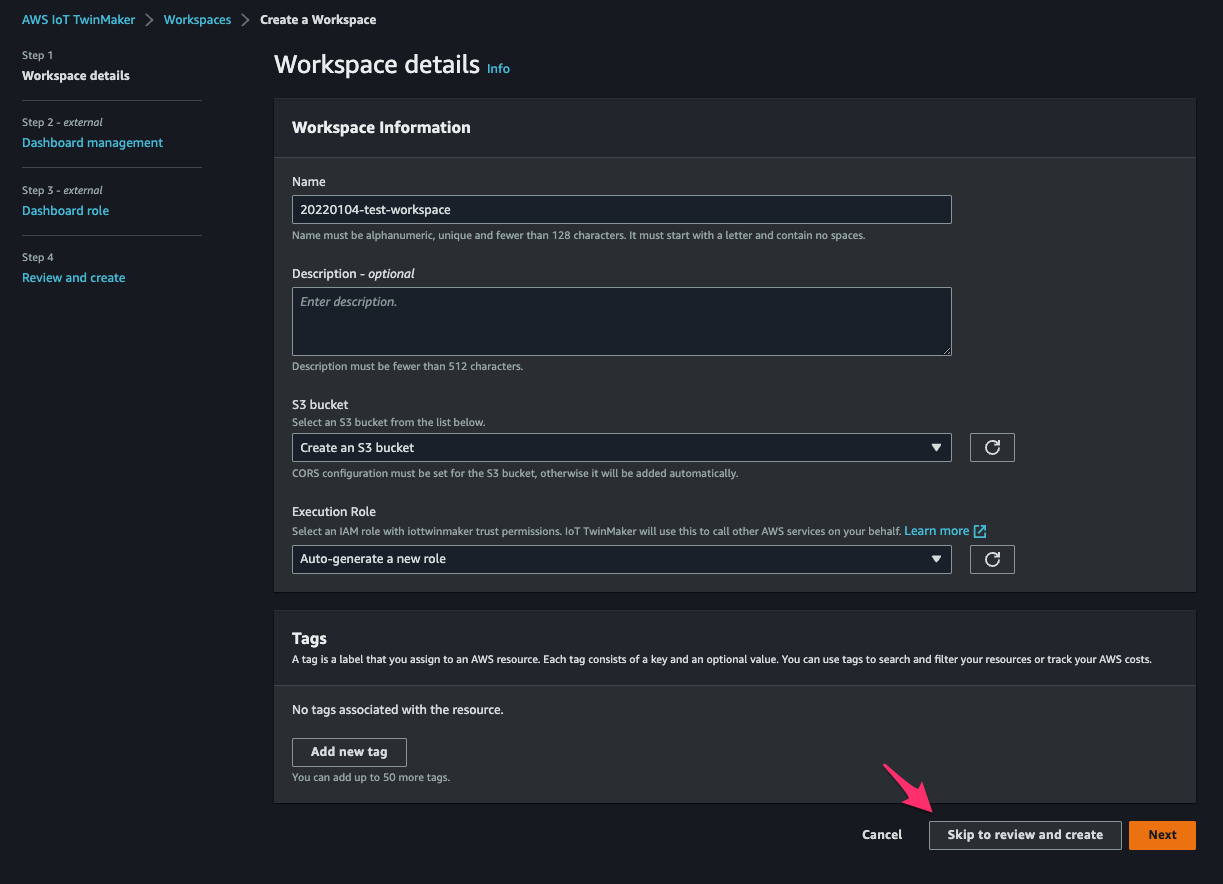
workspace作成
AWS IoT TwinMaker > Workspaces > Create a Workspace コンソールにアクセスして、workspaceを作成しておきます。dashboardの設定はここではスキップします。
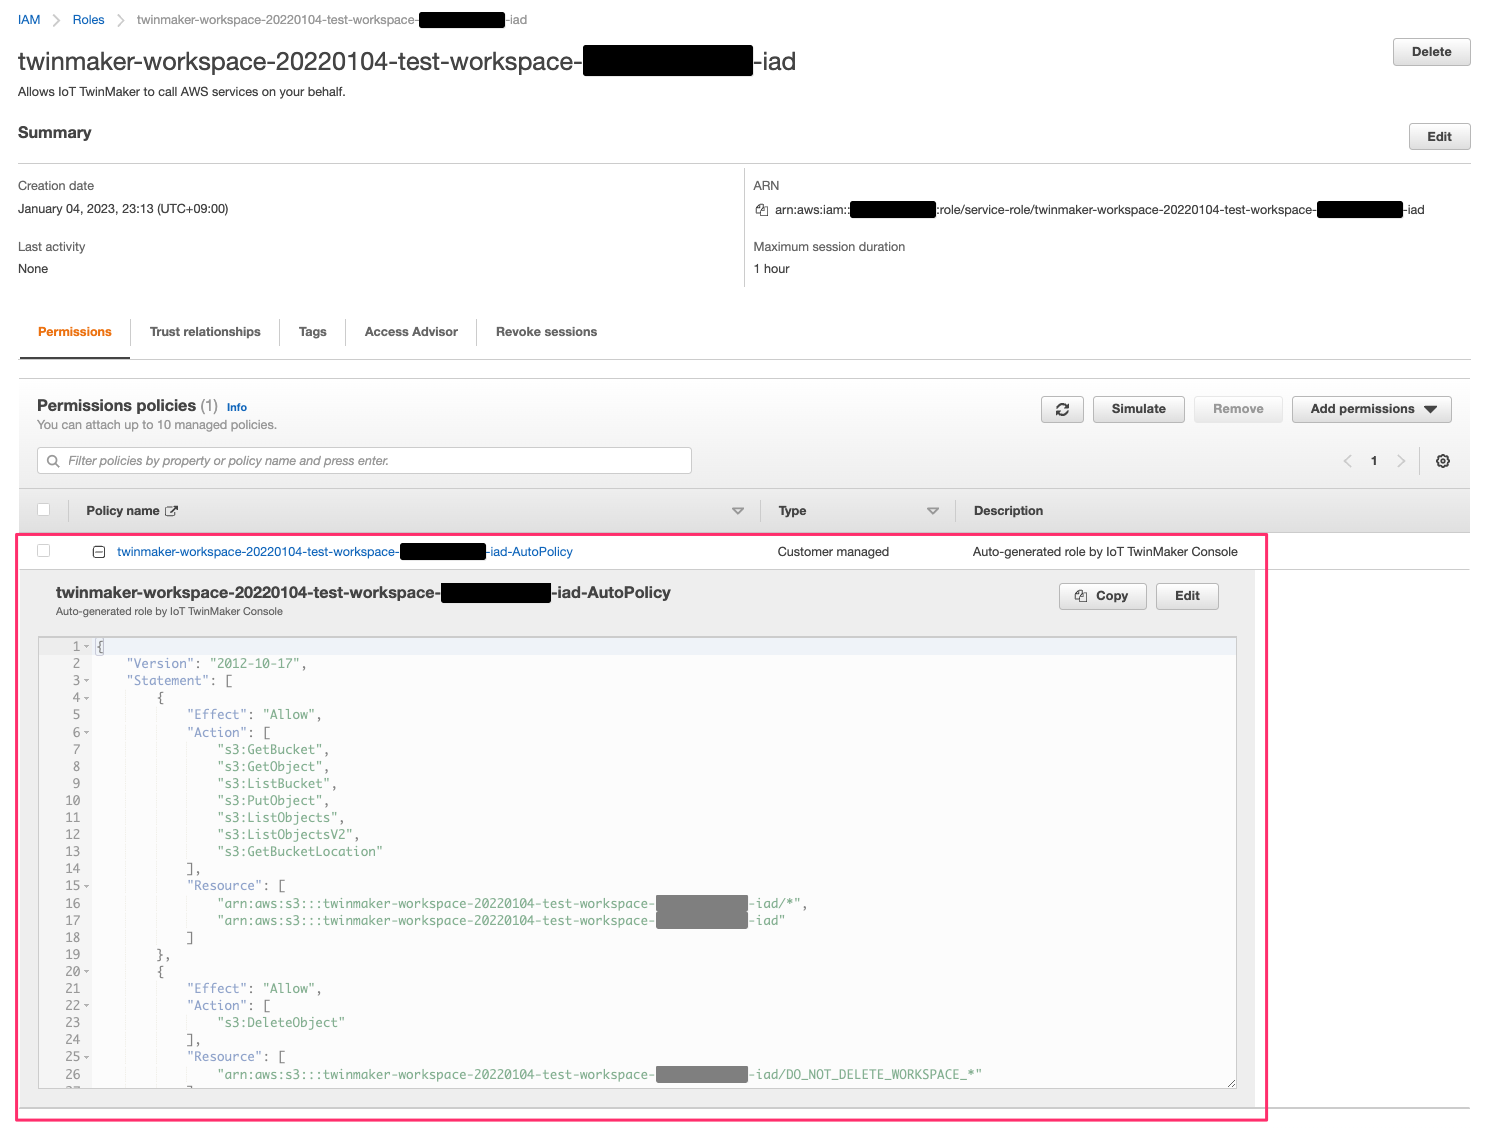
IAM Role設定
AWS IoT TwinMaker Athena tabular data connectorを使うためには、AWS IoT TwinMaker workspace IAM roleに対して次のpermissionを設定する必要があります。
{
    "Effect": "Allow",
    "Action": [
        "athena:GetQueryExecution",
        "athena:GetQueryResults",
        "athena:GetTableMetadata",
        "athena:GetWorkGroup",
        "athena:StartQueryExecution",
        "athena:StopQueryExecution"
    ],
    "Resource": [
        "athena resouces arn"
    ]
},// Athena permission
{
    "Effect": "Allow",
    "Action": [
        "glue:GetTable",
        "glue:GetTables",
        "glue:GetDatabase",
        "glue:GetDatabases"
    ],
    "Resource": [
        "glue resouces arn"
    ]
},// This is an example for accessing aws Glue
{
    "Effect": "Allow",
    "Action": [
        "s3:ListBucket",
        "s3:GetObject"
    ],
    "Resource": [
        "Amazon S3 data source bucket resources arn"
    ]
}, // S3 bucket for storing the tabular data.
{
    "Effect": "Allow",
    "Action": [
        "s3:GetBucketLocation",
        "s3:GetObject",
        "s3:ListBucket",
        "s3:ListBucketMultipartUploads",
        "s3:ListMultipartUploadParts",
        "s3:AbortMultipartUpload",
        "s3:CreateBucket",
        "s3:PutObject",
        "s3:PutBucketPublicAccessBlock"
    ],
    "Resource": [
        "S3 query result bucket resources arn"
    ]
} // Storing the query results
workspace作成時に自動作成されたIAM policyに上記permissionの記述を追加します。
Amazon Athena data connector (component)作成
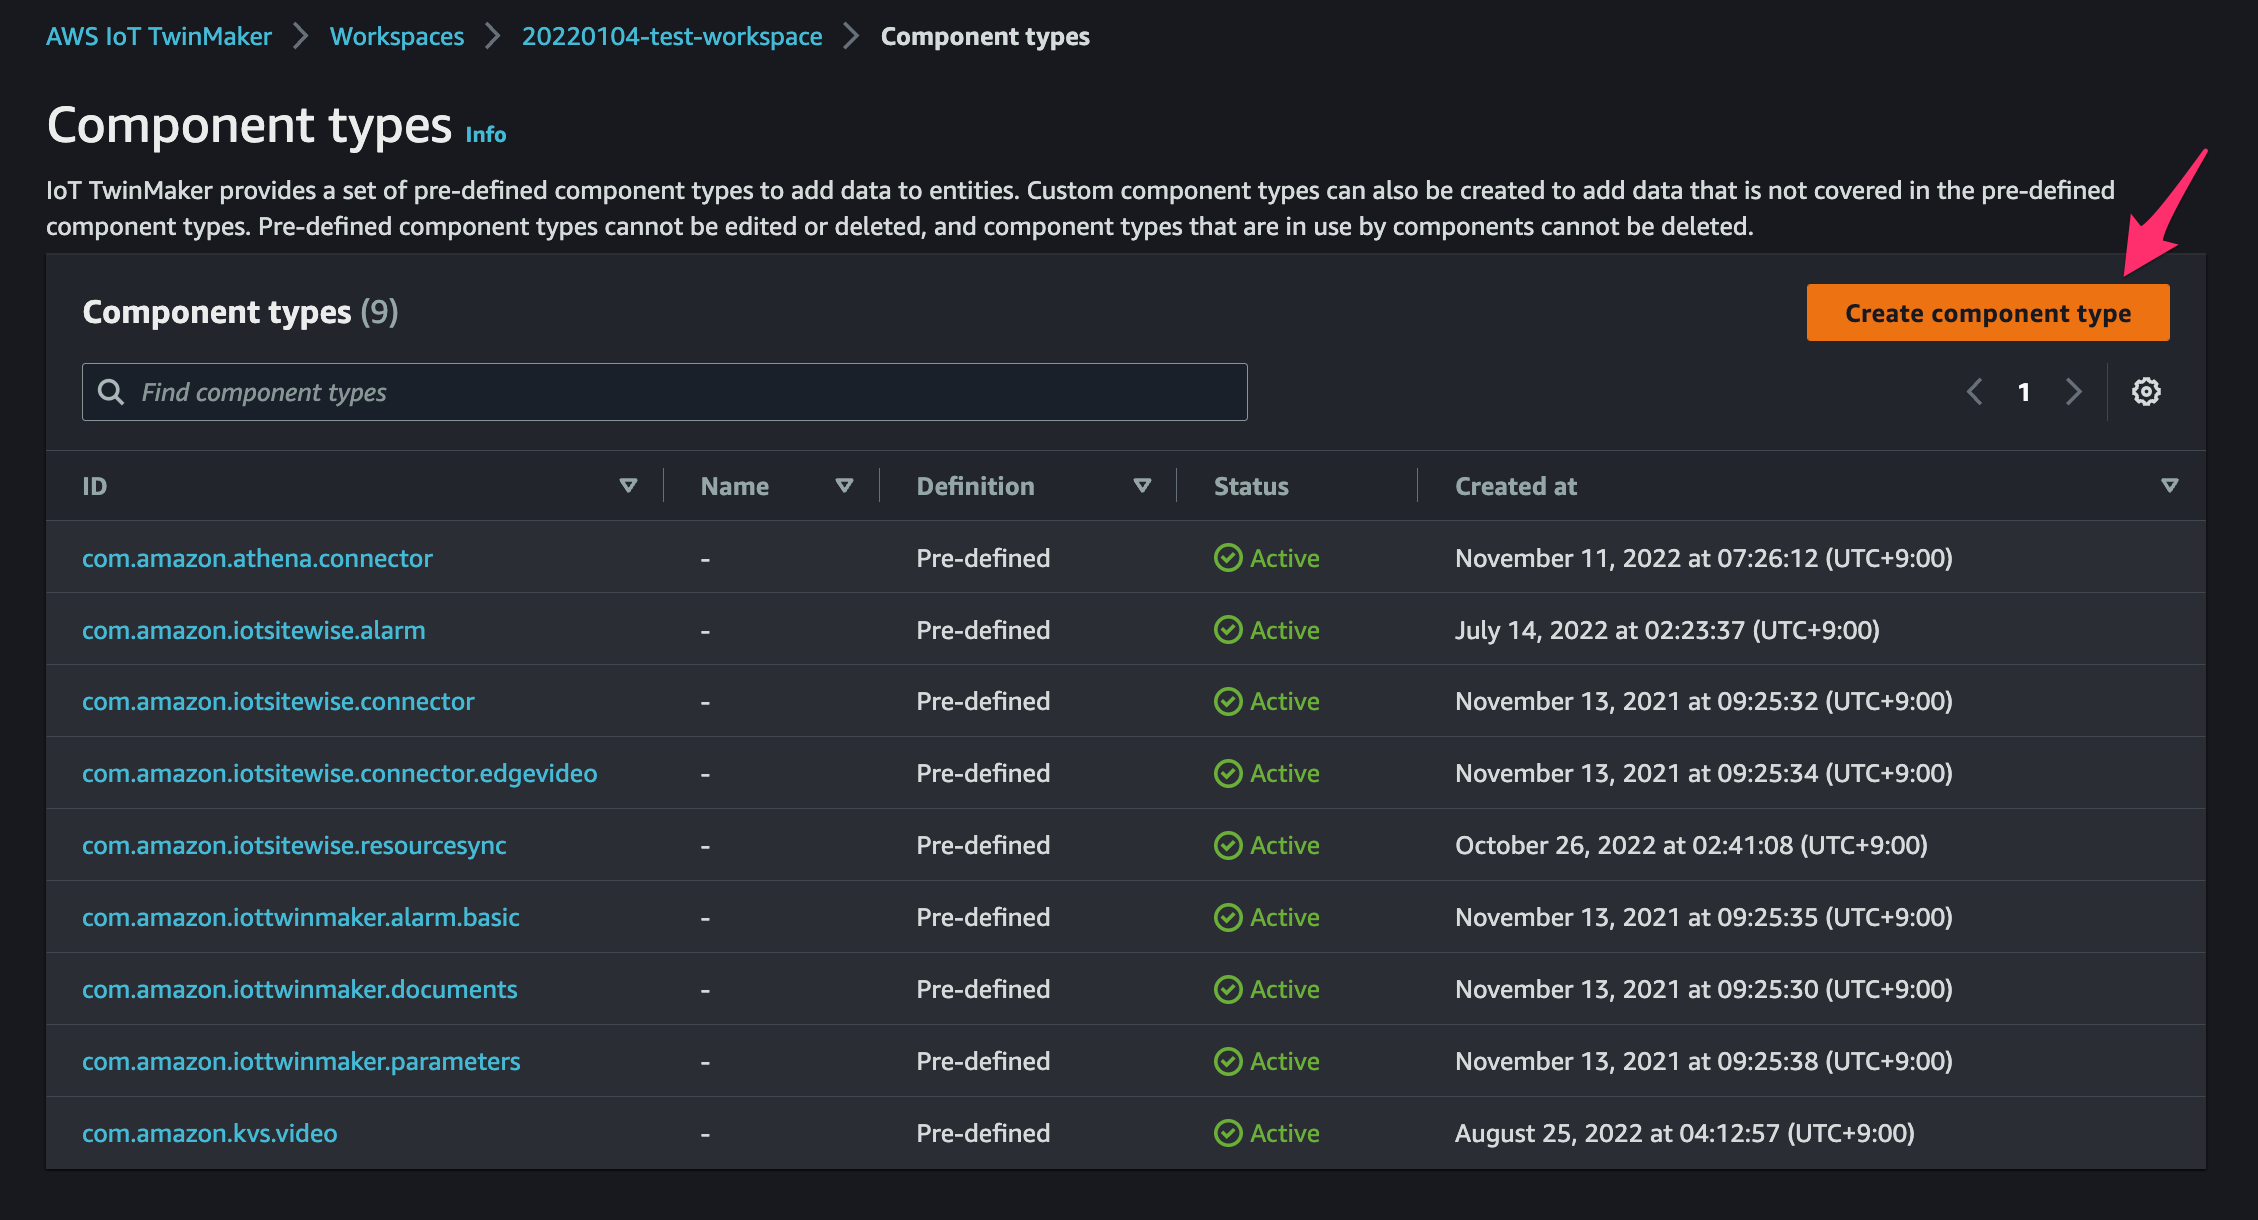
作成したworkspaceの[Component types]で[Create component type]をクリック。
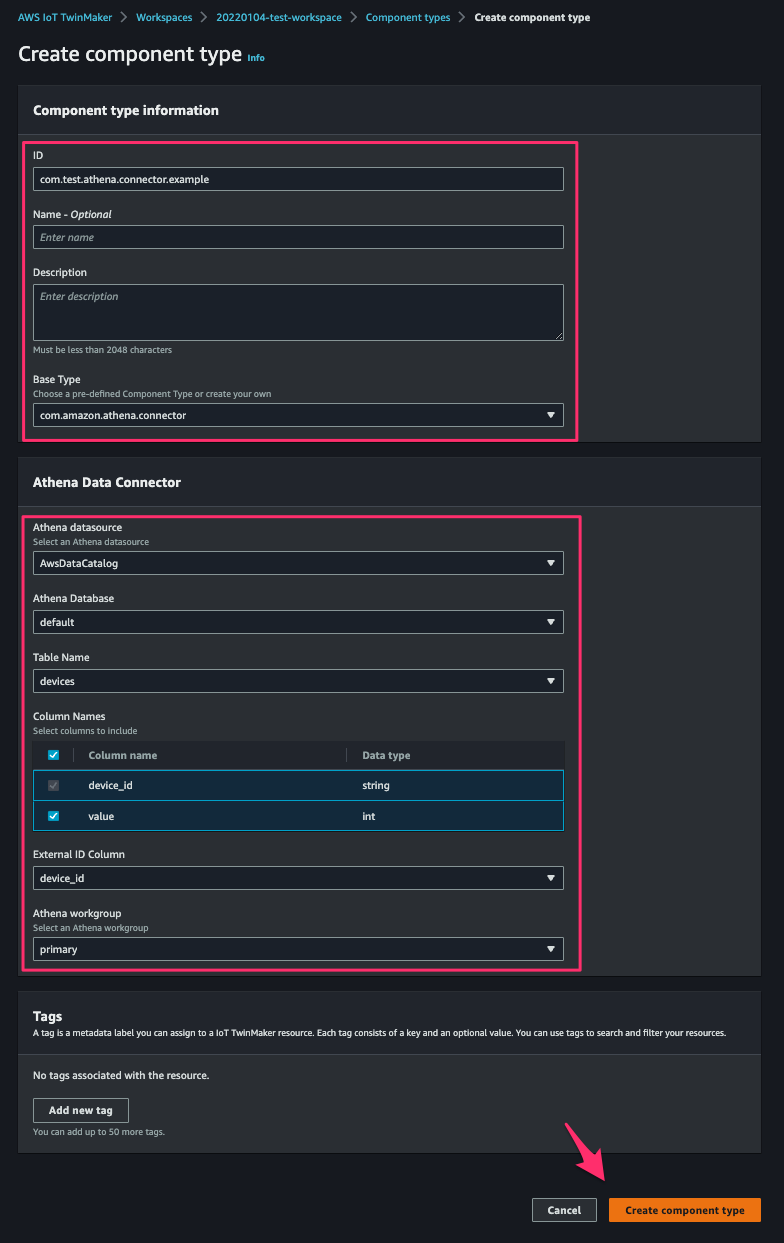
[Component type information]で[ID]に任意のID値、[Base Type]にcom.amazon.athena.connectorを指定します。また[Athena Data Connector]で接続先のAthena data sourceの情報を指定します。[Create component type]をクリックして作成を完了します。
entityにcomponentを追加
componentはentityに追加することにより使用可能になります。
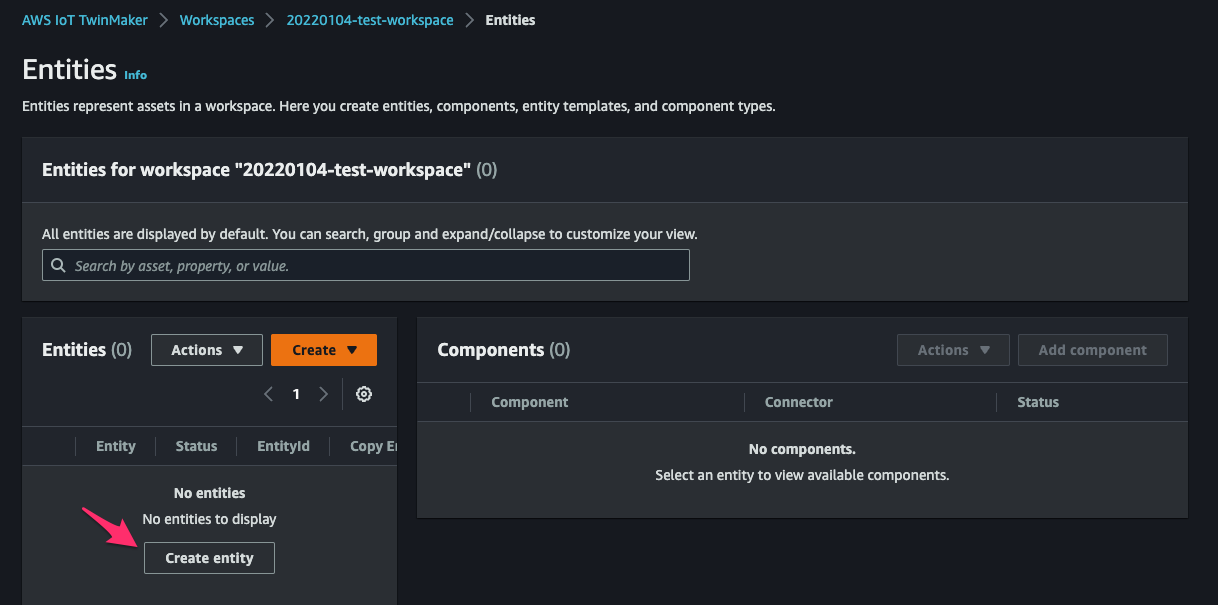
workspaceで[Create entity]をクリック。
[Name]を指定して[Create entity]をクリック。

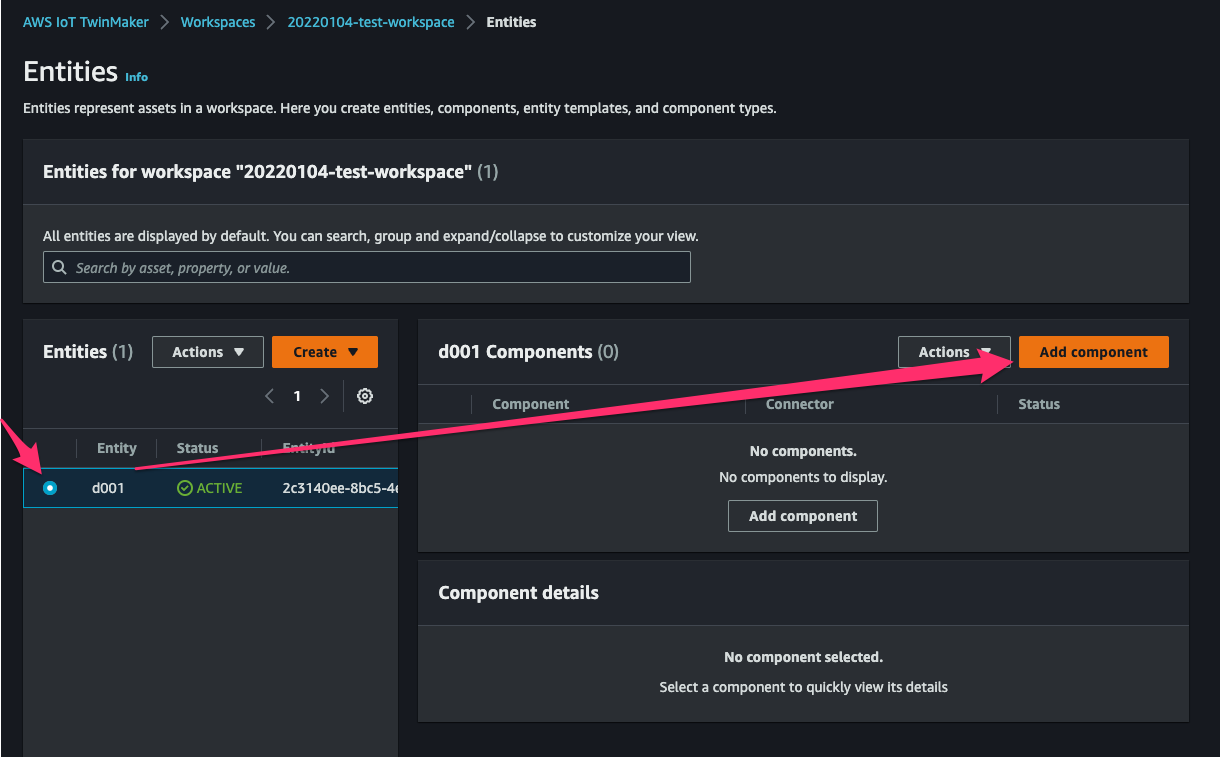
作成されたentityを選択して[Add component]をクリック。
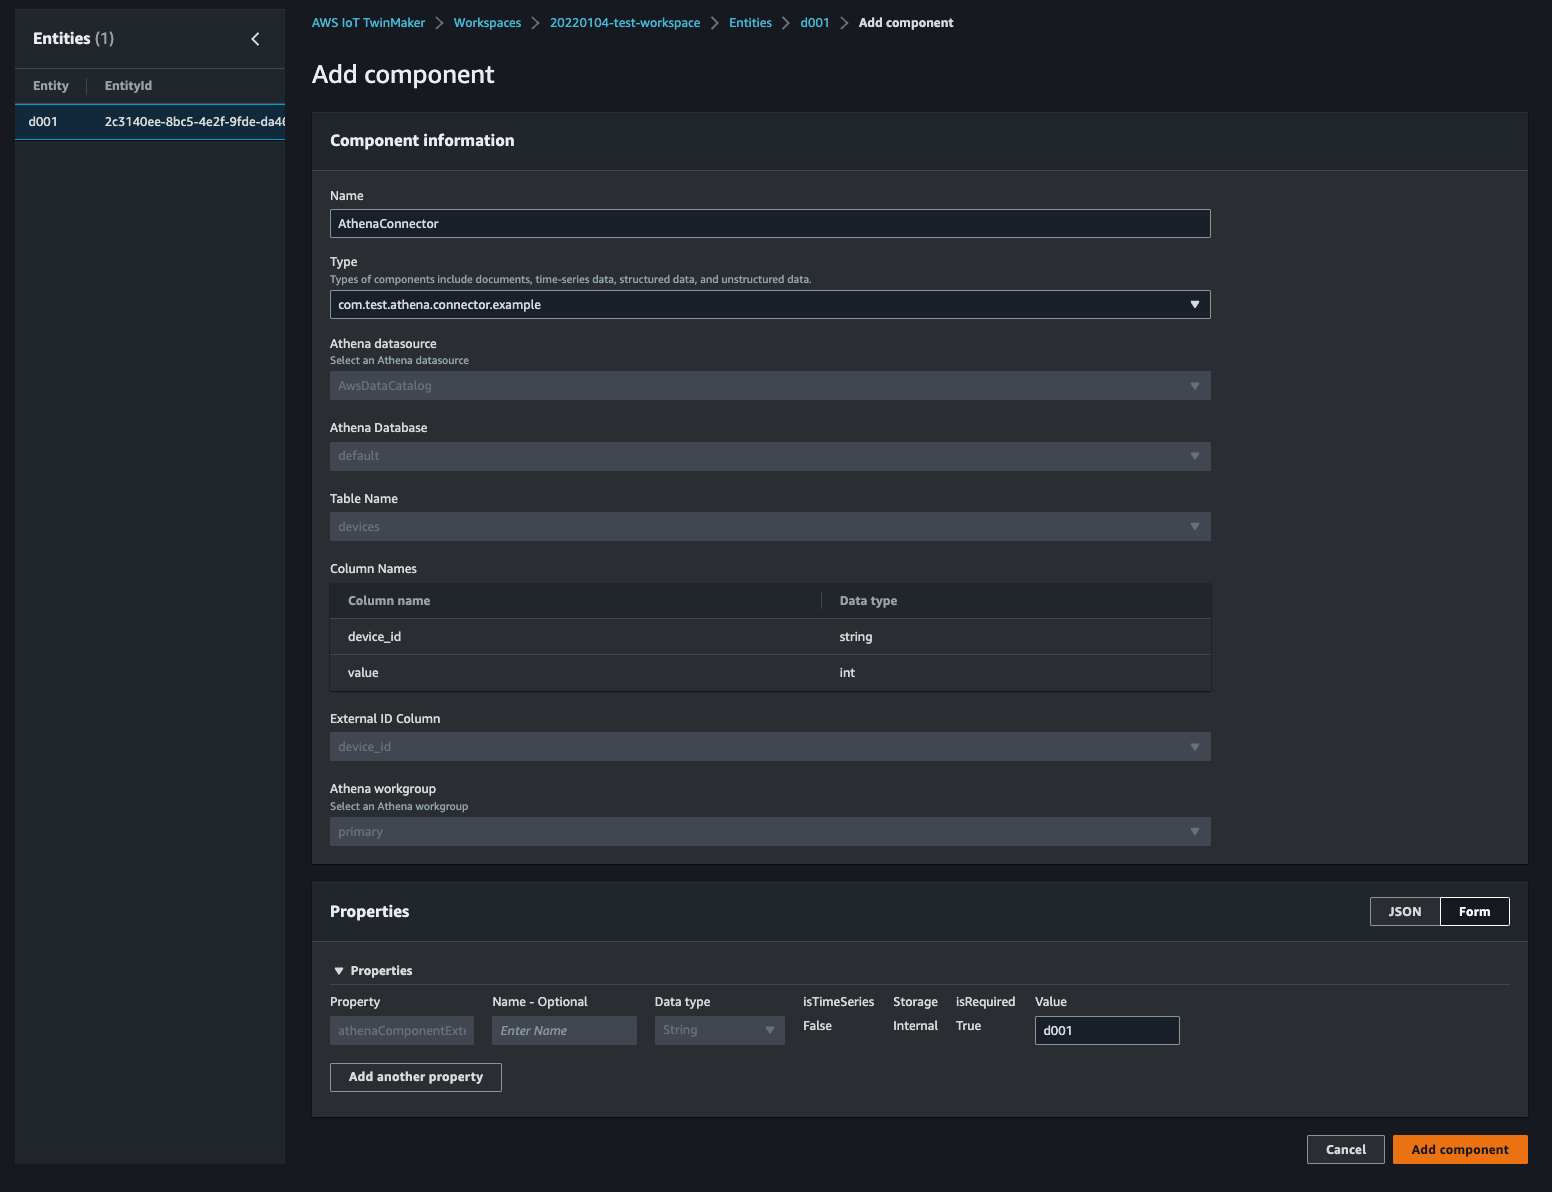
[Component information]で[Name]に任意の名前、[Type]に先程作成したcomponentを指定します。[Properties]で[Value]にこのentityに紐付けたいExternal ID(ここではdevice_id)の値を指定します。[Add component]をクリックして追加を完了します。
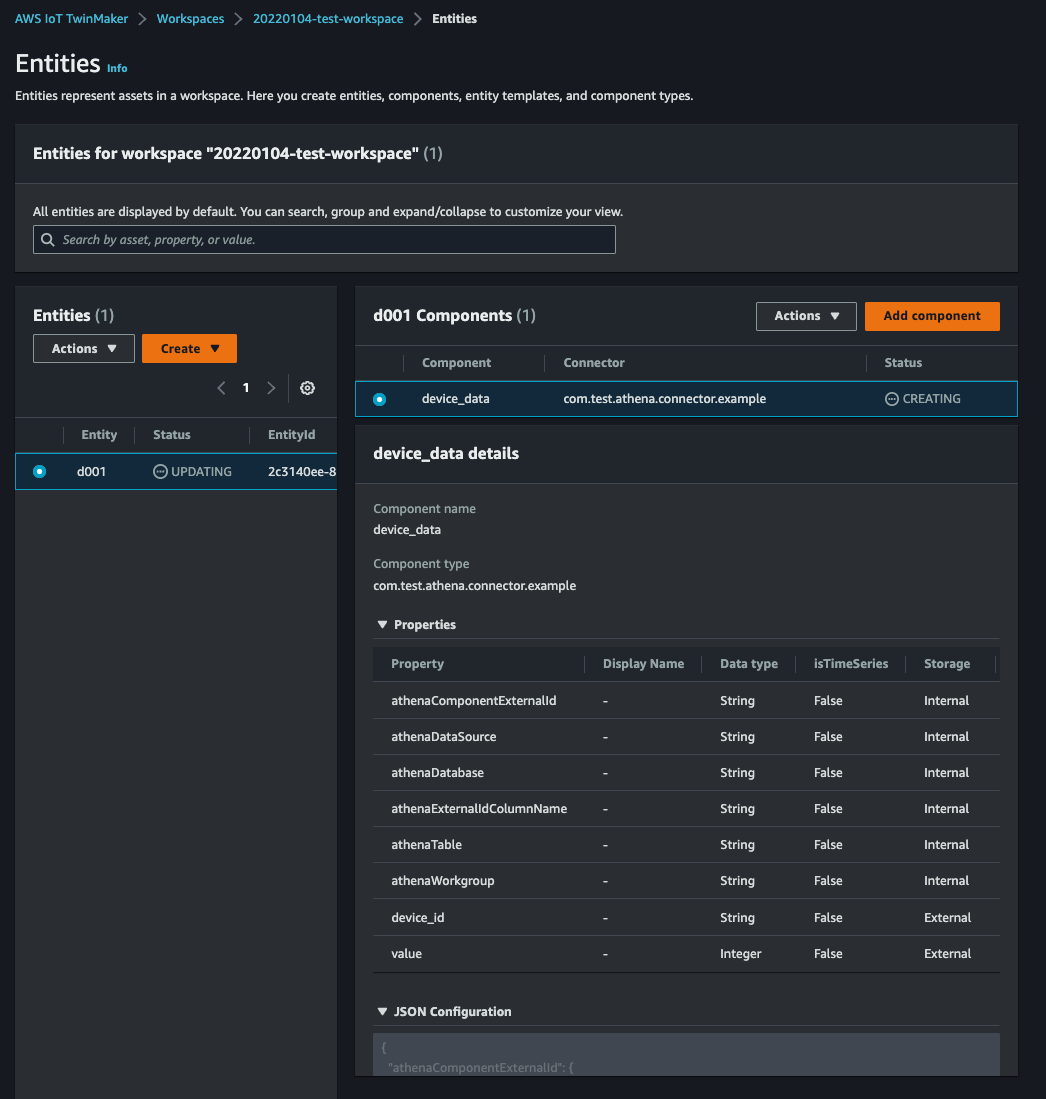
追加できました。
動作確認
まずコンソールからAthena data connectorを使ってデータを取得してみます。
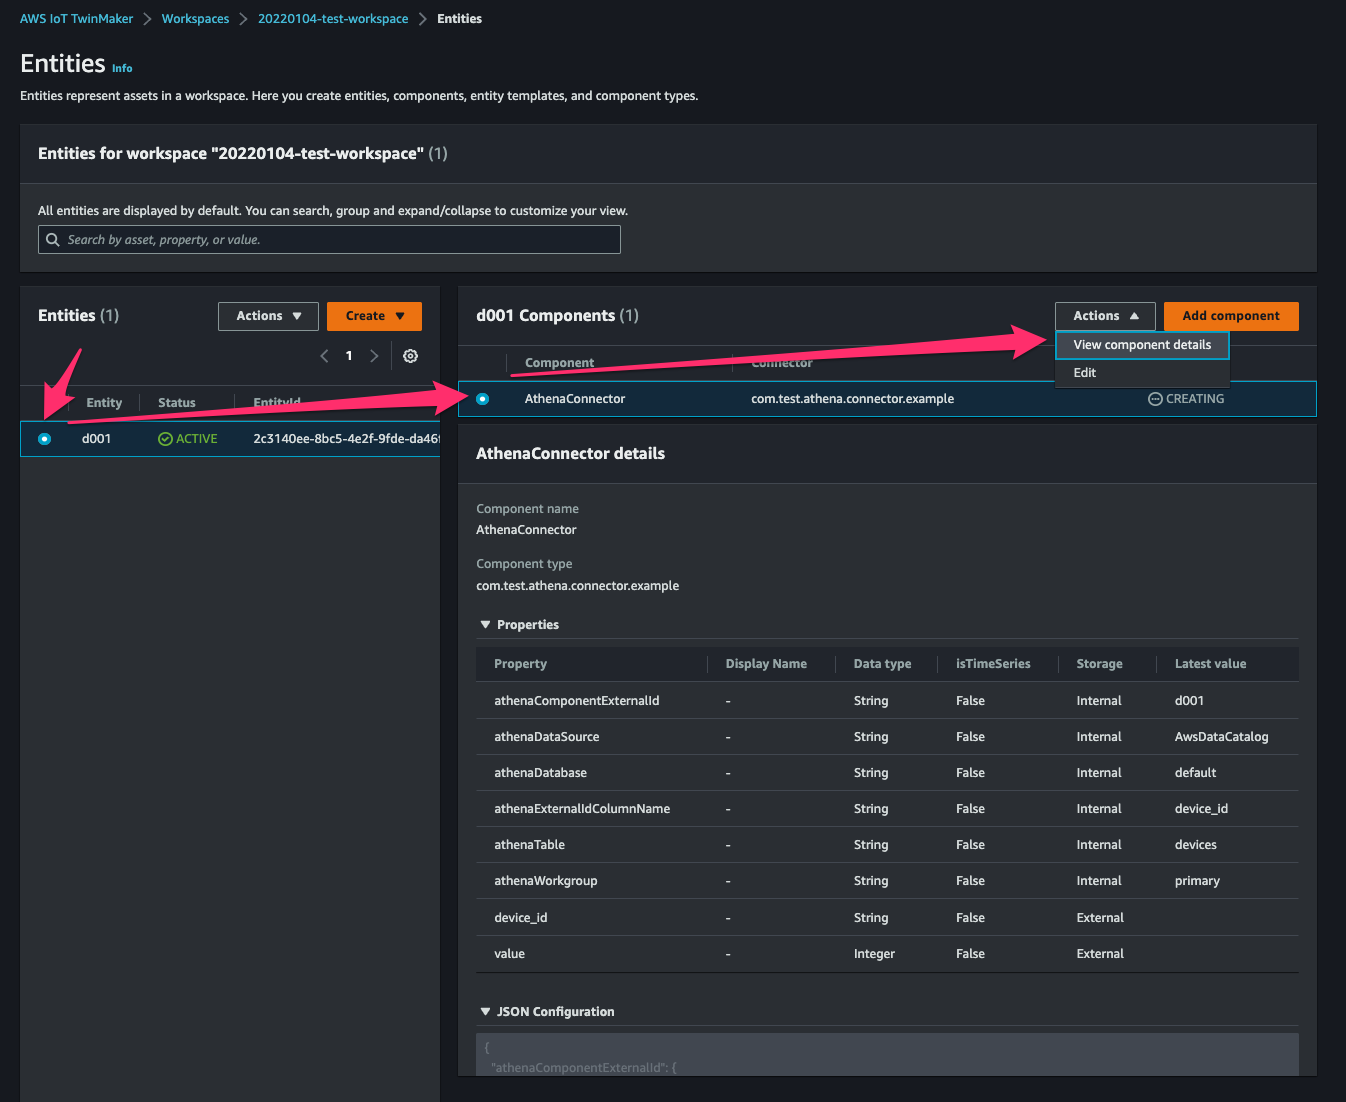
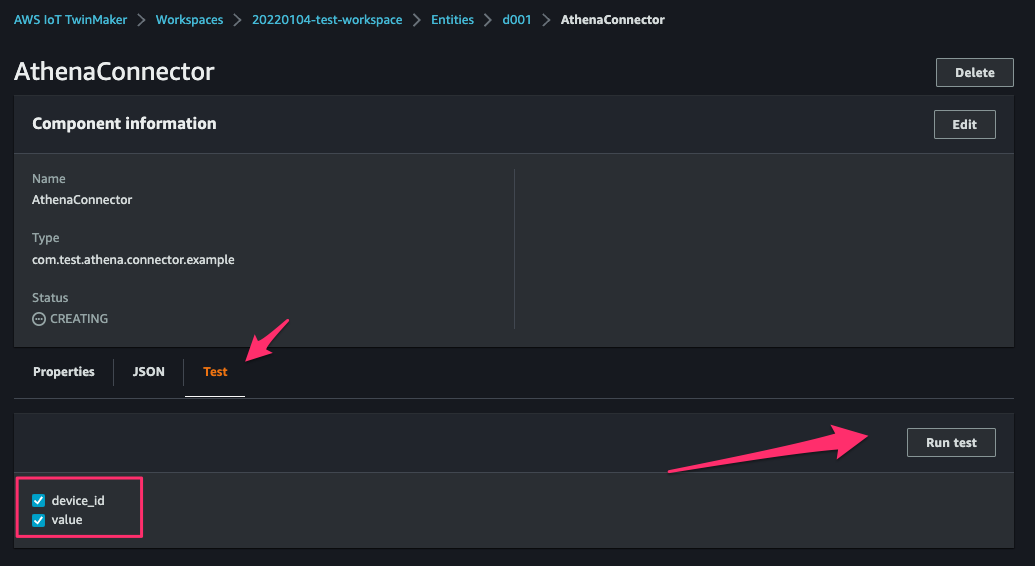
entityで追加したcomponentの[Actions > View component details]をクリック。
[Test]タブで取得したいカラムにチェックを入れて[Run test]をクリック。
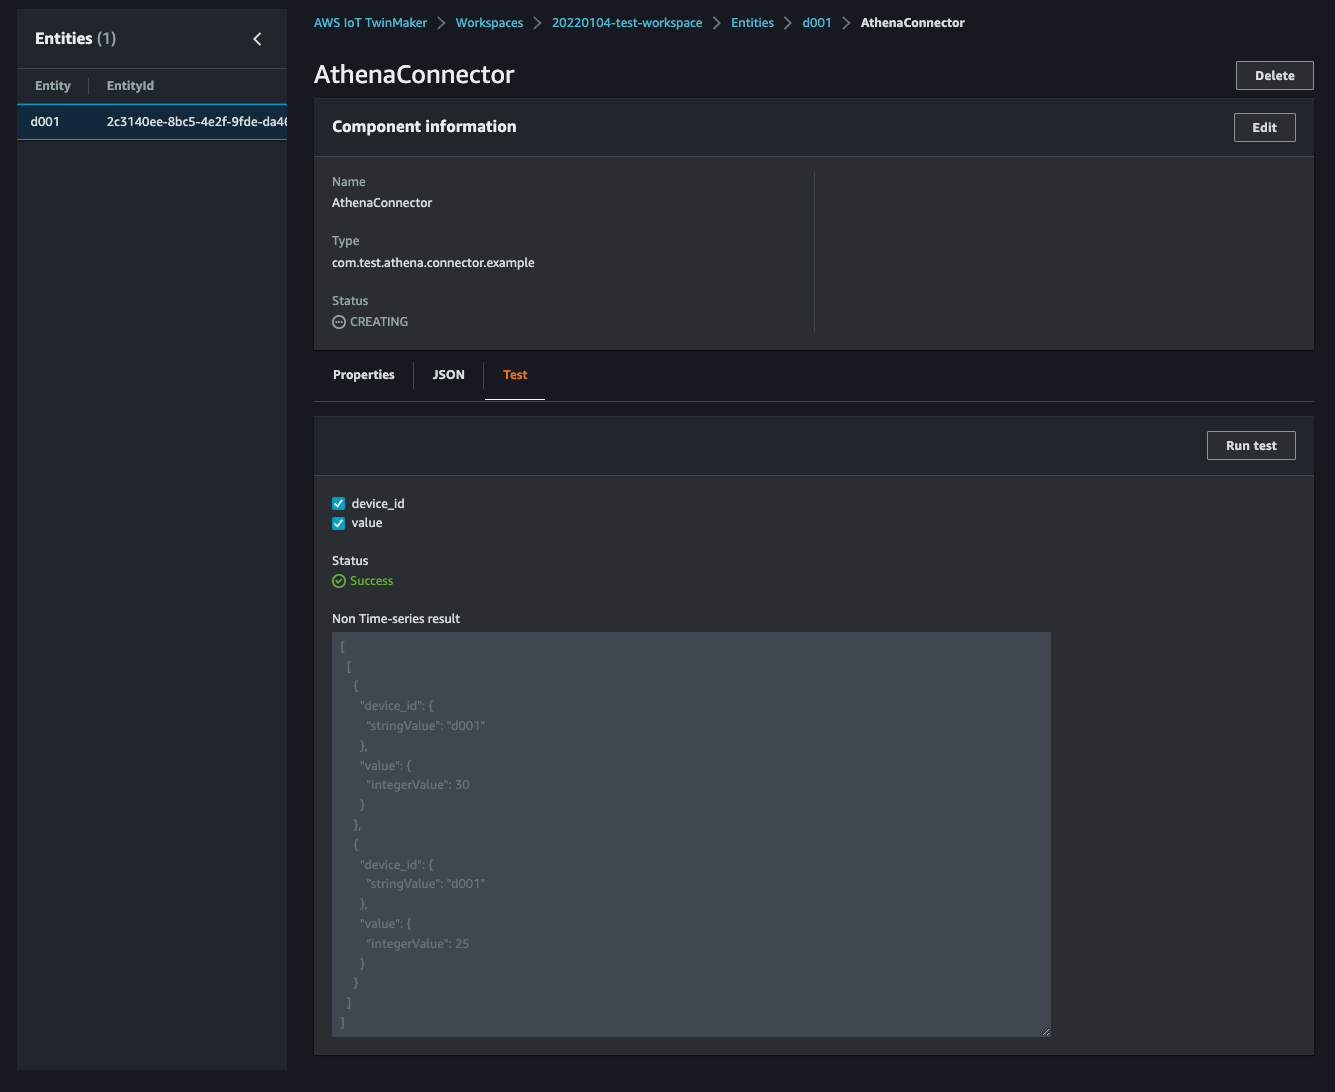
[Status]がSuccessとなりデータが取得できました。
[
  [
    {
      "device_id": {
        "stringValue": "d001"
      },
      "value": {
        "integerValue": 30
      }
    },
    {
      "device_id": {
        "stringValue": "d001"
      },
      "value": {
        "integerValue": 25
      }
    }
  ]
]
次にAWS CLIで取得してみます。
次のコマンドでentityd001のAthenaConnectorによるデータ取得をすることができました。
$ aws iottwinmaker get-property-value \
    --component-name AthenaConnector \
    --entity-id 2c3140ee-8bc5-4e2f-9fde-da46f3af2634 \
    --selected-properties athenaComponentExternalId \
    --workspace-id 20220104-test-workspace \
    --region us-east-1
{
    "propertyValues": {
        "athenaComponentExternalId": {
            "propertyReference": {
                "componentName": "AthenaConnector",
                "entityId": "2c3140ee-8bc5-4e2f-9fde-da46f3af2634",
                "propertyName": "athenaComponentExternalId"
            },
            "propertyValue": {
                "stringValue": "d001"
            }
        }
    }
}
おわりに
AWS IoT TwinMakerがAmazon Athena data connectorをサポートしていたというアップデートについてでした。
S3 bucketに保管されているデータをGrafana dashboard上でレンダリングしたいユースケースはよくあると思うのでなかなか嬉しいアップデートでした。
参考
- AWS IoT TwinMaker Athena tabular data connector - AWS IoT TwinMaker
- Modify your workspace IAM role to use the Athena data connector - Create and manage a service role for AWS IoT TwinMaker - AWS IoT TwinMaker
- [AWS IoT TwinMaker] S3 document connectorを使ってクッキー工場にStatusを追加してみた | DevelopersIO
以上