![[Flutter]riverpod + flutter_hooks + state_notifier + freezedとsembastでデータの永続化を行う](https://devio2023-media.developers.io/wp-content/uploads/2020/02/flutter.png)
[Flutter]riverpod + flutter_hooks + state_notifier + freezedとsembastでデータの永続化を行う
この記事は公開されてから1年以上経過しています。情報が古い可能性がありますので、ご注意ください。
今個人で作っているアプリの状態管理をFlutterの状態管理手法の選定 を参考に以下の構成にしています。
- Riverpod
- StateNotifier
- freezed
- FlutterHooks
この構成のアプリのデータ永続化にsembastを採用しました。この状態管理の構成とsembastについて扱った日本語の記事がないようだったので、後から自分で参照できるように記事にします。sembastを利用している部分を任意の構成での書き方に合わせればsembastを導入できると思います。
触れないこと(本記事の前提知識)
- 状態管理に関係するパッケージの使い方
- 状態管理をこの構成にした理由
- Flutterの基礎知識
環境
❯ flutter --version
Flutter 1.22.6 • channel stable • https://github.com/flutter/flutter.git
Framework • revision 9b2d32b605 (4 weeks ago) • 2021-01-22 14:36:39 -0800
Engine • revision 2f0af37152
Tools • Dart 2.10.5
sembastについて
Flutterでモバイルアプリを作る場合でデータの映像化が必要になる場合FirebaseなどのSaaSやサーバー側で持ってAPI経由で操作するなどが多いと思いますが、今回はローカルで閉じたいアプリの設計になっているのでローカルDBを使用することにしていました。
様々なパケージがあり、非常に迷いましたが最終的にNoSQLでフィルタリング、暗号化がやりやすいことを理由にsembastを採用しました。ローカルDBについてまとまった記事で特に参考にしたのは以下の記事でした。
sembastはDart製のNoSQL データベースで、暗号化やトランザクション、マイグレーションなどデータベースに求められる基本的な機能が提供されています。sqfliteの作者の方がAuthorで開発も活発ということもあり、ドキュメントも整っています。
フィルタリングを使用する機能が多いことを想定しているのでFinderというクラスをつかって簡単にクエリをフィルタできるのが良いのですが、Databaseというオブジェクトを毎回渡す必要があります。
保存できるデータ型はDartの標準的なオブジェクトが中心です。キーはintとString、ValueはString, double, Map<String, dynamic>, List
sembastを使う
pubspec.yamlにsembastとpath_prividerを追加します。状態管理に使用しているパッケージについても併記しておきます。
  # State management
  flutter_hooks: ^0.14.0
  hooks_riverpod: ^0.12.1
  state_notifier: ^0.6.0
  flutter_colorpicker: ^0.3.5
  freezed_annotation:
  # Data persistence
  sembast: ^2.4.9
  path_provider: ^1.6.27
次にsembastを扱うクラスを定義します。直接扱うのではなくインターフェースを通じてStateNotifier越しに扱いたいのでDataStoreRepositoryという抽象クラスを定義します。SubscriptionRecordというkeyとValueという形式のデータ構造なので取得した値を表現する型としてSubscriptionRecordという型を定義しています。
import 'package:habity/model/entities/subscription.dart';

abstract class DataStoreRepository {
  Future<void> setUp();
  Future<SubscriptionRecord> insertSubscription(Subscription subscription);
  Future<void> updateSubscription(SubscriptionRecord subscriptionRecord);
  Future<void> deleteSubscription(int subId);
  Future<List<SubscriptionRecord>> getAllSubscriptions();
}

class SubscriptionRecord {
  final int id; // key
  Subscription sub; // value

  SubscriptionRecord({this.id, this.sub});
}
これを実装するSembastDataStoreRepository内でsembastに関する実装は閉じるようにします。
import 'package:habity/model/entities/subscription.dart';
import 'package:habity/model/persistences/data_store_repository.dart';
import 'package:path_provider/path_provider.dart';
import 'package:sembast/sembast.dart';
import 'package:sembast/sembast_io.dart';

class StorePath {
  static const subscriptions = 'subscriptions';
}

class SembastDataStoreRepository extends DataStoreRepository {
  static DatabaseFactory dbFactory = databaseFactoryIo;

  SembastDataStoreRepository();

  Database db;
  final store = StoreRef.main();
  static const String subscriptionsFolderName = 'Subscriptions';
  StoreRef<int, Map<String, dynamic>> _subscriptionsFolderRef;

  @override
  Future setUp() async {
    db = await _init();
    _subscriptionsFolderRef = intMapStoreFactory.store(subscriptionsFolderName);
  }

  static Future<Database> _init() async {
    final appDir = await getApplicationDocumentsDirectory();
    await appDir.create(recursive: true);
    final databasePath = '${appDir.path}/default.db';
    final database = await databaseFactoryIo.openDatabase(databasePath);
    return database;
  }

  @override
  Future<SubscriptionRecord> insertSubscription(
      Subscription subscription) async {
    return await db.transaction((txn) async {
      // Add the object, get the auto incremented id
      var key = await _subscriptionsFolderRef.add(txn, subscription.toJson());
      return SubscriptionRecord(id: key, sub: subscription);
    });
  }

  @override
  Future<void> deleteSubscription(int subId) async {
    await _subscriptionsFolderRef.record(subId).delete(db);
  }

  @override
  Future<List<SubscriptionRecord>> getAllSubscriptions() async {
    final snapshotRecord = await _subscriptionsFolderRef.find(db);
    return snapshotRecord.map((snapshot) {
      final sub = Subscription.fromJson(snapshot.value);
      return SubscriptionRecord(
        id: snapshot.key,
        sub: sub,
      );
    }).toList();
  }

  @override
  Future<void> updateSubscription(SubscriptionRecord subscriptionRecord) async {
    await db.transaction((transaction) async {
      await _subscriptionsFolderRef
          .record(subscriptionRecord.id)
          .put(transaction, subscriptionRecord.sub.toJson());
    });
  }
}
_init()でデータベースのオープンなど、必要なセットアップを行っています。データベースを開くということは、その内容をメモリにロードすることを意味します。起動時にデータベースを開いて、以降はそのまま使用するのが良いとドキュメントに記載があります。データベースのオープンにかかる処理コストが理由です。iOSのRealmのSDKでも同じような流れだったのを覚えています。
  static Future<Database> _init() async {
    final appDir = await getApplicationDocumentsDirectory();
    await appDir.create(recursive: true);
    final databasePath = '${appDir.path}/default.db';
    return await databaseFactoryIo.openDatabase(databasePath);
  }
依存パッケージにpath_provider パッケージを追加していましたが、これを使ってデータベースを作成するための適切なディレクトリを取得しています。この流れは当然Flutterのネイティブアプリの場合になるので、Flutter for webの場合はsembast_webというパッケージを使うことになります。
次にDBの特定のフォルダへのCRUDを実装しています。フォルダの指定は以下の処理で行っていて、以後このStoreRefのインスタンスメソッドを介してDBへのデータの書き込みなどを実装していくことになります。
_subscriptionsFolderRef = intMapStoreFactory.store(subscriptionsFolderName);
Entityの定義はfreezedで行っています。part キーワードで宣言した後fromJsonメソッドを記述することでtoJsonも自動生成されます。生成の方法など基本的なfreezedの使い方については過去に記事を書きました。
Map<String, dynamic>へのエンコードとMap<String, dynamic>へのエンコードが行えるとsembastでのCRUDに都合が良いのですが、freezedだとこの部分を自動生成で済ませられます。
import 'package:freezed_annotation/freezed_annotation.dart';

part 'subscription.freezed.dart';
part 'subscription.g.dart';

@freezed
abstract class Subscription with _$Subscription {
  const factory Subscription(
      String name,
      String description,
      String urlString,
      int cost,
      String colorToString}) = _Subscription;

  factory Subscription.fromJson(Map<String, dynamic> json) =>
      _$SubscriptionFromJson(json);
}
データの参照と追加を定義しているのは以下になります。定義したfromJsonと生成されたtoJsonを使っています。addで追加、findで一覧を取得しています。
@override
Future<SubscriptionRecord> insertSubscription(
    Subscription subscription) async {
  return await db.transaction((txn) async {
    // Add the object, get the auto incremented id
    var key = await _subscriptionsFolderRef.add(txn, subscription.toJson());
    return SubscriptionRecord(id: key, sub: subscription);
  });
}

@override
Future<List<SubscriptionRecord>> getAllSubscriptions() async {
  final snapshotRecord = await _subscriptionsFolderRef.find(db);
  return snapshotRecord.map((snapshot) {
    final sub = Subscription.fromJson(snapshot.value);
    return SubscriptionRecord(
      id: snapshot.key,
      sub: sub,
    );
  }).toList();
}
次にこれを利用するStateNotifierProviderを定義します。これまで通り先に全コードを載せます。
import 'package:flutter/material.dart';
import 'package:habity/model/entities/subscription.dart';
import 'package:habity/model/persistences/data_store_repository.dart';
import 'package:habity/model/persistences/sembast_data_store_repository.dart';
import 'package:hooks_riverpod/all.dart';
import 'package:state_notifier/state_notifier.dart';

final subListProvider = StateNotifierProvider((ref) => SubListController());

class SubListController extends StateNotifier<List<SubscriptionRecord>> {
  SubListController() : super([]);

  DataStoreRepository _dataStoreRepository;

  Future<void> setUpDatabaseConnection() async {
    _dataStoreRepository = SembastDataStoreRepository();
    await _dataStoreRepository.setUp();
  }

  Future<void> fetchSubscriptions() async {
    if (_dataStoreRepository == null) {
      await setUpDatabaseConnection();
    }
    state = await _dataStoreRepository.getAllSubscriptions();
  }

  Future<void> addSubscription(
      {String name,
      String urlString,
      int cost,
      Color color,
      int spanRange,
      Span span}) async {
    final sub = Subscription(
      name: name,
      urlString: urlString,
      spanRange: spanRange,
      spanString: span.stringValue,
      cost: cost,
      colorToString: color.toString(),
      firstDeductedAt: null,
    );
    final subRecord = await _dataStoreRepository.insertSubscription(sub);
    state = [...state, subRecord];
  }

  Future<void> updateSubColor(
      SubscriptionRecord subscriptionRecord, Color color) async {
    final index =
        state.indexWhere((element) => element.id == subscriptionRecord.id);
    var updatedSubscriptionRecord = state[index];
    updatedSubscriptionRecord.sub =
        updatedSubscriptionRecord.sub.copyWith(colorToString: color.toString());

    await _dataStoreRepository.updateSubscription(updatedSubscriptionRecord);
    state[index] = updatedSubscriptionRecord;
    state = state;
  }

  Future<void> updateSpan(SubscriptionRecord sub, Span span) async {
    final index = state.indexWhere((element) => element.id == sub.id);
    var updatedSubscriptionRecord = state[index];
    updatedSubscriptionRecord.sub =
        updatedSubscriptionRecord.sub.copyWith(spanString: span.stringValue);
    await _dataStoreRepository.updateSubscription(updatedSubscriptionRecord);
    state[index] = updatedSubscriptionRecord;
    state = state;
  }

  Future<void> deleteSub(SubscriptionRecord target) async {
    await _dataStoreRepository.deleteSubscription(target.id);
    state = state.where((sub) => sub.id != target.id).toList();
  }
}

enum Span {
  Year,
  Month,
  Day,
  None,
}

extension SpanExt on Span {
  static Span initFrom(String spanString) {
    switch (spanString) {
      case '年':
        return Span.Year;
        break;
      case '月':
        return Span.Month;
        break;
      case '日':
        return Span.Day;
        break;
    }
    return Span.None;
  }

  String get stringValue {
    switch (this) {
      case Span.Year:
        return '年';
        break;
      case Span.Month:
        return '月';
        break;
      case Span.Day:
        return '日';
        break;
    }
    return "未定";
  }
}
一覧取得と挿入を行う部分は以下です。sembastを扱う時、Futureで返ってくるのでそれに対応するようにウィジェットを含め書いていく必要があります。
Future<void> fetchSubscriptions() async {
  if (_dataStoreRepository == null) {
    await setUpDatabaseConnection();
  }
  state = await _dataStoreRepository.getAllSubscriptions();
}
 Future<void> addSubscription(
    {String name,
    String urlString,
    int cost,
    Color color,
    int spanRange,
    Span span}) async {
  final sub = Subscription(
    name: name,
    urlString: urlString,
    spanRange: spanRange,
    spanString: span.stringValue,
    cost: cost,
    colorToString: color.toString(),
    firstDeductedAt: null,
  );
  final subRecord = await _dataStoreRepository.insertSubscription(sub);
  state = [...state, subRecord];
}
HookWidgetのbuildメソッドからであればuseProviderを通じてグローバルに定義したsubListProviderにアクセスできます。
final subListProvider = StateNotifierProvider((ref) => SubListController());
それを利用しているウィジェット側の実装が以下になります。例に従って先に実装を載せます。説明のためにリストの要素を表すWidget以外は一箇所に書きました。flutter_hooksを使っているのでproviderを使用するクラスはHookWidgetを継承させます。
class _ListView extends HookWidget {
  const _ListView({
    Key key,
  }) : super(key: key);

  @override
  Widget build(BuildContext context) {
    final controller = useProvider(subListProvider);
    final create = useMemoized(() => controller.fetchSubscriptions());
    final snapShot = useFuture(create);
    final state = useProvider(subListProvider.state);

    final navigationKey = useProvider(navigatorKeyProvider);
    if (snapShot.connectionState == ConnectionState.waiting) {
      return Center(
        child: CircularProgressIndicator(),
      );
    }
    if (snapShot.error != null) {
      return Center(
        child: Text(snapShot.error.toString()),
      );
    }

    if (state.isEmpty) {
      return Center(
        child: RaisedButton(
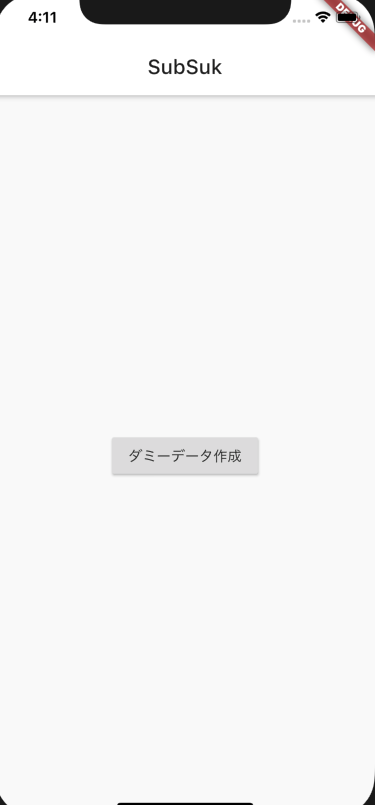
          child: Text('ダミーデータ作成'),
          onPressed: () async {
            await controller.addSubscription(
                name: "Spotify Premium",
                urlString:
                    "https://www.spotify.com/jp/account/subscription/change/",
                cost: 1480,
                color: Colors.greenAccent,
                spanRange: 1,
                span: Span.Month);
            await controller.addSubscription(
                name: 'Amazon Prime',
                urlString:
                    "https://www.amazon.co.jp/mc?_encoding=UTF8&%2AVersion%2A=1&%2Aentries%2A=0",
                cost: 500,
                color: Colors.amber,
                spanRange: 1,
                span: Span.Month);
            await controller.addSubscription(
              name: 'iCloud Drive',
              urlString: "https://support.apple.com/ja-jp/HT207594",
              cost: 500,
              color: Colors.yellow,
              spanRange: 1,
              span: Span.Month,
            );
            await controller.addSubscription(
              name: "Youtube Premium",
              urlString:
                  "https://support.google.com/youtube/answer/6308278?co=GENIE.Platform%3DAndroid&hl=ja",
              cost: 500,
              color: Colors.red,
              spanRange: 1,
              span: Span.Month,
            );
          },
        ),
      );
    } else {
      return ListView.separated(
        padding: EdgeInsets.all(5),
        itemBuilder: (BuildContext context, int index) {
          var subscriptionRecord = state[index];
          print(subscriptionRecord.id);
          print(subscriptionRecord.sub);
          return SubListItem(
            title: subscriptionRecord.sub.name,
            subTitle: '¥${subscriptionRecord.sub.cost}',
            tileColor: subscriptionRecord.sub.colorToString.toColor(),
            leading: Icon(Icons.cake),
            onTap: () => navigationKey.currentState.pushNamed(
                SubEditPage.routeName,
                arguments: SubEditPageArguments(id: subscriptionRecord.id)),
          );
        },
        separatorBuilder: (BuildContext context, int index) {
          return SizedBox(height: 10);
        },
        itemCount: state.length,
      );
    }
  }
}
buildメソッドの冒頭が肝になります。先程宣言したsubListProviderをuseProviderを使って取り出します。その後useFutureを使って一覧を取得するfetchSubscriptionsというメソッドを通じて保存したデータの一覧を取得します。
@override
  Widget build(BuildContext context) {
    final controller = useProvider(subListProvider);
    final create = useMemoized(() => controller.fetchSubscriptions());
    final snapShot = useFuture(create);
    final state = useProvider(subListProvider.state);
useFutureを使用するとアプリが何度もビルドされてしまった
useFutureを使うことでネストが一段深くなるFutureBuilderを使わずにWidgetを記述できます。useXXX系のメソッドはflutter_hooksから提供されているメソッドです。HooksはReact Hooksから来ていて、flutter_hooksはそのFlutter版になります。
Hooksについては5分でわかるReact Hooks - Qiita 、flutter_hooksのuse系のメソッドについてはFlutter HooksのuseXXXの使い方 - Qiita がわかりやすかったです。
最初は以下のようにuseMemoizedを呼ばずにuseFutureを呼んでいました。結果としてリビルドが何度も走って意図通りの表示になりませんでした。
final controller = useProvider(subListProvider);
final create = useMemoized(() => controller.fetchSubscriptions());
final snapShot = useFuture(create);
final state = useProvider(subListProvider.state);
これを解決するためには、useMemoizedを使って値をキャッシュする必要があるとのことでした。実際にuseMemoizedで一覧取得するメソッドを呼んで、それをuseFutureを渡す先述のコードだとリビルドは走らなくなりました。
stateを変更しているはずなのにWidgetがリビルドされない
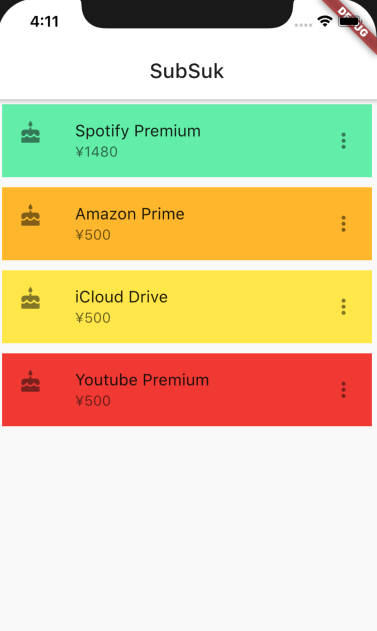
一度アプリを落としてから起動すればデータは永続化されていることを確認できたのですが、追加した時にWidgetにリビルドが全く走りませんでした。追加しているのはダミーのデータで、中央のボタンタップ時にダミーデータが追加されます。追加されたらWidgetがリビルドされることを想定していました。

当初はfetchSubscriptionsの戻り値の型Future<ListAsyncSnapShot<List<Subscription>>になっていました。
この部分をuseProviderで参照するstateプロパティに変更することにより状態の変更時にリビルドが走るようになりました。

アプリを落として、再起動してもDBから参照されたデータから状態が復元されWidgetが描画されることも確認しました。
まとめ
sembast自体は非常にシンプルなパッケージで使いやすかったのですが、flutter_hooksやriverpod、state_notifier、freezedと合わせて使おうとすると思ったより実装の修正に時間がかかってしまいました。当初Hiveを使う予定で、Hiveはopenした後Futureを使用しなくてもDBのデータにアクセスできるため、それが前提になった実装を修正する必要があったので余計に時間がかかってしまったのかもしれません。
DBを扱うオブジェクトを外からDIするようにするなど改善しなければいけないことは色々とありますが、これで一旦動作するようになりました。全く同じ構成の記事はなかったので、同じ構成の人でsembastを導入しようかと考えている人の参考になれば幸いです。
Flutterの学習・開発は始めたばかりで説明やその裏にある認識に誤りがあるかもしれません。なにかお気づきの際はコメントやTwitterなどでお知らせください。
参考リンク
sembastについて学習する時や記事の執筆の際に参考にしたりドキュメントがあるので最後に列挙します。


