MacBook Keyboard Repair Program and Data Migration
この記事は公開されてから1年以上経過しています。情報が古い可能性がありますので、ご注意ください。
Guten Tag! Here's Mai from Classmethod Europe.
I've been using a MacBook Pro as my work PC since joining Classmethod three years ago. I'm neither a worshiper, nor an expert of Apple, but clearly, this computer is fantastic. There is however one thing to complain about - the Butterfly Keyboard. After a year of use a few of the keys begin to not respond, or respond crazily. When this happens, it's time to bring your Mac to a Genius and get it fixed. Are you afraid of the repair costs? Surprisingly, you can exchange the whole keyboard (and bonus, the battery as well!) for free if your device is qualified for the Keyboard Service Program.
Is your Mac eligible for the repair program?
First, check to see if your MacBook's model is included in the list on the official page. You can check your own model under the Apple () menu > About This Mac.
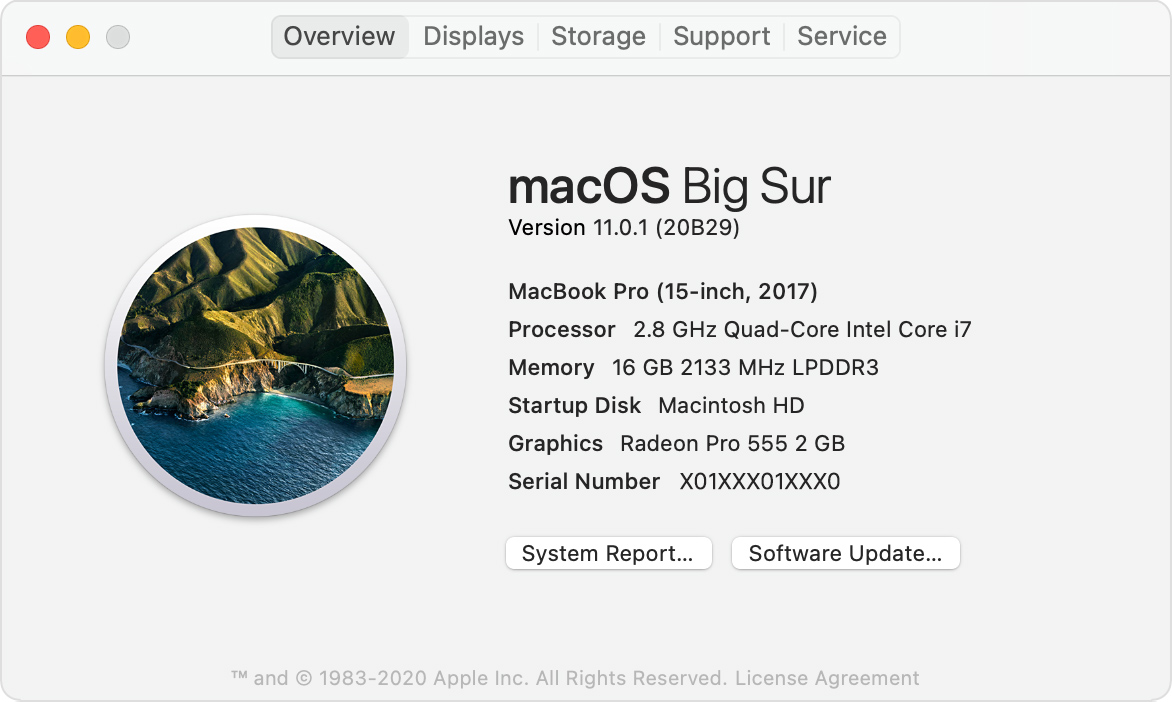
Also, the purchase of your Macbook needs to have been within 4 years.
If yes, confirm that you notice any of the behaviors written on the official page (i.e. key input repeating unexpectedly or not responding). The engineer will ask you about the symptoms when you bring it to a provider, so you should be prepared to present them. In the worst case the repair might be declined :(
Repairment procedure
Now let's make an appointment at an Apple Store or an authorized provider. Here is an overview of the steps:
Making an appointment
- Click on the link Authorized Service Provider or Apple Store on the program page
- Sign into the Apple account with your Apple ID
- Select the device to repair. If you have already signed into the Apple ID account locally on the device, it should be displayed on the list. If not, type the serial number, which can be found in About This Mac.
- Find the availability nearest you, and make an appointment.
- You should receive a confirmation email.
This year when I tried making an appointment, I don't know if it was because of Covid-19, but it happened to me a couple of times that the nearest available providers were either in another city, or even in Poland. Do not presume that there is always availability, so plan your schedule well!
Bringing your MacBook
- Bring your MacBook on the appointment date. Nothing else is required unless it's specified.
- Briefly explain the symptoms to the engineer.
- Inform your contacts.
- Get a receipt and keep it safe until you get your PC back.
I waited at minimum 5 days, at maximum 3 weeks. Presumably it varies depending on the season or shops.
Also, I was once informed that Apple may possibly judge that your MacBook's condition is not qualified for the program even after submitting it via a provider. In that case you will get a call and be asked if you want it simply returned, or have it fixed for a fee.
Receiving your MacBook
- Visit the provider again with the receipt.
- Sign a document and receive your MacBook.
- In case of repair costs, receive an invoice. (If it's a company laptop, you should prepare the company name, address and VAT number beforehand!)
Backup and migration ... or clean install?
Whether you use your mac for private use or work, you definitely want to, and should make a backup before taking it to a provider. You may also use a substitute device temporarily, or switch to a new device. In these cases you need to properly migrate the data - maybe even twice.
If you've been using the same device for a while, the storage will most likely contain some junk files. In this case the device would be way faster, or stabler if you do a clean install, which means completely resetting the device with a new OS installation and adding your existing data. It's quite a lot of work compared to a simple migration. However, if you feel like the device is sluggish, it's a good option to consider.
Here's the major flow before and after the repairment.
| Backup | Get ready for a backup first and then back up your Mac with Time Machine |
| Migration | If you use a substitute MacBook during the repairment, migrate data from your current one. |
| Reset | If you do a clean install, reset your MacBook and reinstall the latest OS. Even if not, I recommend you do it before you leave your confidential device with somebody. |
| Repair | Now, bring your MacBook to the store! |
| Set up | If you decided on a clean install, simply set up the computer and sign in the apps etc. Otherwise, migrate your data again from the substitute machine or the backup disk. |
See the details of each step below.
Get ready for a backup
In order to speed up the backup process (and restore later on), delete any unrequired local files, such as a pile of videos and massive logs from ancient times.
Here are some optional steps which I recommend:
- Keep an emergency key of a password manager. - e.g. for 1Password users, open an app, go to the menu > Account > Get Emergency Kit. It includes a secret key, an online sign-in URL, and a QR code. Print it (NOT in a shared network!) or store it in an external device.
- Save all documents/files on cloud storage - e.g. OneDrive, iCloud, Google Drive
- Save important hidden files - e.g. .aws, .ssh, .zshrc (especially in a user's home directory)
- Save browser's bookmarks - Sign in an account on Chrome to sync them or export them.
- Make sure the data of your apps and tools are synced on the internet or can be lost - Otherwise, save data manually. (e.g. export Clipy's snippets)
Additionally, if you do a clean install,
- Make sure you have login credentials for critical websites - You'll need to sign in every website again after the clean install. Be sure they are all stored in a password manager.
- Note the list of applications - Not only apps from the App Store but those you downloaded from websites.
- Note the important configuration of System Preferences - As far as I know, there's no official way to export and import the settings to a new device. If you want to keep environmental settings exactly, please google the method.
Device backup with Time Machine
- First of all, buy an external drive.
- Connect the drive to your computer.
- A dialog will show up which asks to use the drive as a backup disk for Time Machine. Follow the instructions and let it back up!
- Note: You should charge your MacBook during the backup. As the backup is incremental, it could take hours if it's the very first time. You can do your work in the background without paying attention to it.
- If the drive isn't freshly new, you should first format the disk by using Disk Utility. Choose APFS as a format for High Sierra or later.(Learn more about How to Format External SSD for Mac Time Machine)
- Eject the disk and unplug the drive. -- Do not rush and unplug it when the backup is done! The proper way is either right-clicking on the drive icon on Desktop and selecting "Eject XXX", opening a Finder and clicking the Eject icon of the drive, or clicking the Eject icon in Disk Utility.


For future usage I recommend buying an SSD for an external drive, which works way faster than HDD. In my case I purchased SanDisk's SSD 500GB for 120 EUR on Amazon.de.
Migrate data to your Mac
For the data migration, refer to the official articles.
- If you have two devices in hand, follow this guide to move your data from an old Mac to a new Mac.
- If you restore from an external device, follow this guide to restore from a backup.
Reset and reinstall OS
After the migration, you want to completely clear the data on the old device. Here are the brief steps. Follow these also for a clean install.
- Enter the Recovery Mode: turn on your Mac, then immediately press and hold Option (⌥) + Command (⌘) + R. When a spinning globe appears, release the keys. (If you see an apple and then the usual signin screen, you have to reboot it and try again.)
- Choose your Wi-Fi network and type the password. This is required every time you enter this mode. Then wait for the next screen for a while (in my experience, 5-30 minutes)
- From the utilities window, select Disk Utility.
- In the Disk Utility window, from the pulldown "View" on the top left, select "Show All Devices".
- Choose the top physical device (e.g. "APPLE SSD ~") and click the Erase button. Type "Macintosh HD" as a new name, select "APFS" as a format, and then click Erase.
- Quit Disk Utility.
- Back in the utilities window, select Install macOS. (Ref: Reinstall macOS)
- Follow the instructions. This will also take 30-50 minutes.
If you don't use the old device again and sell it, see the complete steps of resetting a device in the official guide for more security.
Cons of a clean install
A clean OS installation is good, especially when you upgrade the OS major version. However, if you decide to perform a fresh install of macOS, you need a fine-grained plan and careful preparation as well as a bunch of re-setups in the fresh device. The plan would differ depending on how you use a MacBook, which software you use and so on, so I recommend you google "clean install macOS", read multiple blogs, and make your own perfect plan.
Here, I list some of the things you need to do after a clean install. You have to consider that you cannot instantly use your Mac again as comfortably as you did before.
- First thing to do before browsing the internet: reinstall antivirus software. You will need to retype a license code or re-sign into an account. Be prepared in advance.
-
System Preferences are all fresh, so you have to reconfigure them as you prefer. You'd be surprised how much you had changed the settings. This includes displaying dates and time, customizing keyboard and trackpad inputs, cleaning Docks up, allowing apps for access, and even printer, bluetooth and WiFi settings.
-
You have to re-install apps, and re-setup or sign-in to them as well.
-
On browsers, no login caches remain. You need to reenter passwords for every webpage account.
In my case, some initial configurations were required to be performed using the office IP, so I eventually asked our IT representative to help me with doing it at home.
One time I assumed that the bookmarks of each "Person" on Chrome were all synced and did a clean install. It turned out later that the main person for work was not signed in with a Google account and I lost all the important bookmarks, which was a disaster. (In Google Chrome, you can add a profile, called "Person/People", which allows you to make different bookmark lists and sign into a separate Google account.)
But if you migrate with Time Machine, it's amazingly easy! Creating a backup, migrating the data, clearing the PC, and repairing it...simple, right? Don't be afraid to benefit from the program while it's valid!