Save files attached to an email in OneDrive and move the email using Power Automate
この記事は公開されてから1年以上経過しています。情報が古い可能性がありますので、ご注意ください。
IFTTT, Zapier, Integromat... these automation tools integrate with a bunch of apps. On the other hand, the supported apps on Microsoft Power Automate (formerly known as Microsoft Flow) seems relatively limited. Still it has a big advantage as a native MS' tool when it integrates with Office 365 apps.
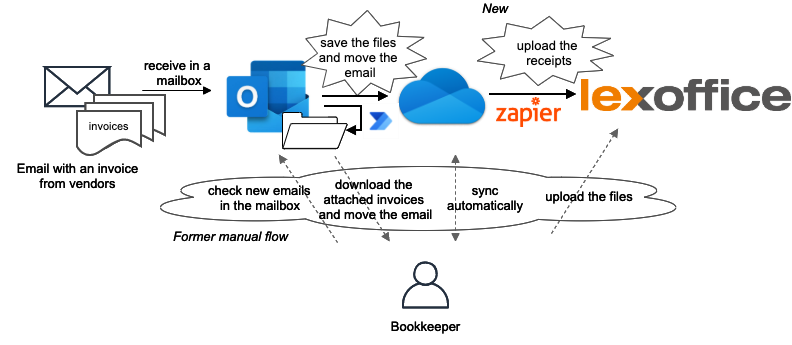
In the previous post, I wrote about how I automated our accounting tasks with Zapier. As explained there, the Task 2 could not be achieved only with Zapier because it doesn't support a shared mailbox.
Task 2 - "Uploading an invoice to Lexoffice when it's sent via email"
So I implemented Power Automate to save an incoming invoice emailed to our shared inbox into OneDrive, and to move the handled email to a specified folder in the mailbox. By saving a file in the OneDrive folder, Zapier triggers the action uploading it to Lexoffice. You can see how I configured this latter half on Zapier in the previous post. In this post, I will show how I configured the first half on Power Automate.
How to configure Power Automate
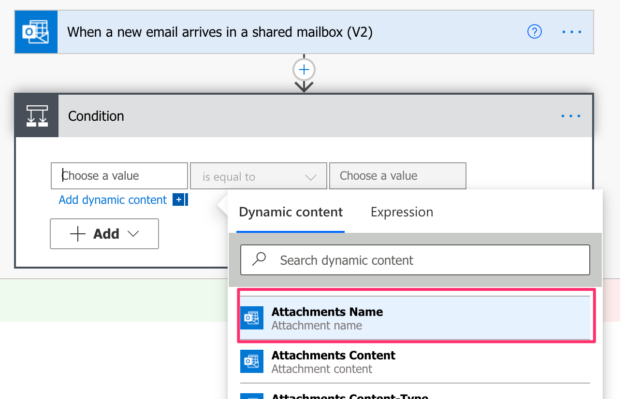
Trigger a new email with attachments in a shared mailbox
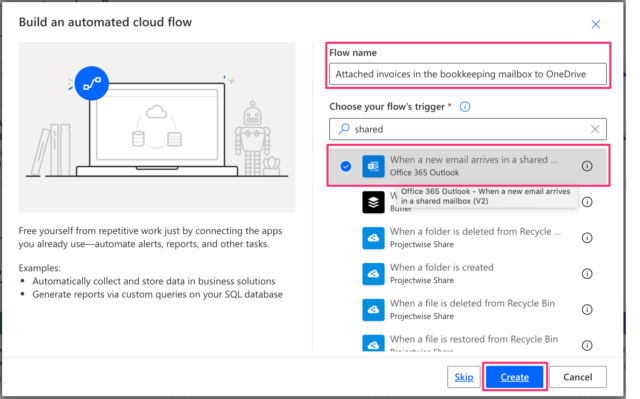
Let's create a brand new flow. Click [Create] and choose "Automated Cloud Flow".
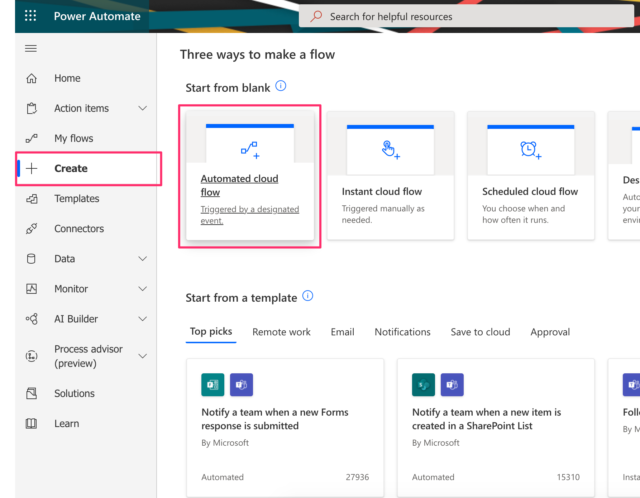
Specify a flow name accordingly and choose this as a trigger: "When a new email arrives in a shared mailbox". Be sure to select the one with a "shared" mailbox. Then click [Create].
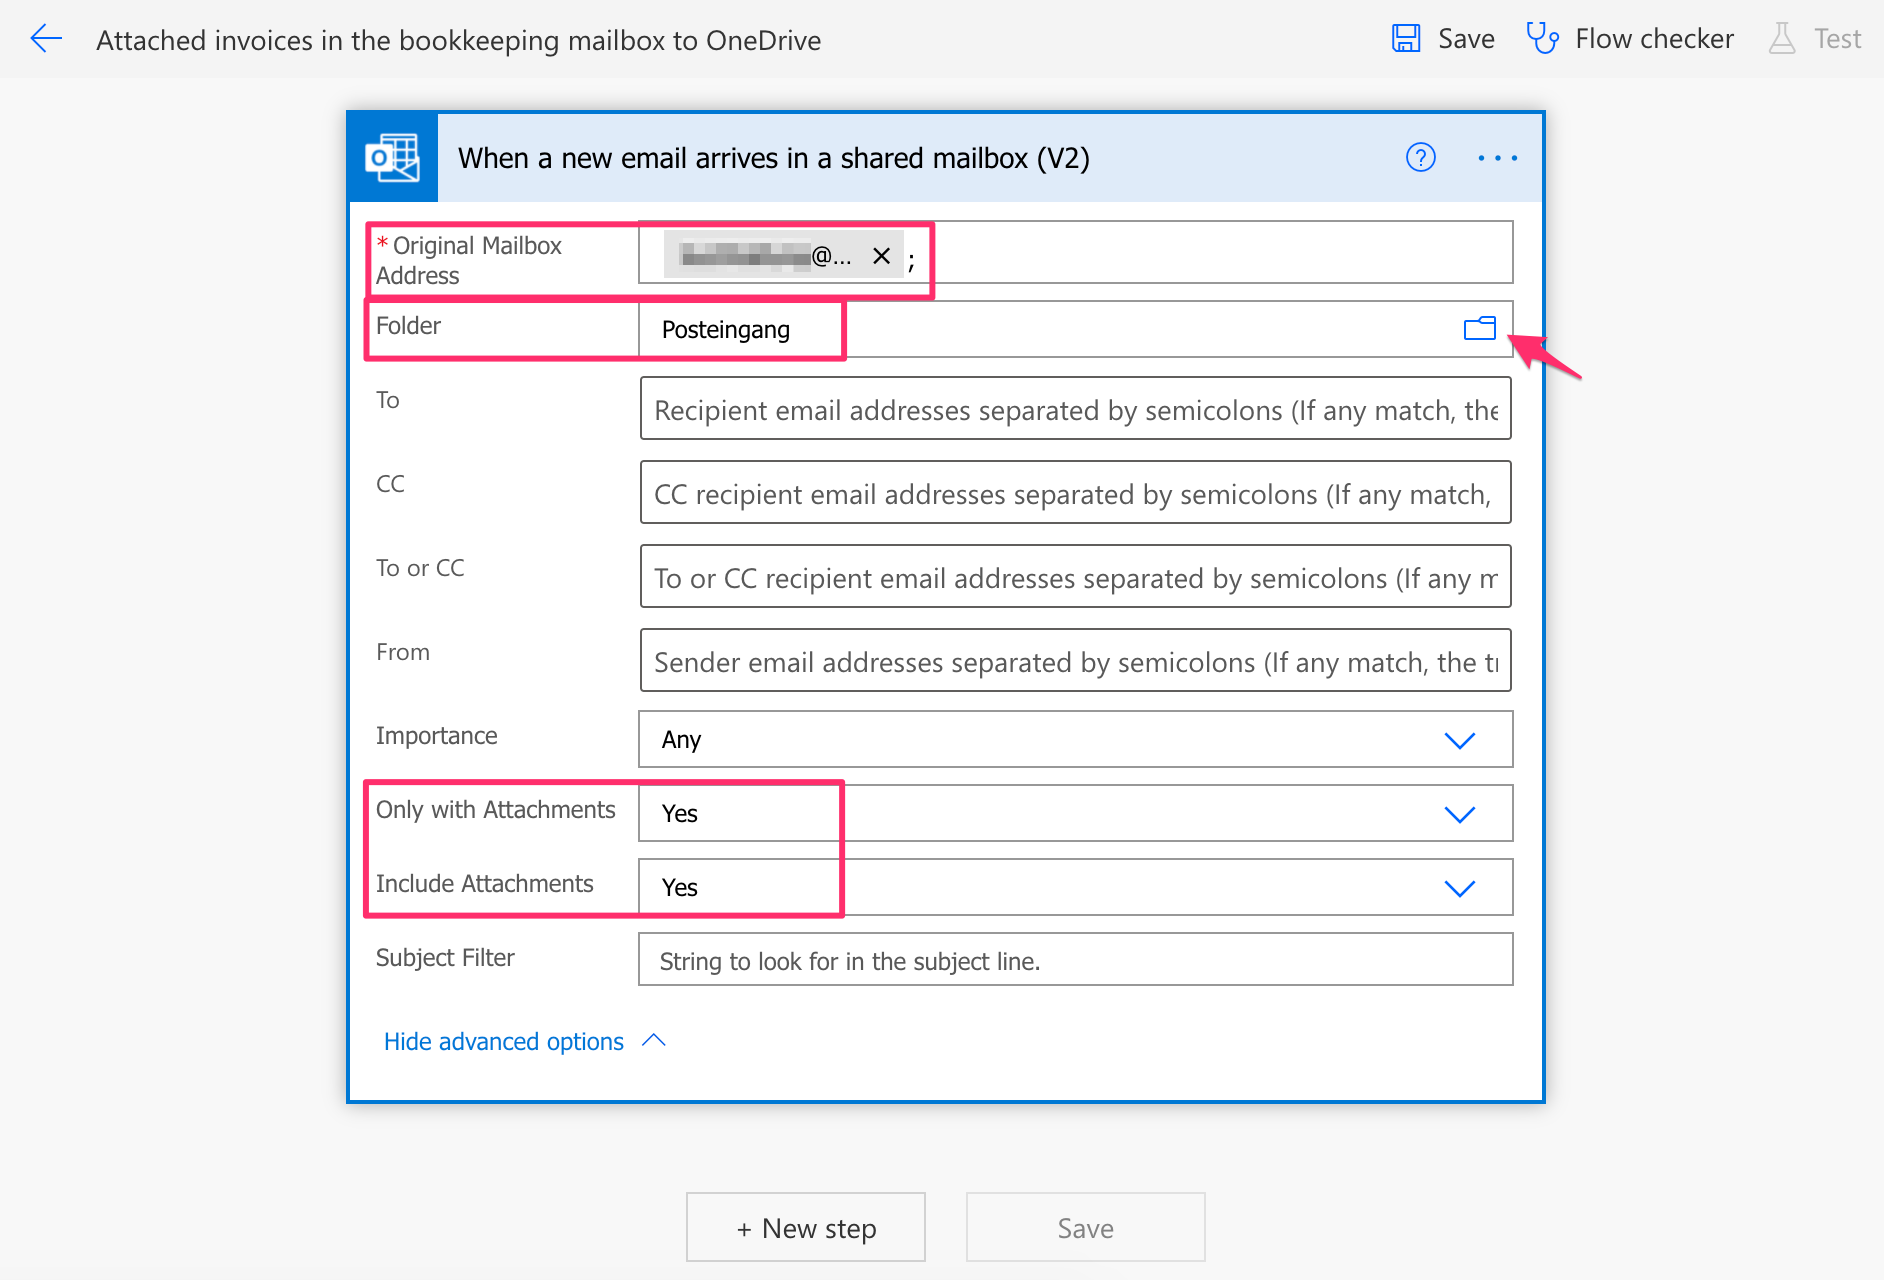
Configure as below:
- Original Mailbox Address: Specify the address of the shared mailbox. - When you type a part of the address, you will see the related list of the addresses that you have access to. (Choose the one from the list and it'll be displayed as the image below. But it doesn't matter if it's displayed in a gray box like this, or just typed as a simple text.)
- Folder: Choose the folder where a new email arrives. - By clicking on the folder icon on the right hand, you can select a folder from the folder trees.
- Attachments-related options: 'Yes'
Add conditions
Click [New step] and choose "Condition" as the next operation.
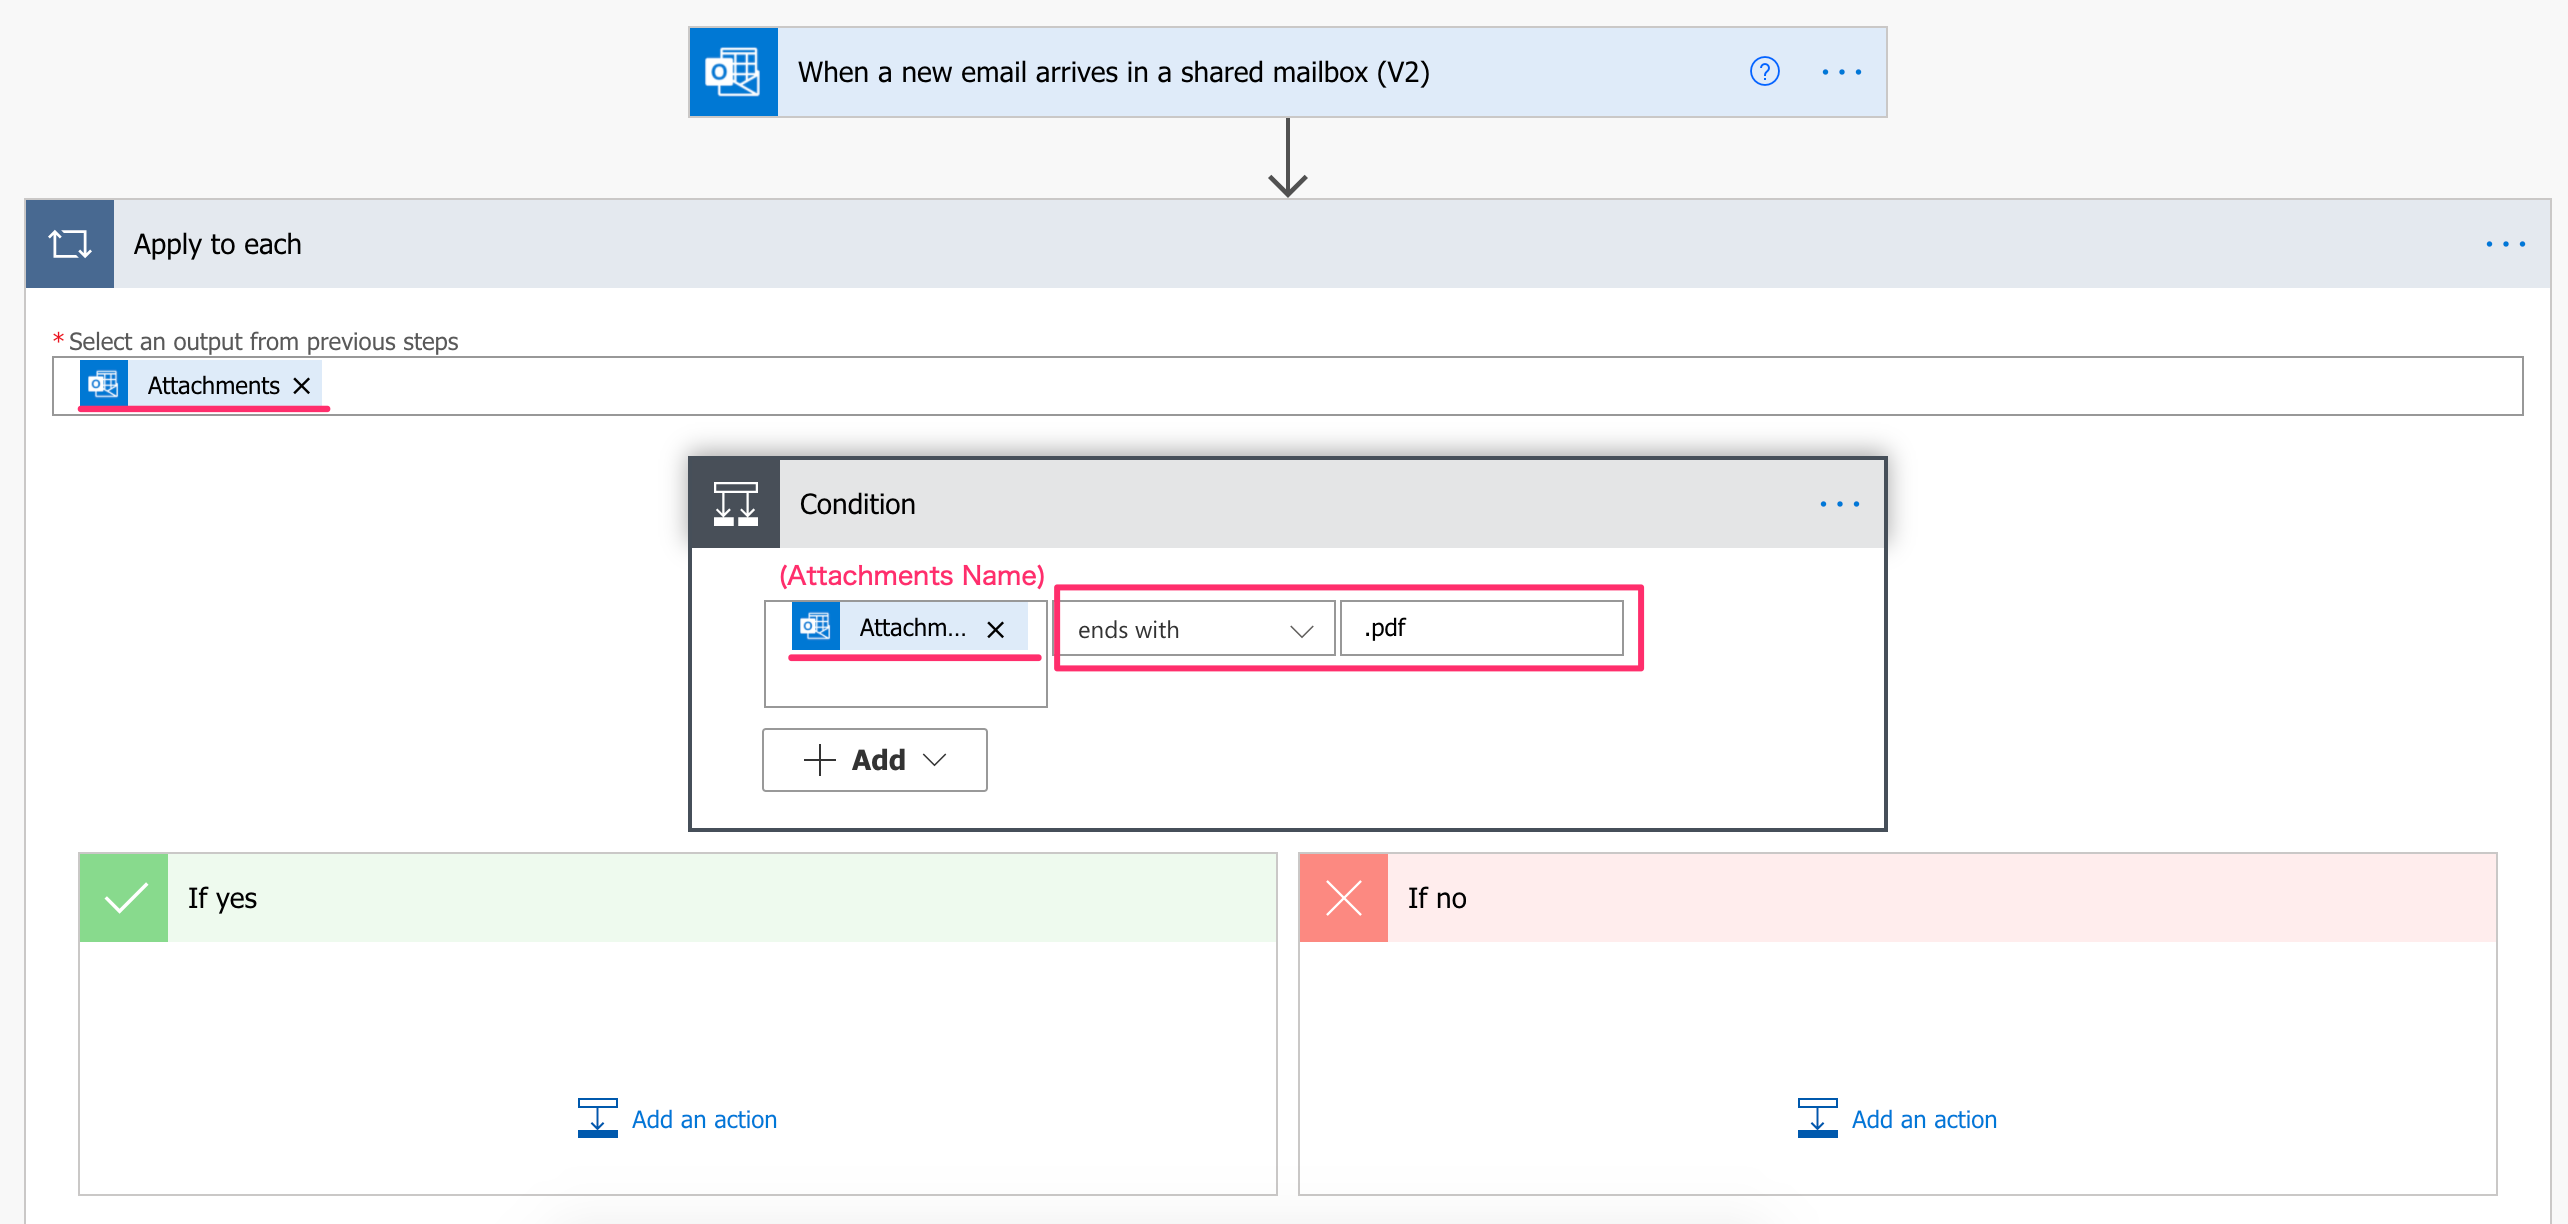
Click the field of the condition and select "Attachments Name" in dynamic contents.
Then a block "Apply to each" pops up with "Attachments" specified in the field automatically. Since multiple attachments could be attached to an email, this "Apply to each" is required to handle the condition with a name of attachments.
In the Condition, "Attachments Name" is already specified. Select "ends with" and type ".pdf" for the value. This is to only save attached PDF files in OneDrive. Otherwise, any other file, such as a company logo PNG image included in an email signature, will be saved in the folder, which in our case leads to uploading it straight to Lexoffice due to Zapier.
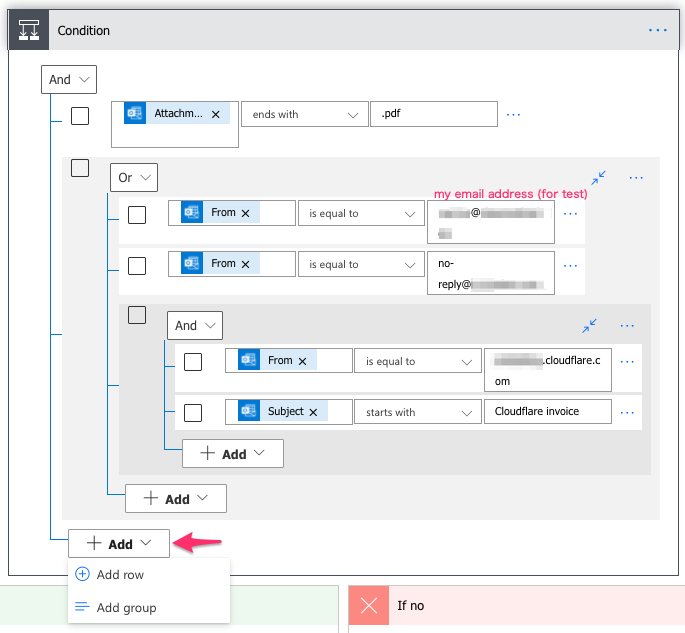
In addition to the condition of a file format, I'd like to save files only when an email is from specific senders and optionally, an email subject has a specific keyword.
In our use case, some vendors send us digital invoices using a "no-reply" address or a billing department's address, which rarely change. However, we also receive an email from customers in this mailbox, who possibly ask us to fix an invoice that we sent and attach the copy. Also if any irregular invoices are delivered, bookkeepers would rather like to check them manually before they're automatically synced to Lexoffice. Therefore, the condition of a sender is required. Additionally, Cloudflare sends a specific invoice and a while later a reminder with a copy of the invoice again from the same address. To avoid the duplication, I add a condition of a subject for this sender.
The conditions now look like below. From [Add], you can select "Add row" or "Add group" and you can choose to use AND or OR for each hierarchy of conditions.
Save files in OneDrive and move an email to the specified folder
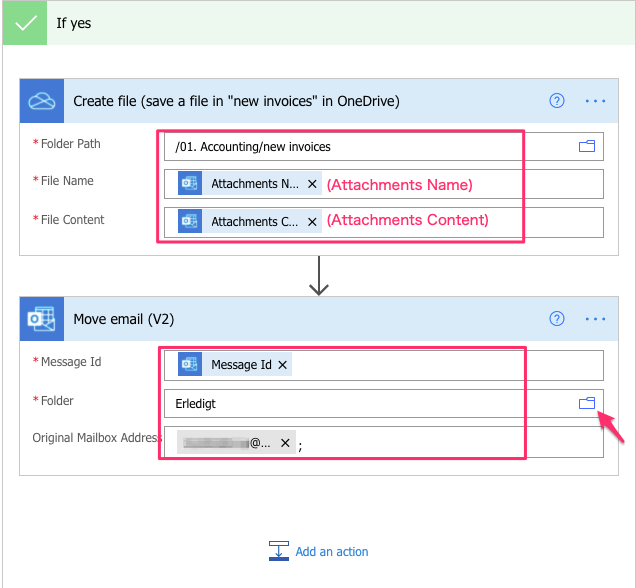
As the next step, click "Add an action" in the "If yes" block and choose "Create file" (OneDrive) as an operation. Click another "Add an action" below and choose "Move email" (Outlook). Configure as below:
- Folder Path: Choose the OneDrive folder where you want to save invoices. - By clicking on the folder icon. To complete the flow 'Task 2', this must be the folder which Zapier watches in a trigger!
- File Name: "Attachments Name" (dynamic content)
- File Content: "Attachments Content" (dynamic content)
- Message Id: "Message Id" (dynamic content)
- Folder: Choose the folder where you want to move your email. - Before clicking on the folder icon again, specify the next "Original Mailbox Address" first. Otherwise, the folder trees in YOUR mailbox appear.
- Original Mailbox Address: Specify the address of the shared mailbox again.
After all the configurations, save the flow.
Test
Now let's send an email with attaching a PDF invoice! I picked an email sent by a vendor in the past and forwarded it from my email address (added in the condition for test) to the shared email address.
Wait for it...
After a while you'll find that the PDF file attached to the forwarded email is now saved in the OneDrive folder.

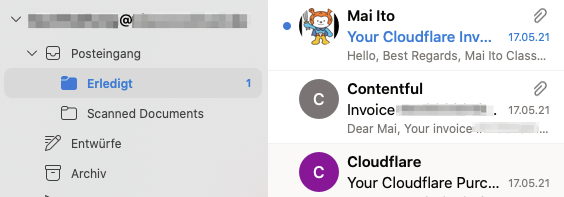
In a shared mailbox, the email sent by me is automatically moved to the 'Erledigt' folder instead of sitting in the inbox ('Posteingang' in German).
When you log in to Lexoffice and go to "Beleg erfassen", the file is already there! (*To do this, configure Zapier in advance. See the previous post for more info.)

Summary
By using Power Automate, I've achieved saving an incoming invoice in OneDrive when it is emailed to a shared mailbox, and moving the email to a folder in the mailbox. With an integration of Zapier, saving a file in OneDrive triggers uploading it to Lexoffice. Task 2 is now complete!
I also used Power Automate to create a folder called 'yyyyMM' when files arrive in a certain place and to move them to this created folder. I first struggled figuring out how to specify this folder name, but I googled and found the solution quickly in Microsoft community. It's another big advantage of Power Automate that tons of user knowledge are available!
