SnowflakeのQuickstartにあるAutomating Data Pipelines to Drive Marketing Analytics with Snowflake & Fivetranを試してみた
かわばたです。
表題のとおり、SnowflakeのQuickstartにあるAutomating Data Pipelines to Drive Marketing Analytics with Snowflake & Fivetranを試していきます。
【ドキュメント】
対象読者
- FivetranとSnowflakeの接続の仕方が知りたい方
- Fivetran・dbt・Snowflakeの一連の流れを体験したい方
アジェンダ
- 概要
- Snowflakeの構成
- Fivetranの設定
- Googleスプレッドシートでサンプルデータをアップロード
- Githubでサンプルdbtプロジェクトをフォークする
- Fivetran_dbt変換の設定
- Snowflakeの設定
- まとめ
概要
このハンズオンでは、Fivetran、Snowflake、dbtを使用して、Google広告データのマーケティング分析を実行するためのステップバイステップガイドを学習します。
ドキュメントより引用。
検証環境
- SnowflakeトライアルアカウントEnterprise版
- Fivetran
- Githubアカウント
- サンプルのGoogle広告データ
Snowflakeの構成
ハンズオンのとおり進めていきます。
- Snowflakeトライアルアカウントにログインします。
- 今回のハンズオンでは
ACCOUNTADMINロールで作業します。
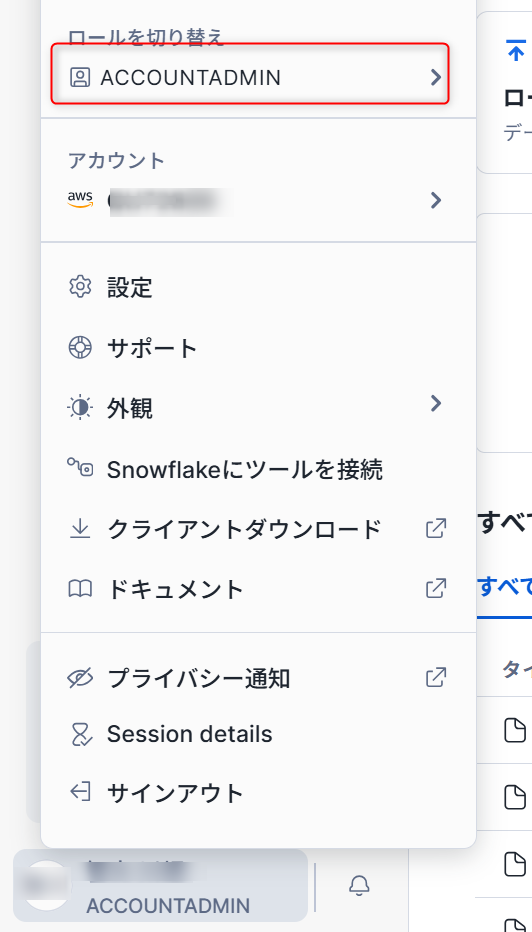
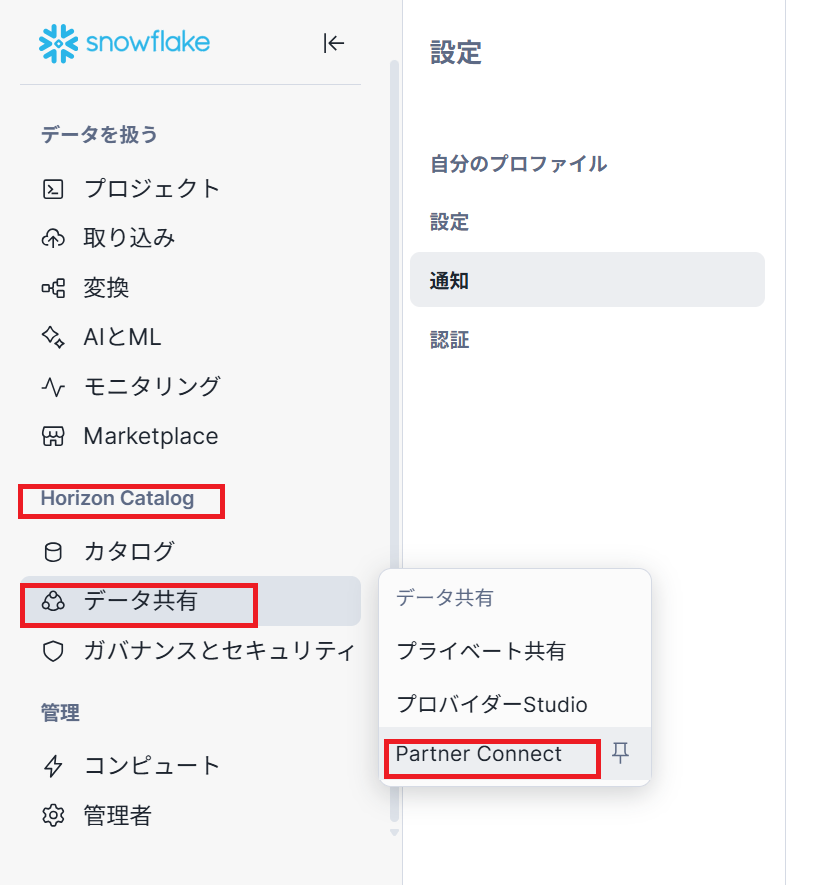
- SnowflakeUIの画面左側、
Horizon Catalog項目のデータ共有からPartner Connectを選択します。
- 以下のように検索画面が表示されるので、
Fivetranと入力します。
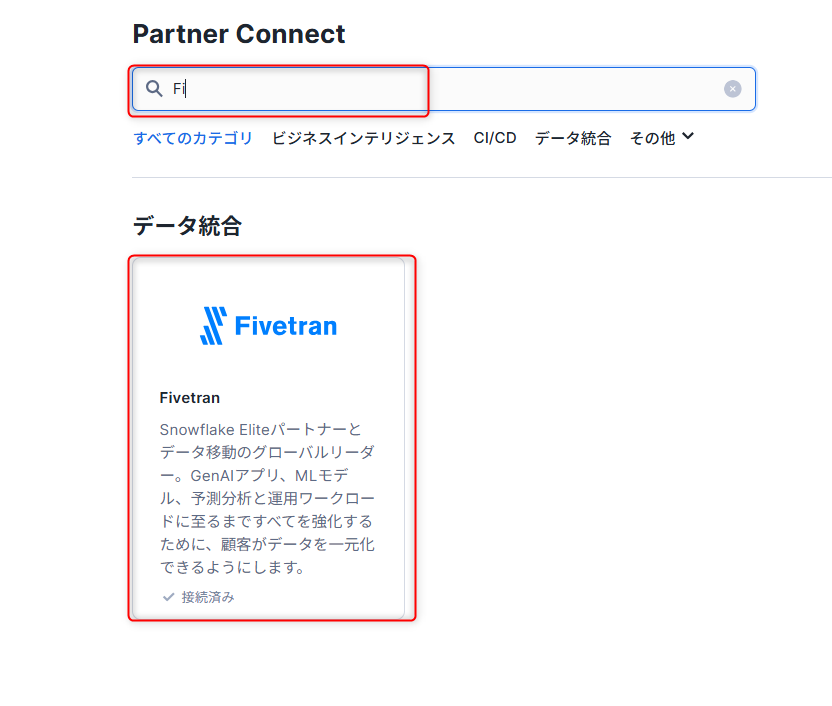
- Connectをクリックします。
※かわばたはもともと接続していたため「起動」と表記されています。
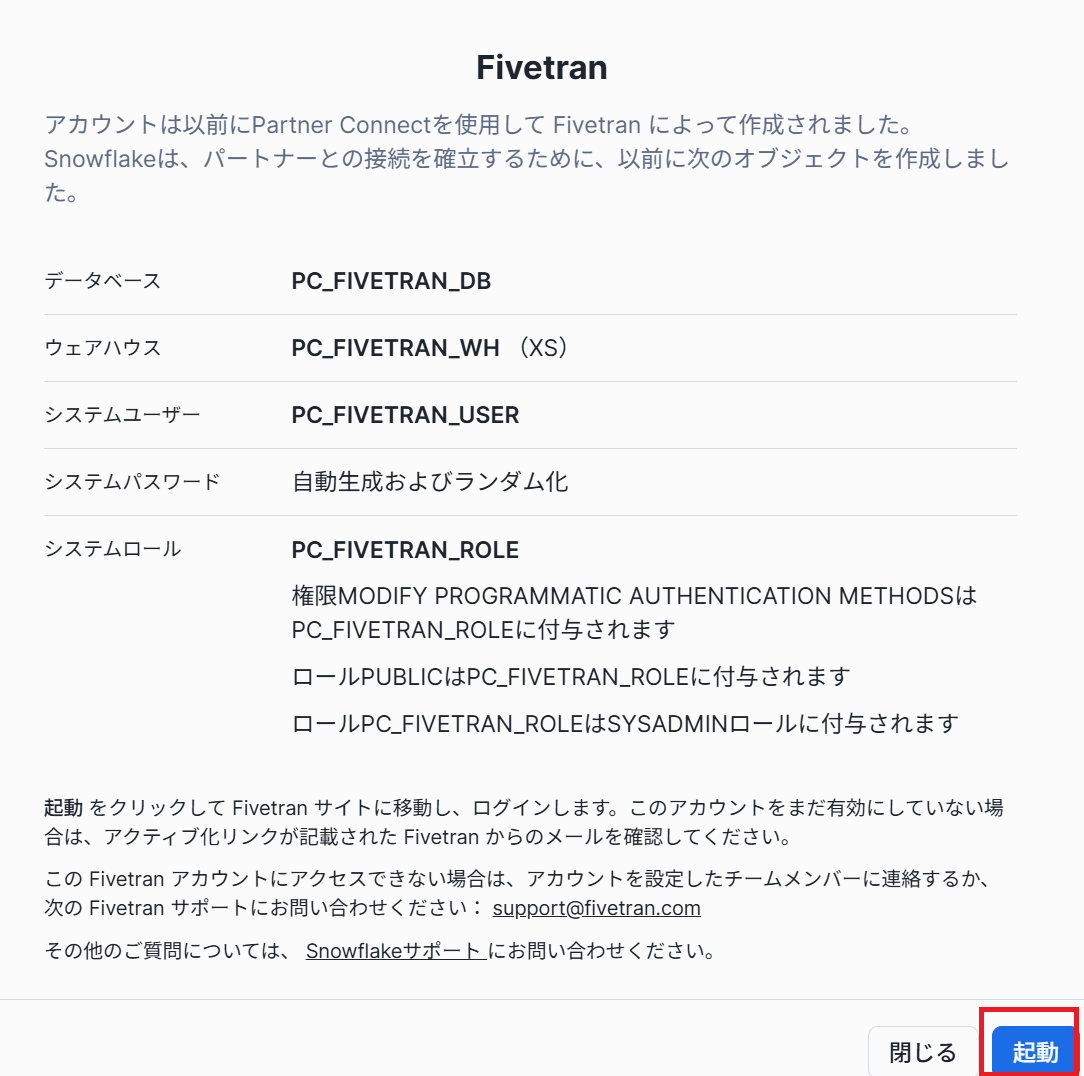
- 表示されるポップアップでアクティブ化をクリックします。
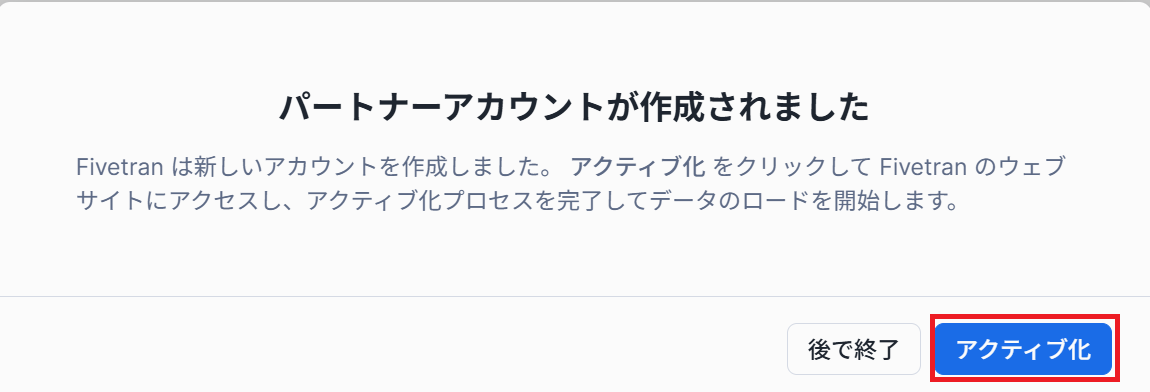
【躓きポイント】
ここでアクティブ化を選択せずに、Activate Laterをクリックするとその後のアクティブ化が面倒になりますので注意してください。
かわばたは後ほど設定しようと思いクリックしてしまいました。
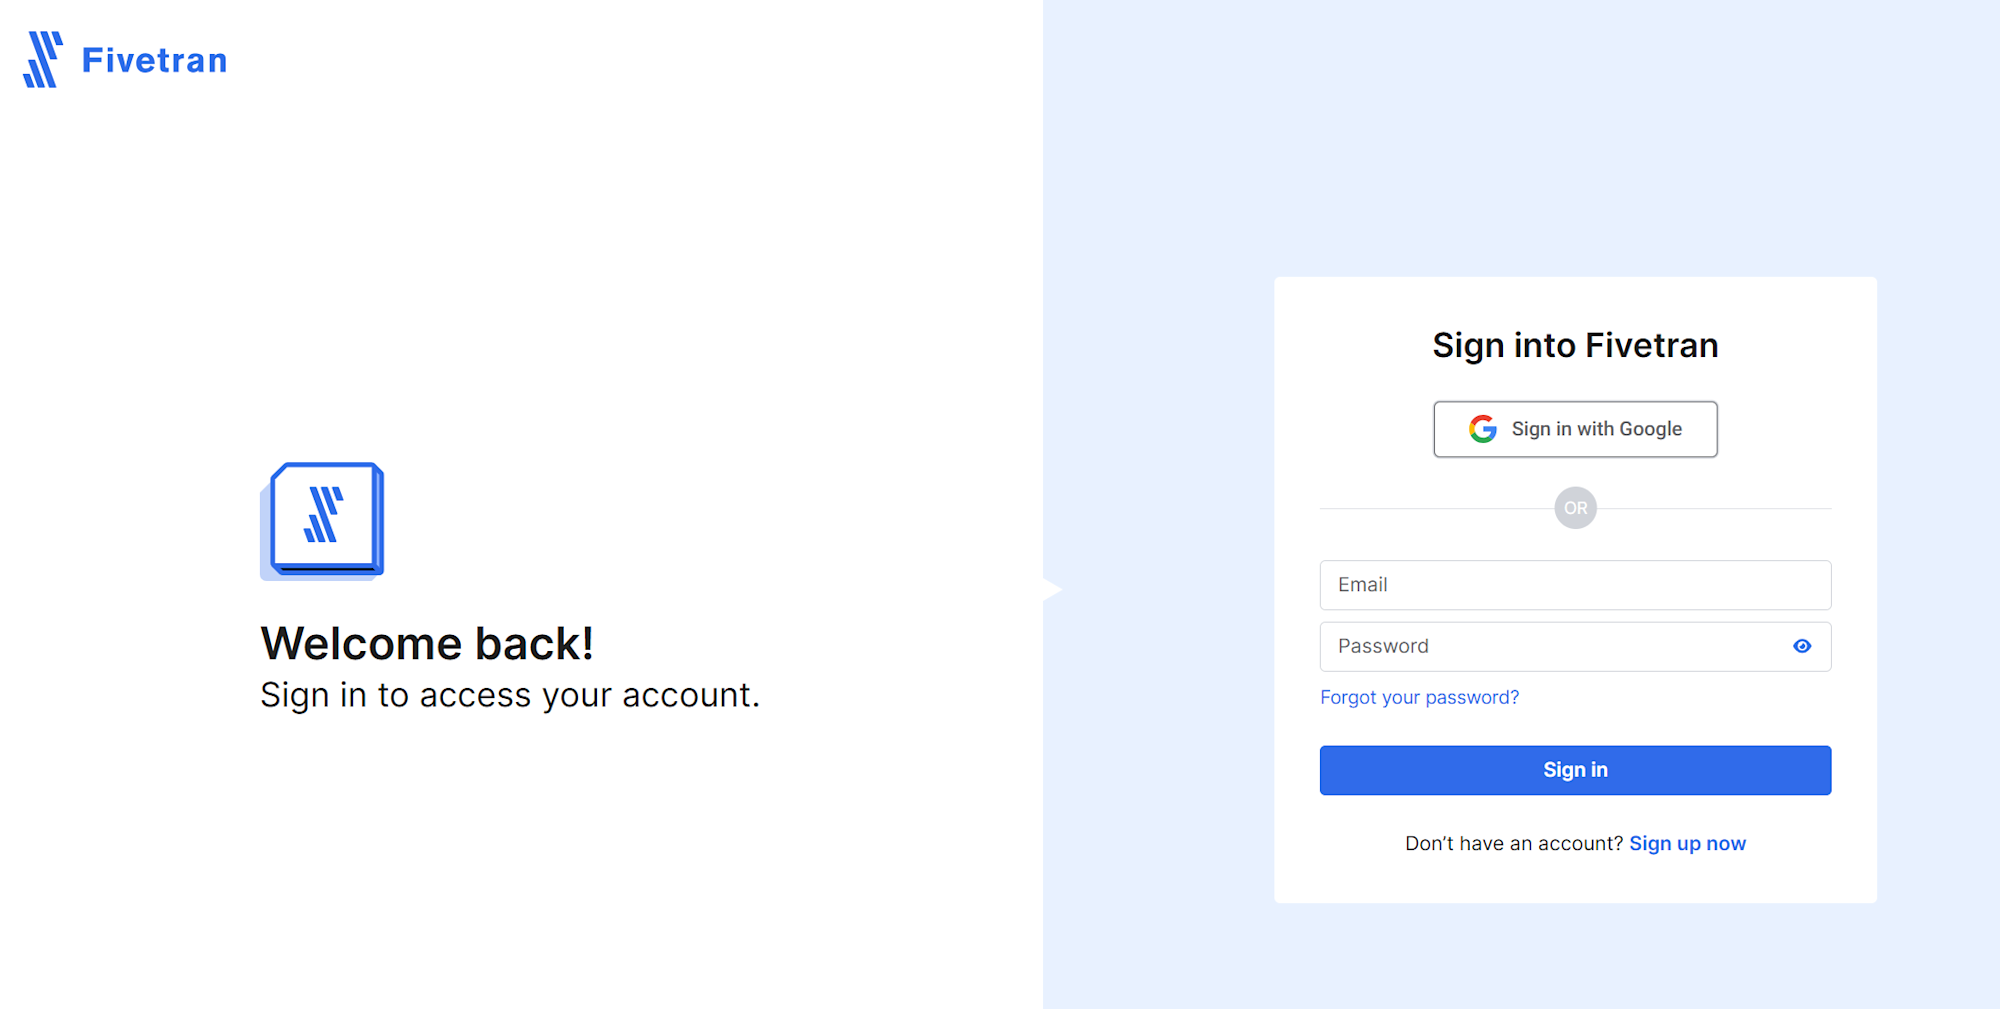
- 新しいブラウザタブが開き、Fivetran のサイトに移動します。そこでログイン情報を入力します。
Destinationの設定
手順6でActivate Laterを選択した方向けにDestinationの設定を記載していきます。
-
Fivetranの画面から、Destinationを開きAdd destinationを選択します。

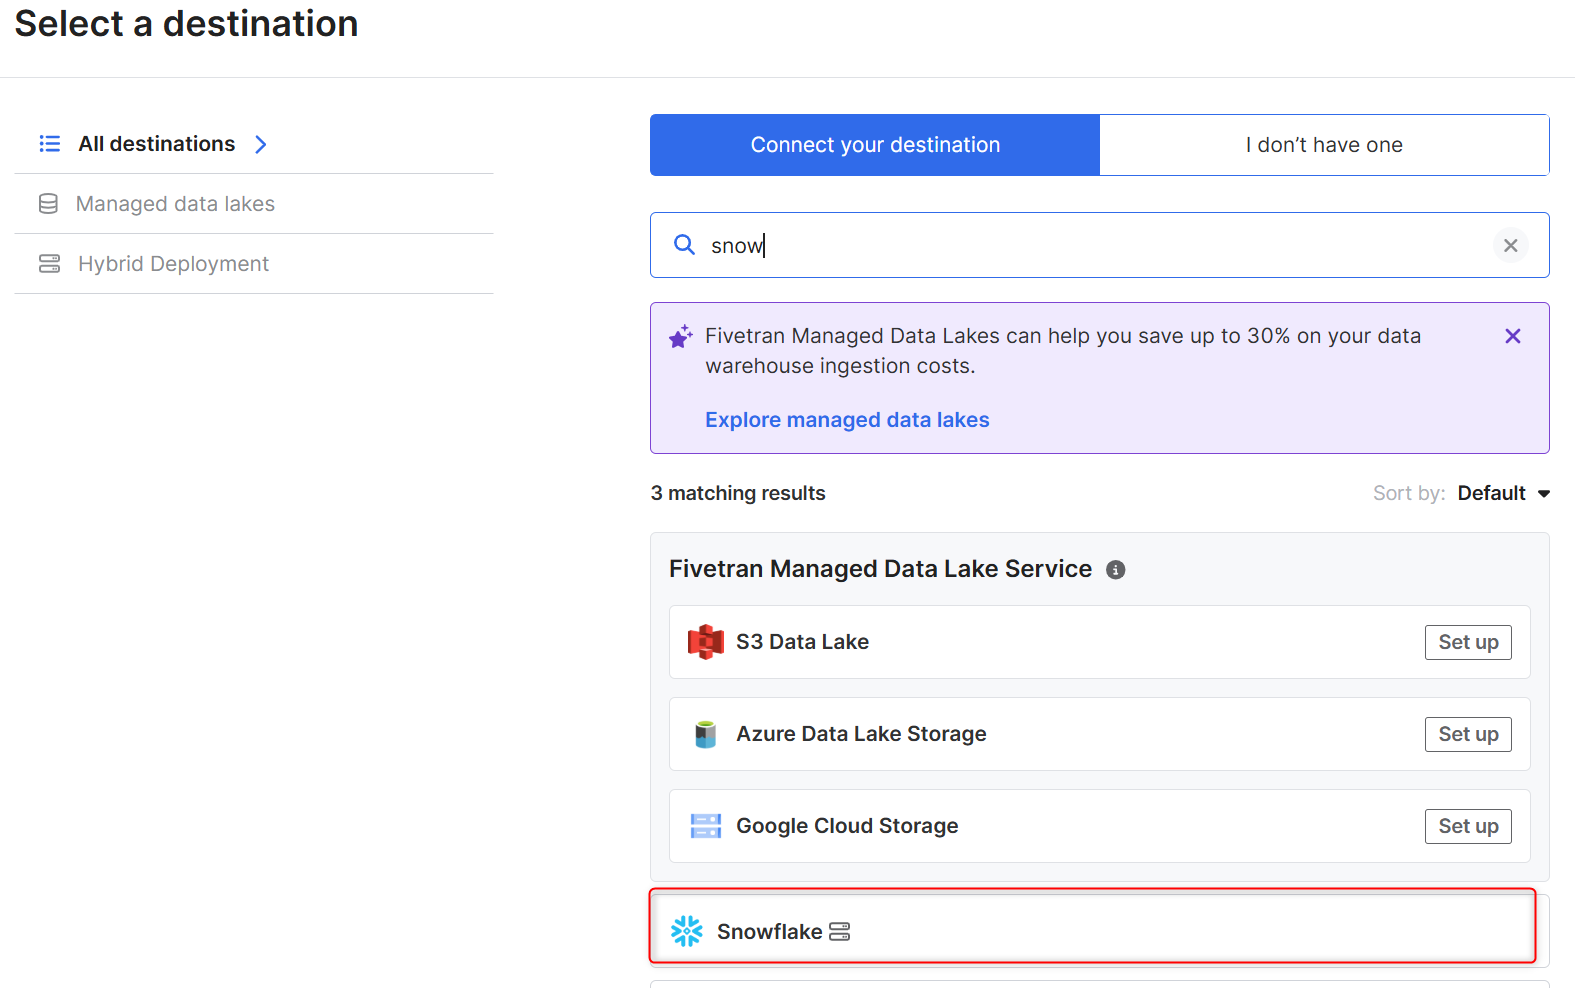
-
Select a destinationに画面が遷移するので、Snowflakeを選択します。
-
以下内容がポップアップするので、任意の名称を入れます。

-
以下のスクリプトを実行し、使用するデータベース等を作成します。
			begin;

   -- ユーザー / パスワード / ロール / ウェアハウス / データベースの変数を作成します (オブジェクトの場合は大文字にする必要があります)
   set role_name = 'FIVETRAN_ROLE';
   set user_name = 'FIVETRAN_USER';

   -- -- Snowflakeはパスワードベースの認証を廃止する予定なので、次の行を削除することをお勧めします。
   set user_password = 'password123';

   set warehouse_name = 'FIVETRAN_WAREHOUSE';
   set database_name = 'FIVETRAN_DATABASE';

   -- ユーザー/ロールの手順で、ロールをsecurityadminに変更します。
   use role securityadmin;

   -- fivetranのロールを作成する
   create role if not exists identifier($role_name);
   grant role identifier($role_name) to role SYSADMIN;

   -- fivetranのユーザーを作成する
   create user if not exists identifier($user_name)
   password = $user_password
   default_role = $role_name
   default_warehouse = $warehouse_name;

   grant role identifier($role_name) to user identifier($user_name);

   -- バイナリ入力フォーマットをBASE64に設定する
   ALTER USER identifier($user_name) SET BINARY_INPUT_FORMAT = 'BASE64';

   -- ウェアハウス/データベース手順のロールをシステム管理者に変更する
   use role sysadmin;

   -- fivetranの倉庫を作成する
   create warehouse if not exists identifier($warehouse_name)
   warehouse_size = xsmall
   warehouse_type = standard
   auto_suspend = 60
   auto_resume = true
   initially_suspended = true;

   -- fivetranのデータベースを作成する
   create database if not exists identifier($database_name);

   -- fivetranロールにウェアハウスへのアクセスを許可する
   grant USAGE
   on warehouse identifier($warehouse_name)
   to role identifier($role_name);

   -- fivetranにデータベースへのアクセスを許可する
   grant CREATE SCHEMA, MONITOR, USAGE
   on database identifier($database_name)
   to role identifier($role_name);

   -- STORAGE INTEGRATION サポートのために、ロールを ACCOUNTADMIN に変更します (GCP 上の Snowflake のみ必要)
   use role ACCOUNTADMIN;
   grant CREATE INTEGRATION on account to role identifier($role_name);
   use role sysadmin;

 commit;
- ホスト名を確認します。
Snowsight(SnowflakeのWeb UI)にアクセスしているブラウザのURLを確認します。URLは通常、以下の形式になっています。
https://<組織名>-<アカウント名>.snowflakecomputing.com
この<組織名>-<アカウント名>.snowflakecomputing.comの部分が、Snowflakeアカウントのホスト名です。
- 確認した内容を設定
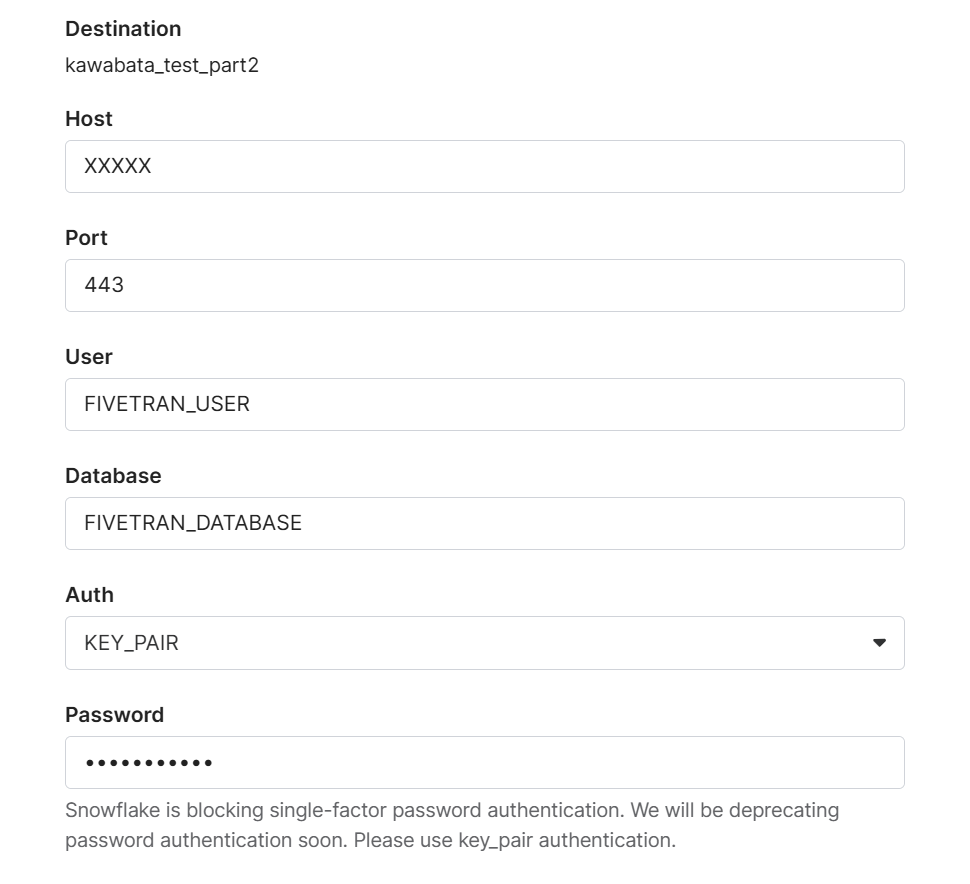
Authはキーペアかパスワードを選択できますが、Snowflakeではパスワードベースの認証を廃止する予定です。
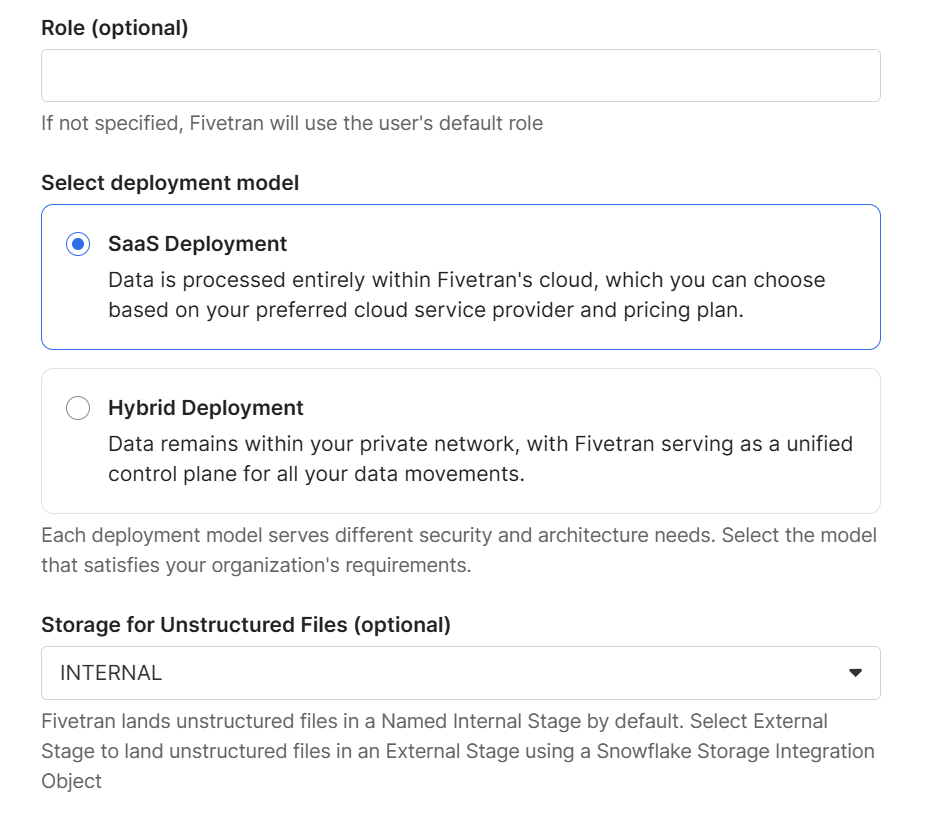
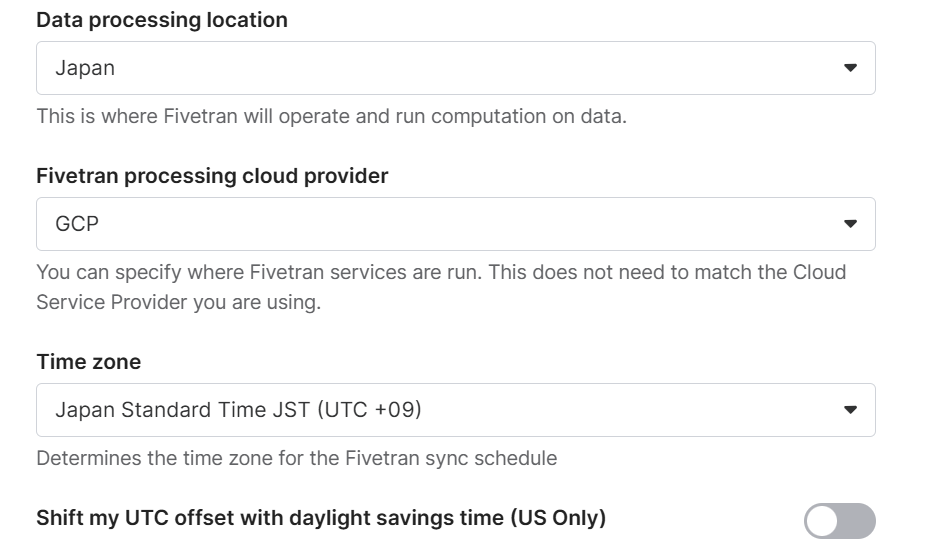
すべての項目が入力できましたら、Save&Testをクリックします。
以下のように認証が完了したら終了です。
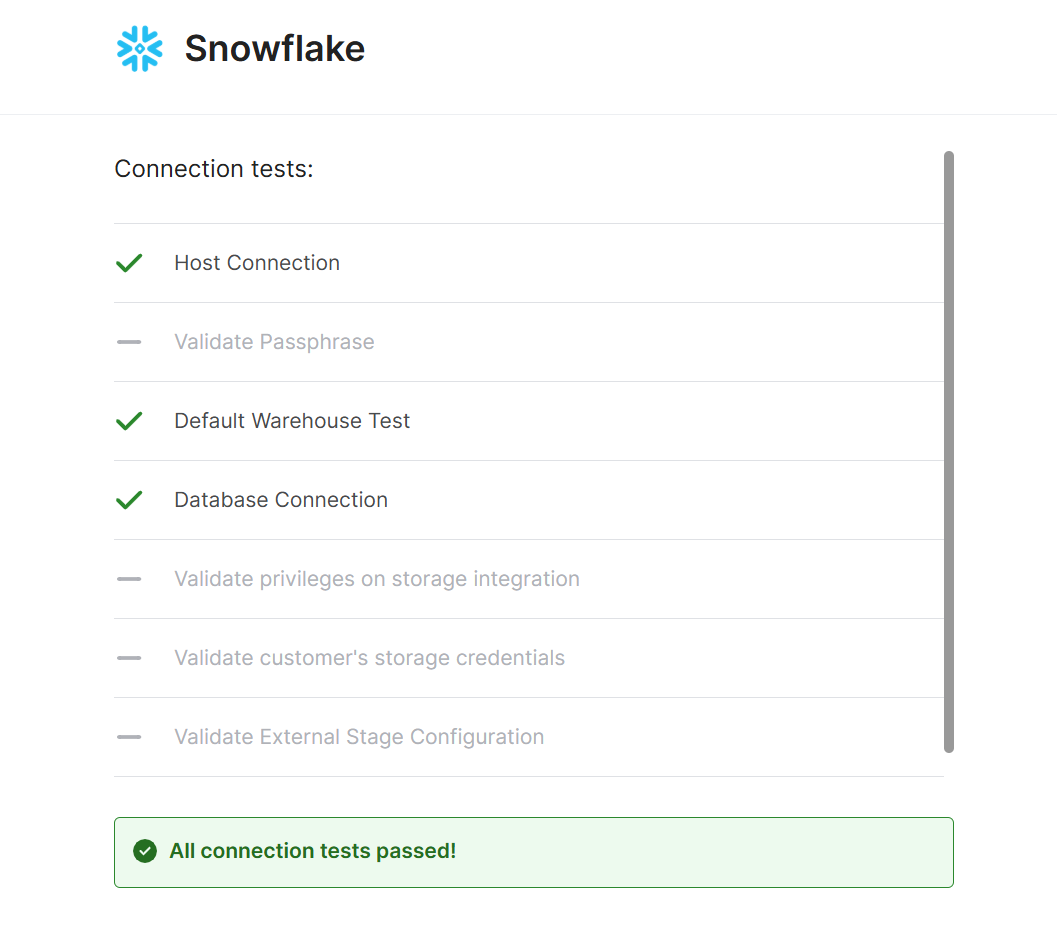
【Snowflake接続セットアップガイド】
Fivetranの設定
ここではFivetranアカウントの設定内容が記載されていますが、パスワードを設定するのみなので割愛します。
Googleスプレッドシートでサンプルデータをアップロード
- Google Sheetsコネクタを使用して新しいスキーマとテーブルを作成する
- テーブルごとに1つのGoogle Sheetsコネクタを作成します。
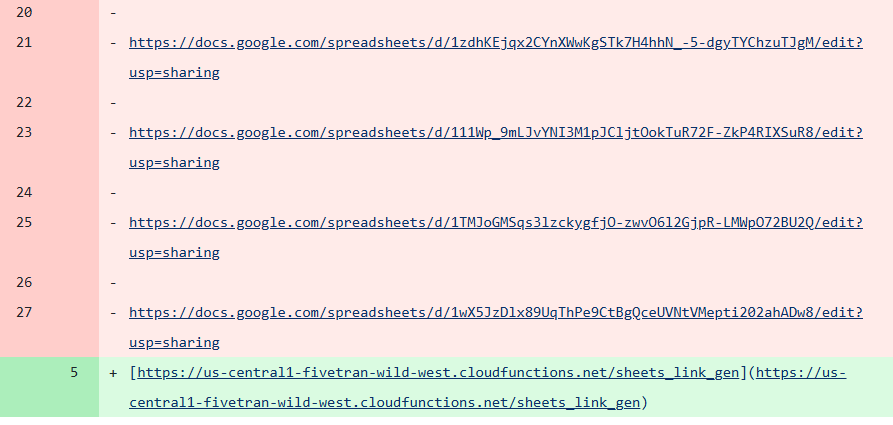
- このドキュメントにあるGoogleスプレッドシートのリンクのいずれかを使用します
-
Connectionsを選択し、Add connectionをクリックします。

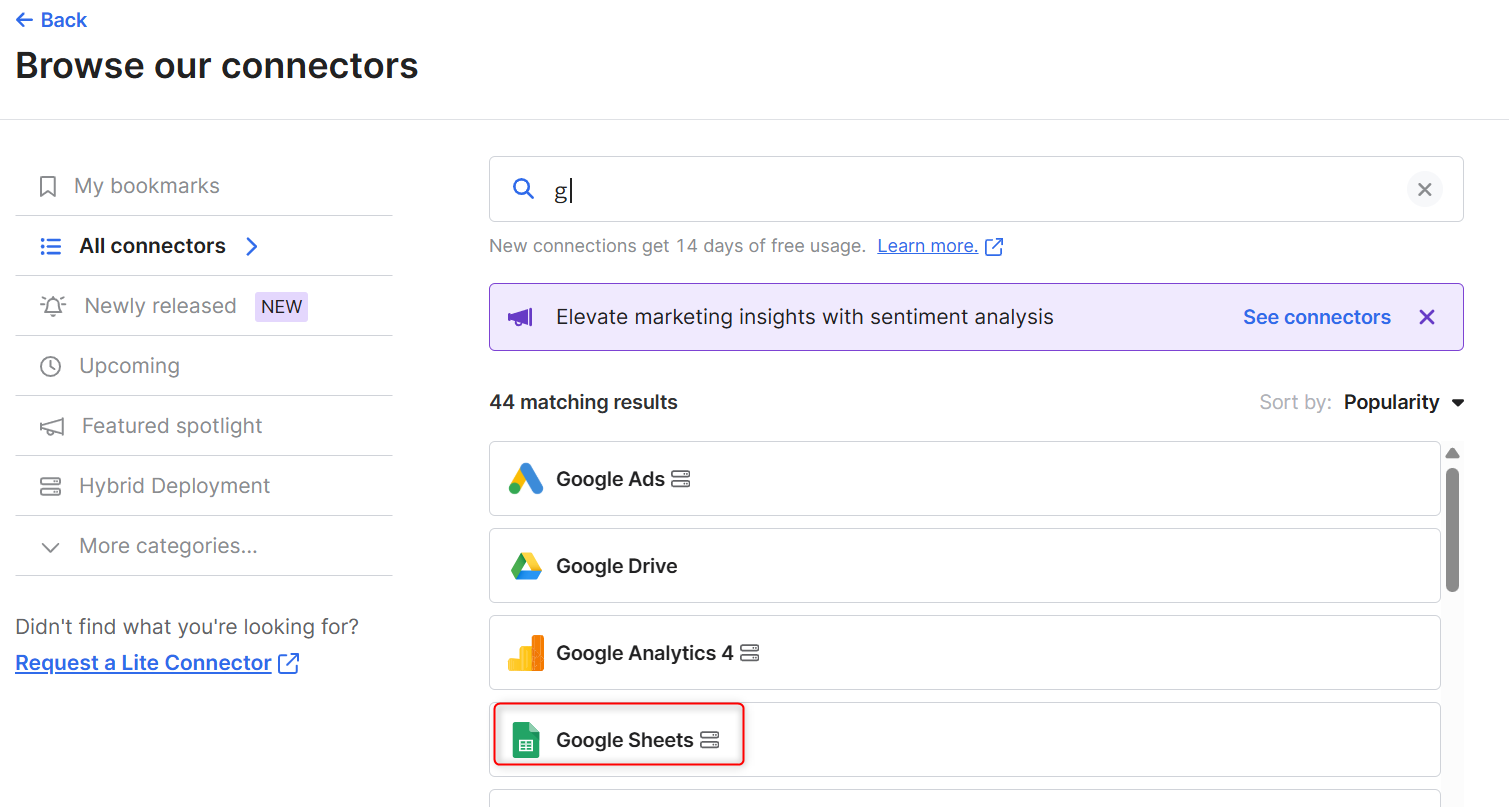
-
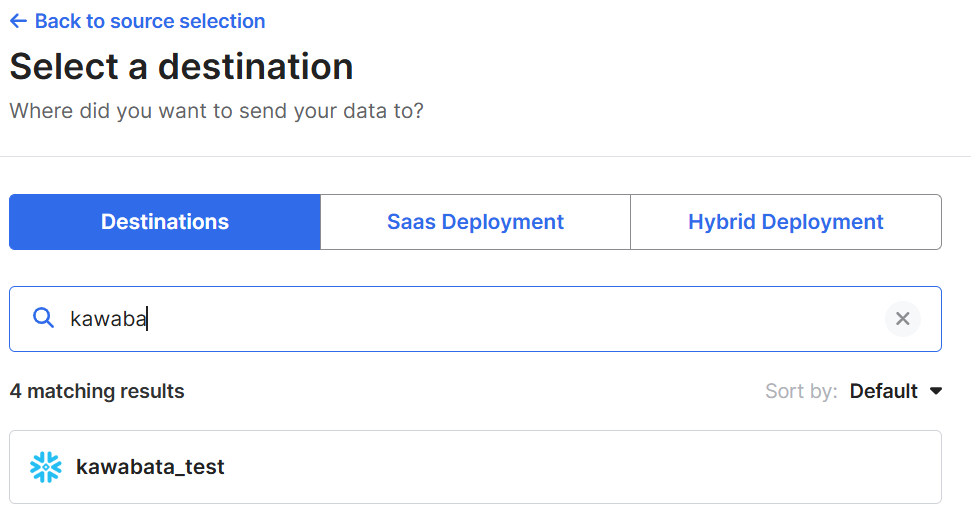
Browse our connectorsに遷移するので、Google Sheetsを選択します。
-
Select a destinationに遷移するので、作成したDestinationを選択します。
-
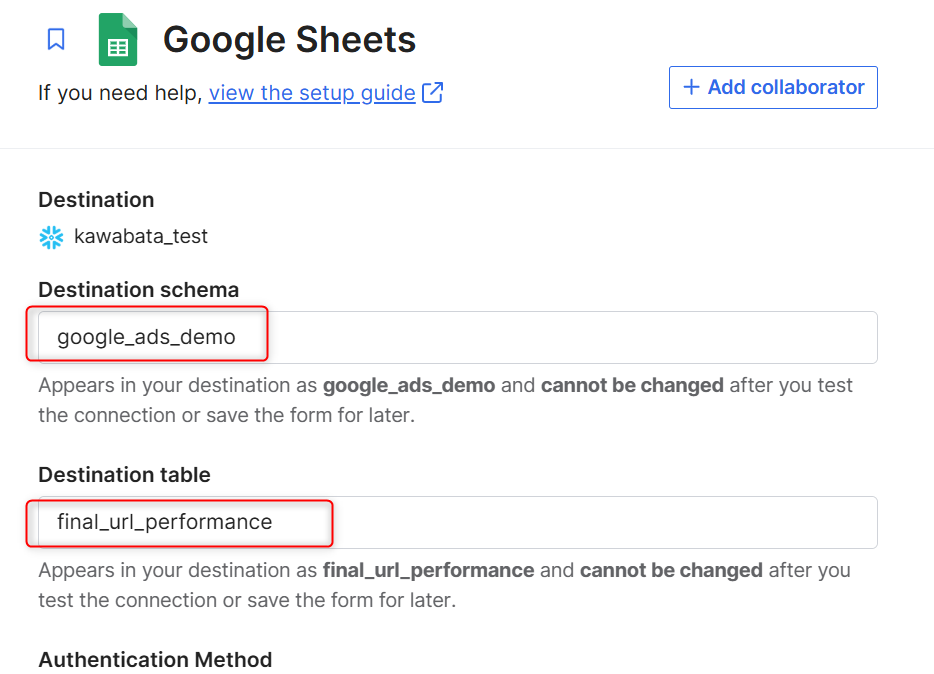
2つのフィールドに次の値を入力します。
- Destination schema:
google_ads_demo - Destination table:
final_url_performance
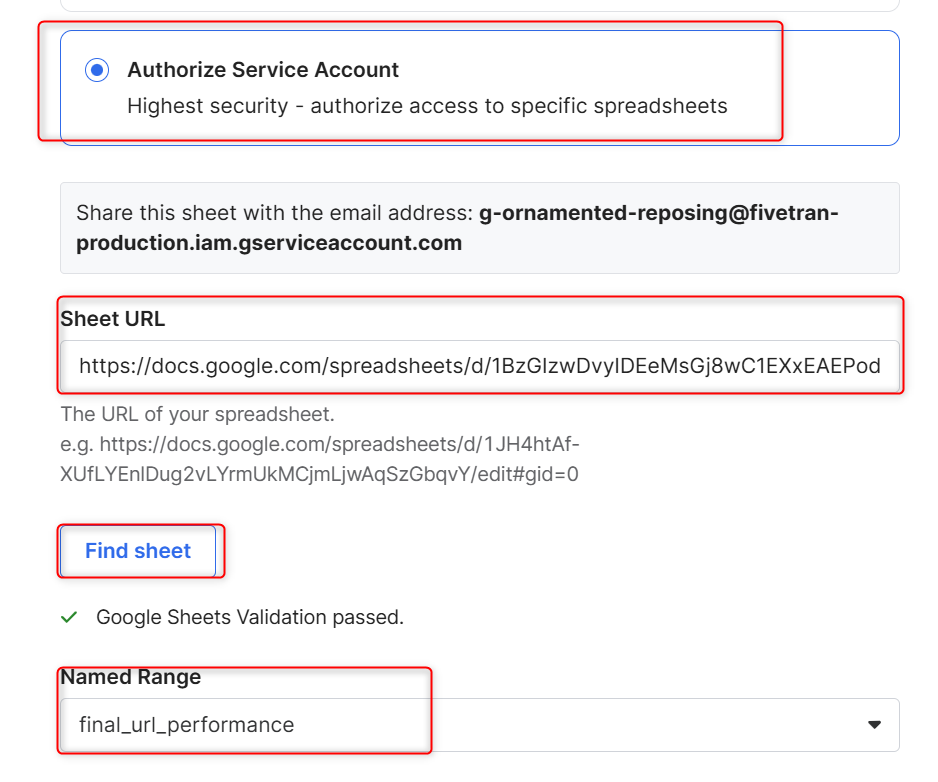
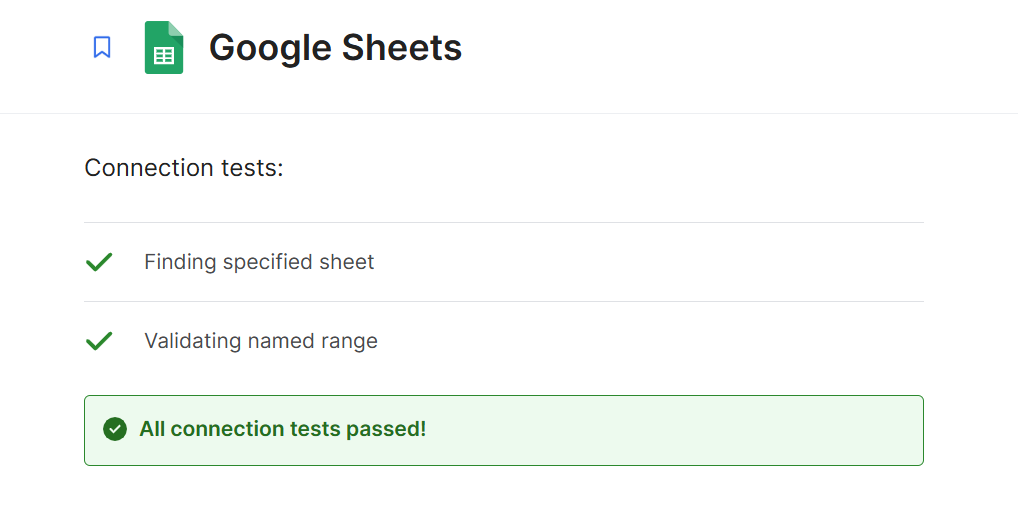
Authorize Service Accountを選択し、Sheet URLにスプレッドシートURLを入力しFind sheetをクリックします。
問題なければNamed Rangeでfinal_url_performanceを選択します。
スプレッドシートURL:https://docs.google.com/spreadsheets/d/1BzGIzwDvyIDEeMsGj8wC1EXxEAEPodf8U-BUXKuZp-w/edit?usp=sharing
【躓きポイント】
公式ドキュメントでは下記から選択してくださいとありますが、リンクをクリックすると期限切れでした。
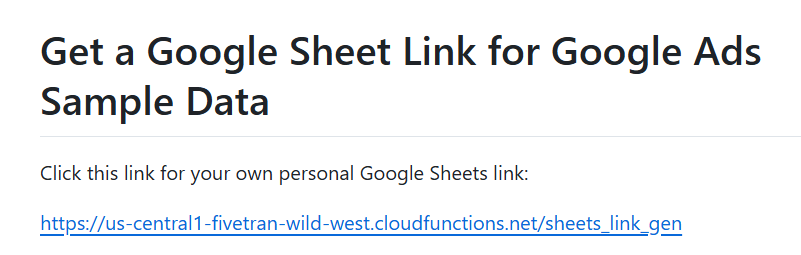
リンクをクリックすると、以下の画面が表示されます。
GitHubで変更内容を確認し、過去のURLがまだ使用できたので活用しています。
-
以下のように問題なく接続が出来ました。
-
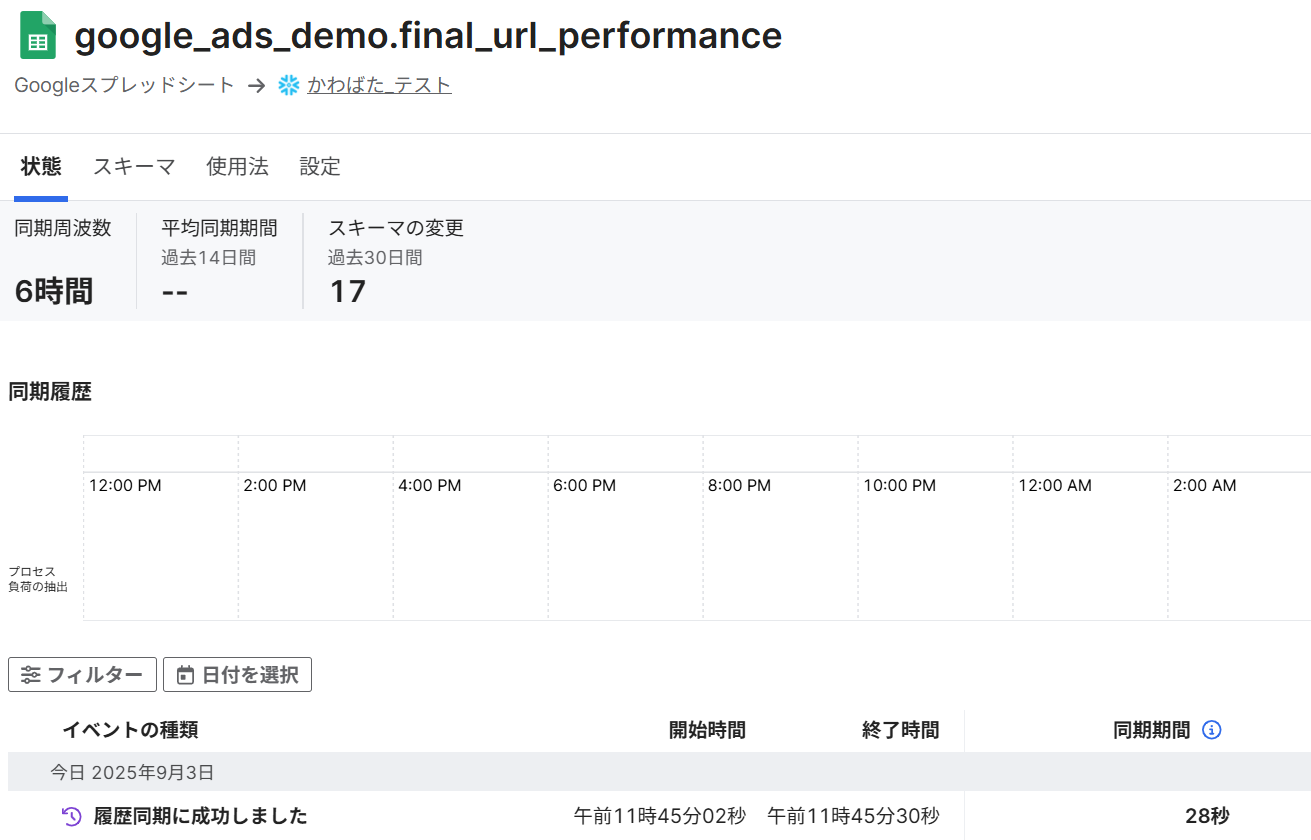
Continueをクリックすると、以下画面になるので、Start Initial Syncをクリックします。

押下後は以下の画面に遷移し、同期が開始されます。
- 1~7と同じ作業で
Named Rangeをcriteria_performanceとclick_performanceを作成していきます。
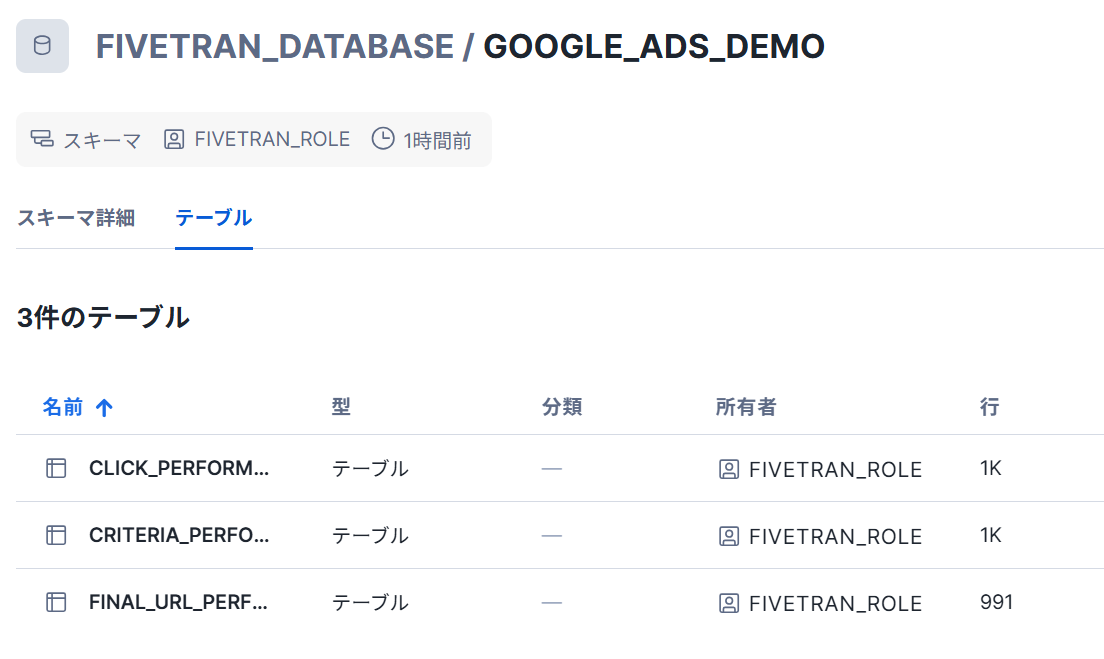
Snowflakeのデータベースを確認すると以下のように格納できていました。
GithubでサンプルdbtプロジェクトをForkする
このセクションでは、Githubアカウントを作成し、そのアカウントにログインしていることを前提としています。
- GitHubのURLをクリックし、右上に
Forkボタンをクリックしてください。
URL:https://github.com/fivetran/snowflake_fivetran_vhol
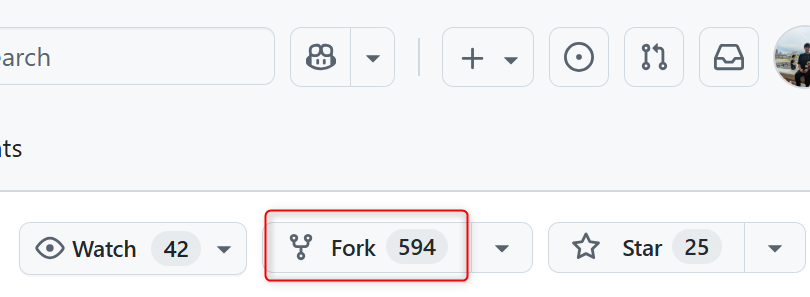
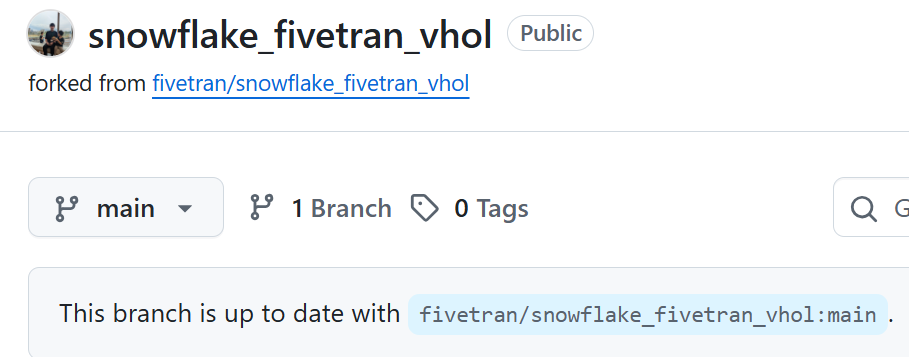
- 以下のように
Forkできていれば完了です。
Fivetran_dbt変換を設定する
このセクションでは、FivetranのUIが変わっているためドキュメントに記載されている手順とは異なります。
【注意点】
このセクションで実際にデータ出力を得るには、少なくとも1つのFivetran Google Ads接続が、データを宛先へ同期している必要があります。
dbtの接続テストまでは試すことが可能です。
Transformationsから、Add Transformationをクリックします。

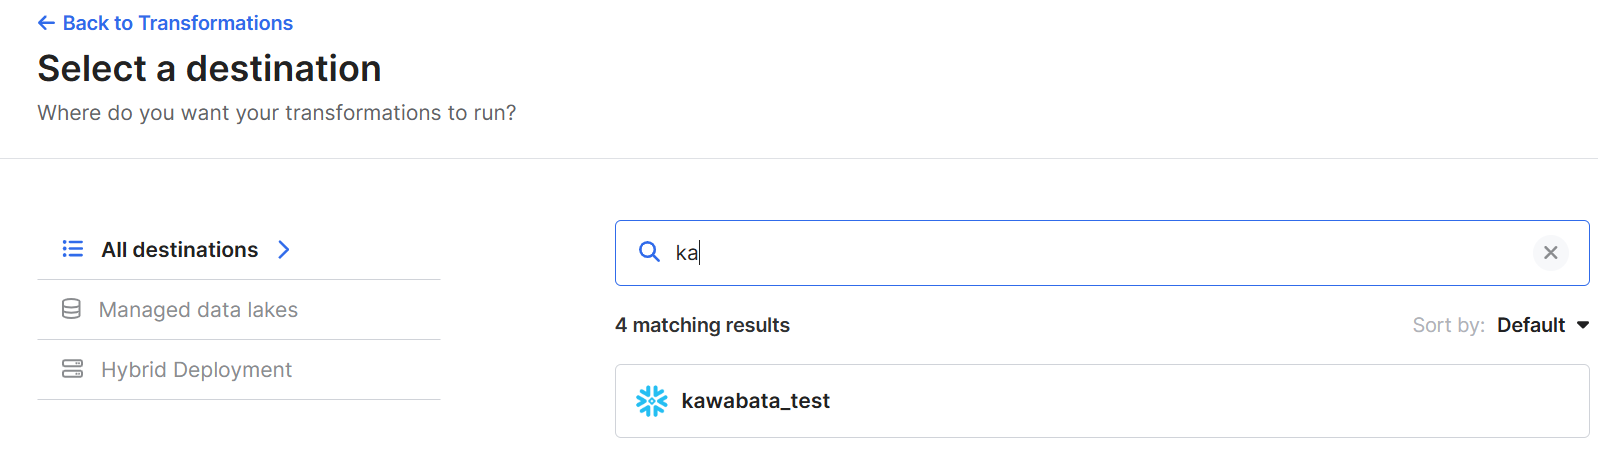
2. Select a destinationからdestinationを選択します。
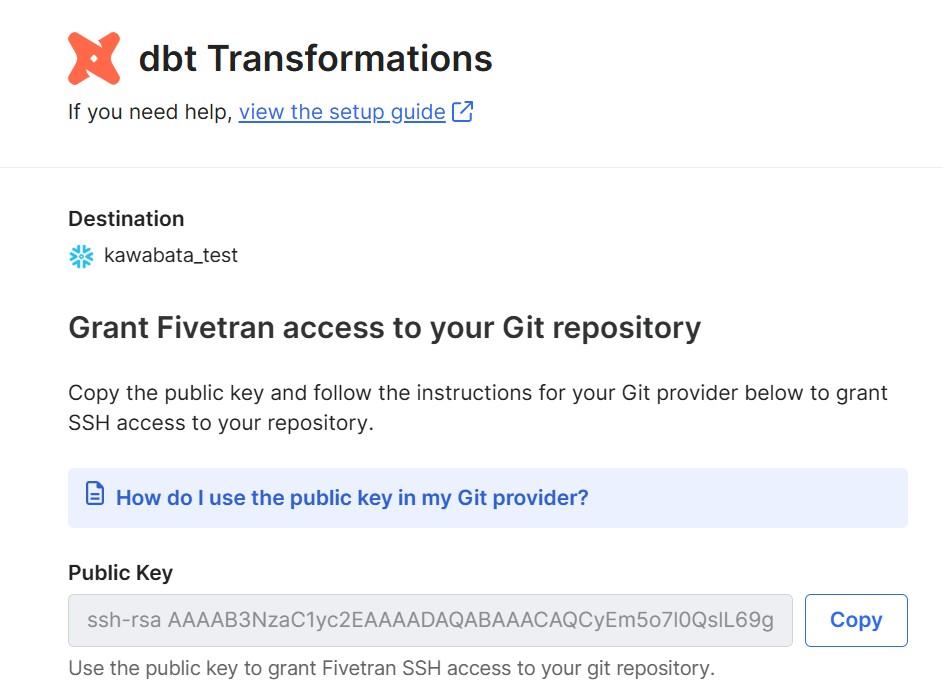
- 以下画面に遷移するので、dbtCoreを選択します。
※手順は異なりますが、ドキュメント準拠のため

Public Keyをコピーしておきます。
-
作成したGitHubリポジトリで
Settingsをクリックします。

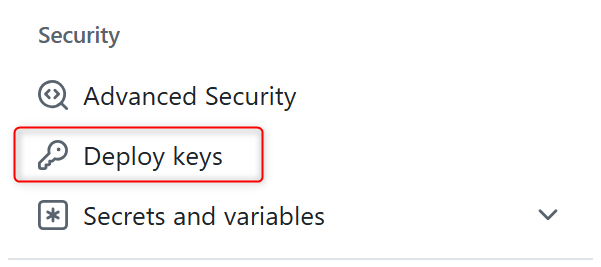
-
左側のナビゲーションで,
Deploy keysをクリックします。
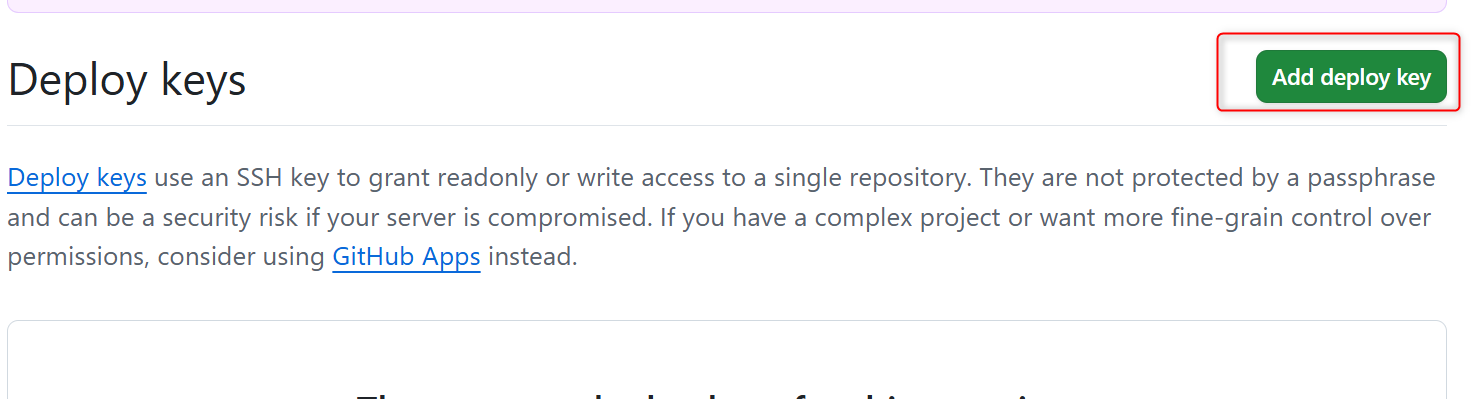
-
画面の右上にある
Add Deploy keysをクリックします。
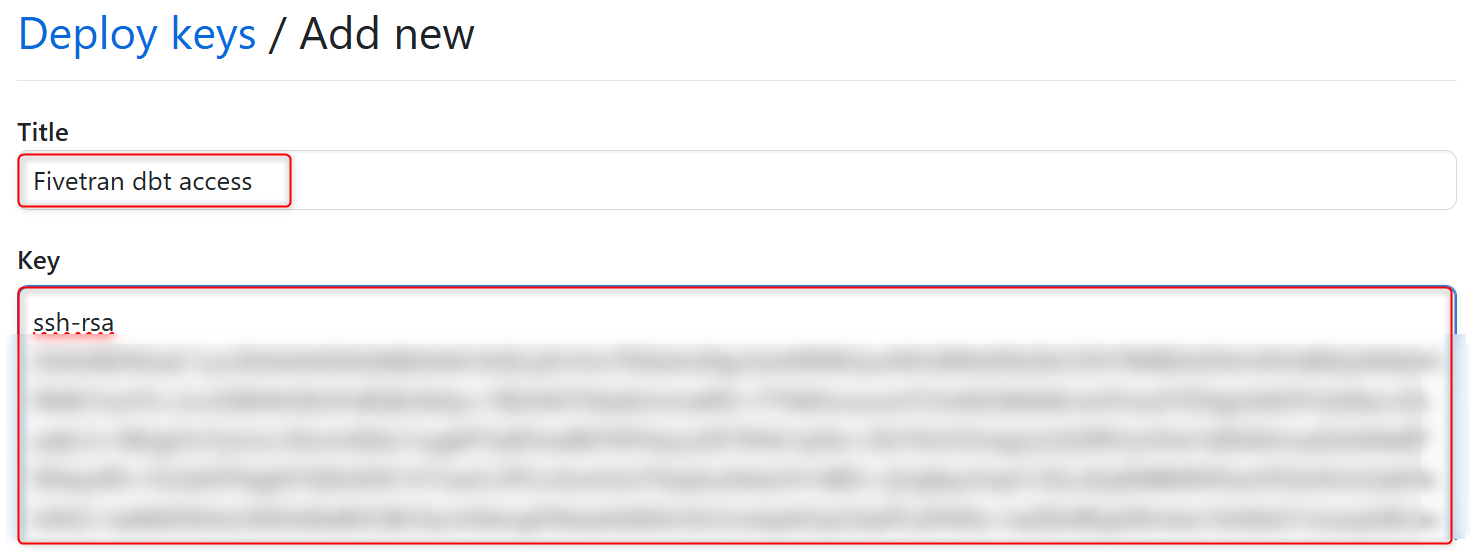
- 以下画面でタイトルを
Fivetran dbt accessと入力します。また、KeyにコピーしていたPublic Keyを貼り付けます。Allow write accessはチェック不要です。
Fivetranのアクセスを取り消したい場合はこちらの画面に戻り、キーを削除してください。
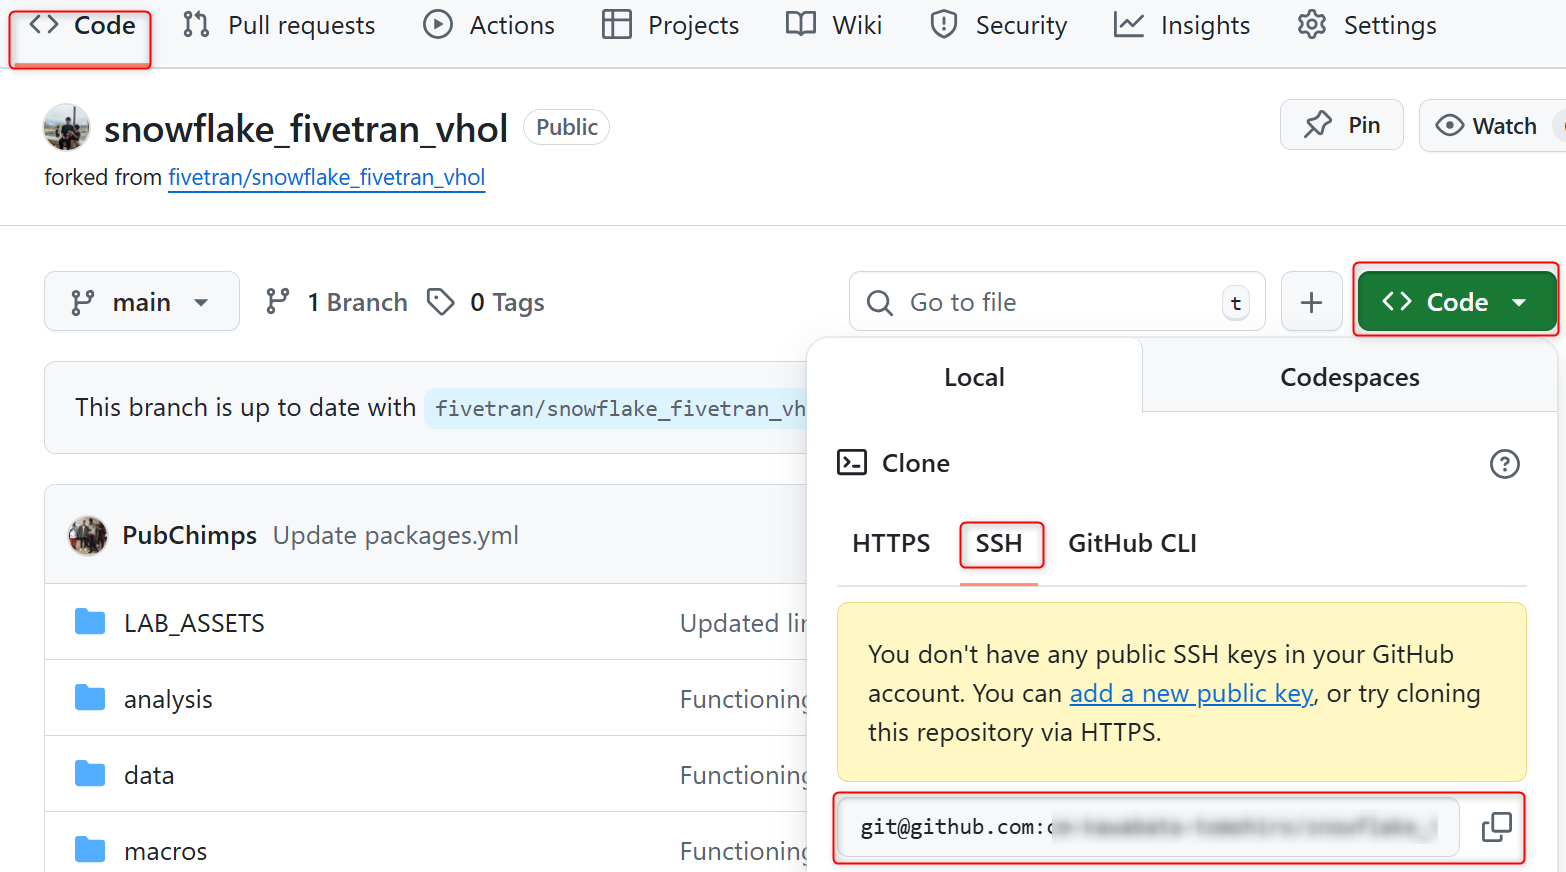
Codeタブから、緑色のCodeボタンをクリックします。SSHタブからURLをコピーします。
URL内容
git@github.com:your_username/snowflake_fivetran_vhol.git
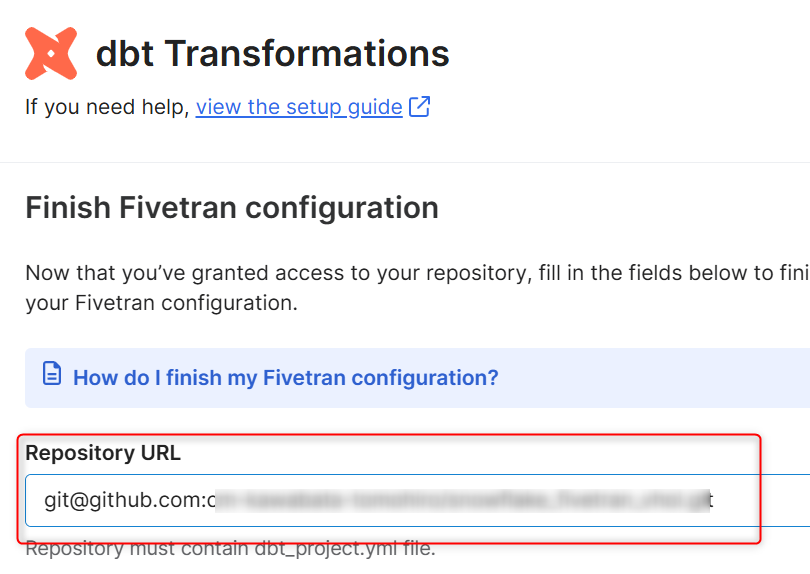
-
Fivetranに戻り、
Repository URLにコピーした値を貼り付けます。
-
Default Schema NameをGOOGLE_ADS_DBTとしました。

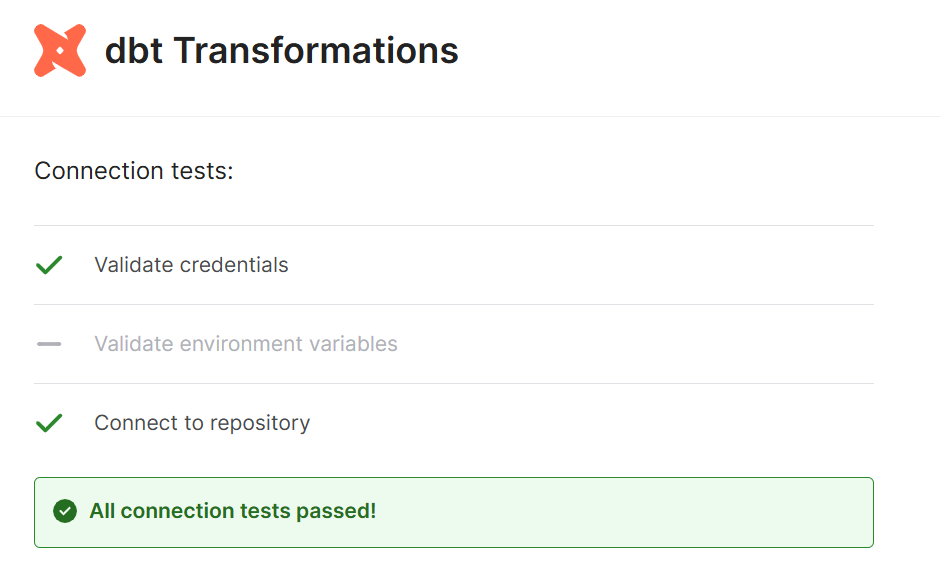
Save&Testを実施し、以下画面が出たら完了です。
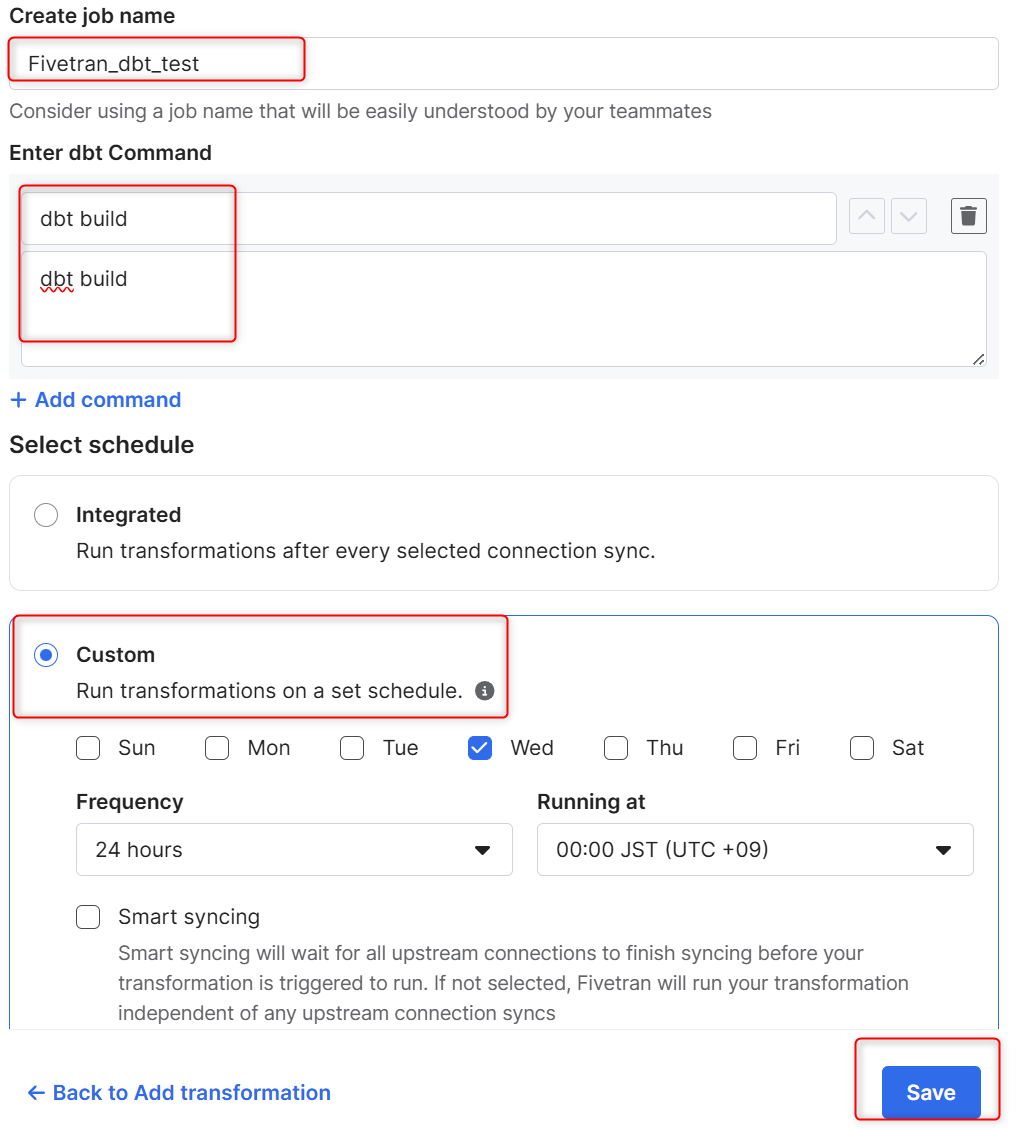
- 以下画面に遷移するので、jobを作成します。
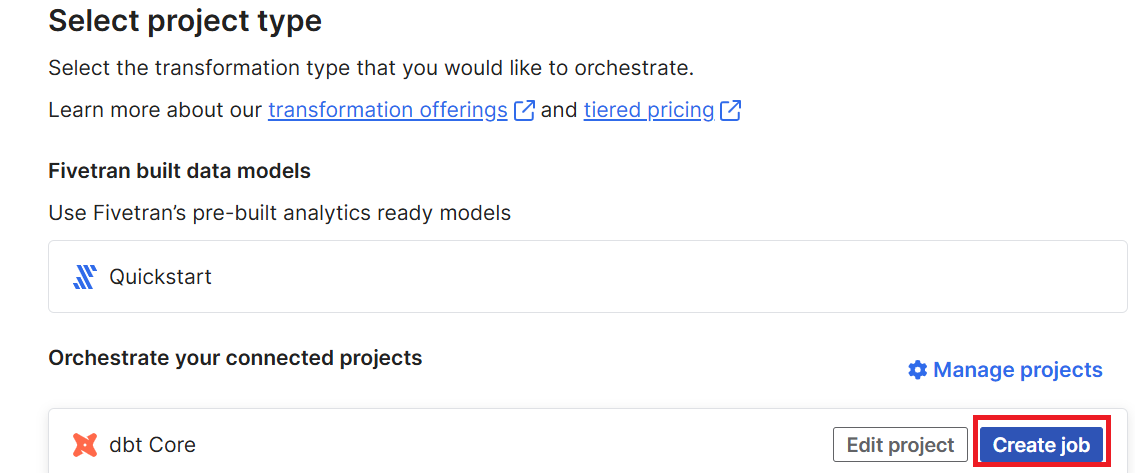
- こちらはドキュメントに記載がなかったので、以下のような形で設定しました。
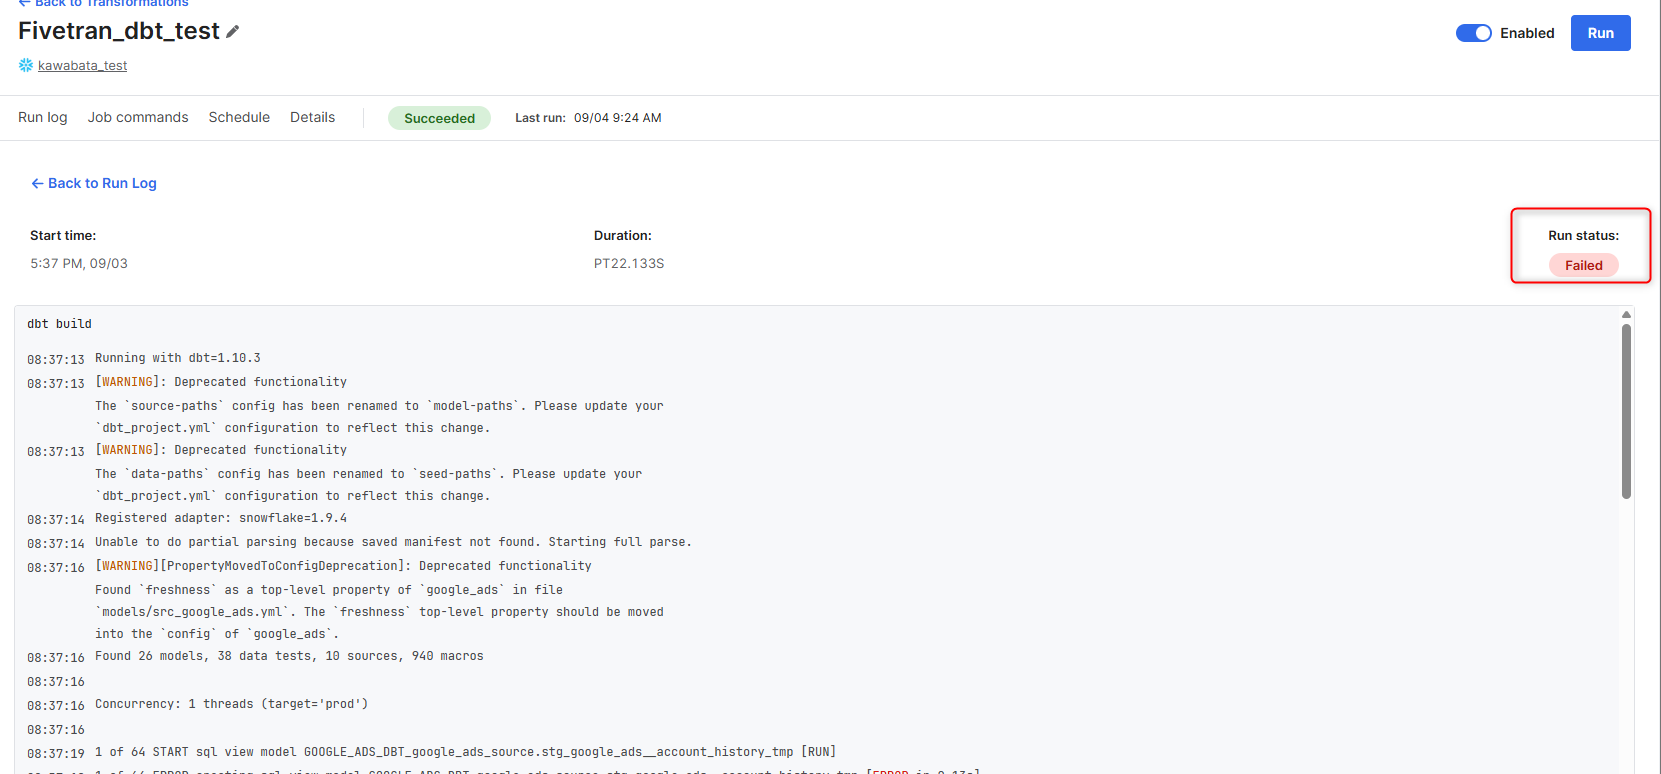
- 作成したjobを選択し
Runをクリックします。
以下のようにエラーとして出力されます。
【躓きポイント】
ドキュメントを確認したところ、以下が要因でした。
Forkしたpackages.ymlのバージョンが古い
			packages:

  - package: fivetran/google_ads_source
    version: [">=0.9.0", "<0.10.0"]

  - package: fivetran/google_ads
    version: [">=0.9.0", "<0.10.0"]
と記載がありますが、
			packages:
  - package: fivetran/google_ads
    version: 1.0.0
に変更が必要です。
google_ads_sourceは
All required sources and staging models are now bundled into this transformation package. Do not include fivetran/google_ads_source in your packages.yml since this package has been deprecated.
と記載があり、非推奨となっているため変換パッケージに含めないでくださいとありました。
【参考ドキュメント】
dbt_project.ymlのオブジェクトの指定が古い
			source-paths: ["models"]
test-paths: ["tests"]
と記載がありますが、
			model-paths: ["models"]
seed-paths: ["seeds"]
上記のように変更が必要です。
変更を加えた後は、以下のように成功しました。
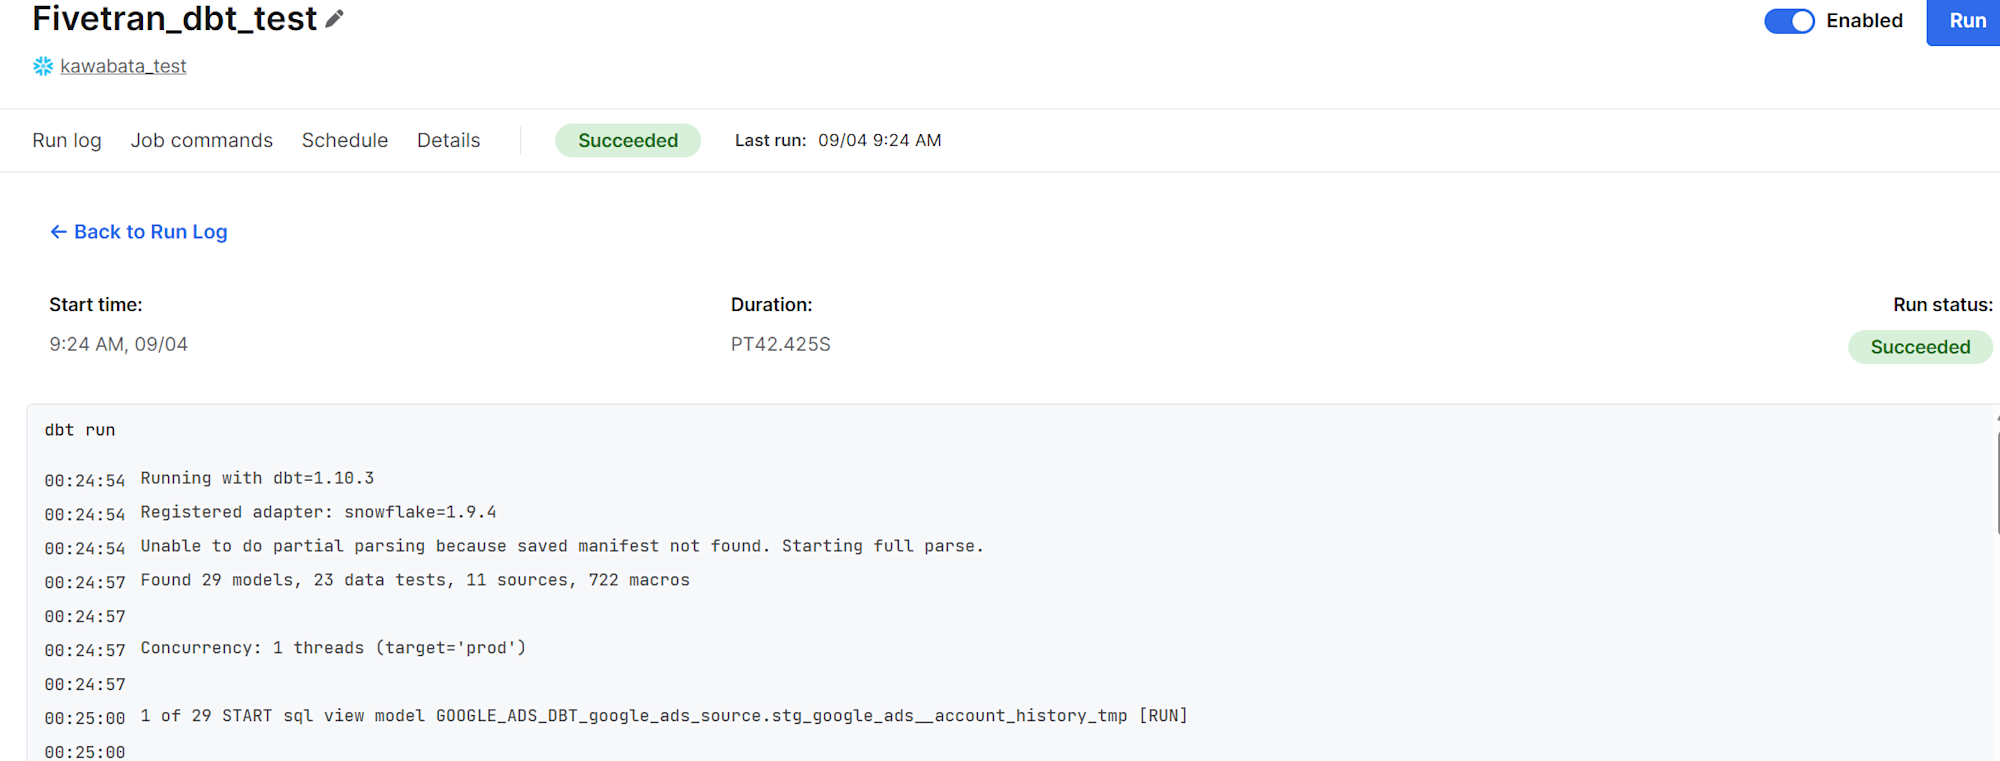
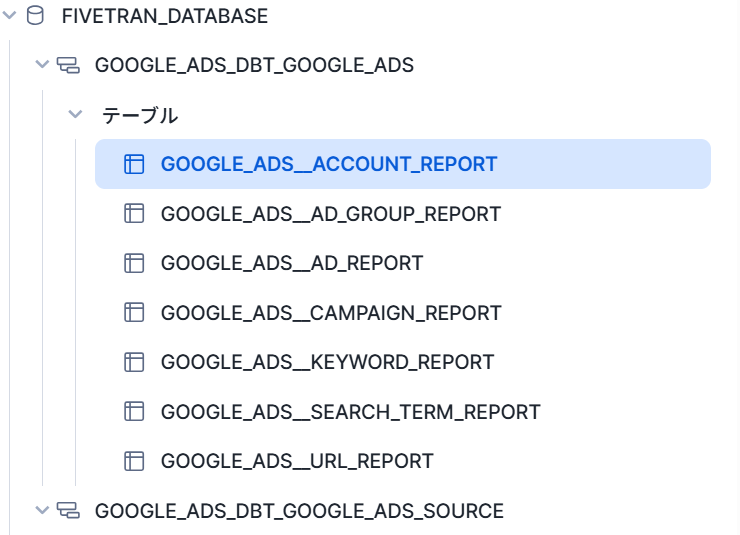
ただし、前述のとおりFivetran Google Ads接続でデータを送るような設定にしていないとSnowflake側へは変換結果が書き込まれない仕様でした。変換先のテーブルは作成されていました。
Snowflakeパート2
前段のデータが作成できていなかったためこのセクションは割愛しました。
内容としては、前セクションで作成したデータをもとに管理者と分析者の一般的な作業フローを解説しています。
最後に
いかがでしたでしょうか。
Fivetranの設定・同期の仕方から、Snowflakeとの接続、dbtを介しての接続設定を体験できました。
このQuickstartが作成されてから時間も経っているため、今回活用したFivetran・Snowflake・dbtのUIや仕様が変わっている部分があり各製品のアップデートの速さを改めて感じました。
こちらの記事が何かの参考になれば幸いです。