NVIDIA Jetson Xavier NXのシステムボリュームをNVMe SSDに切り替える
この記事は公開されてから1年以上経過しています。情報が古い可能性がありますので、ご注意ください。
ども、ゲストのソラコム大瀧です。
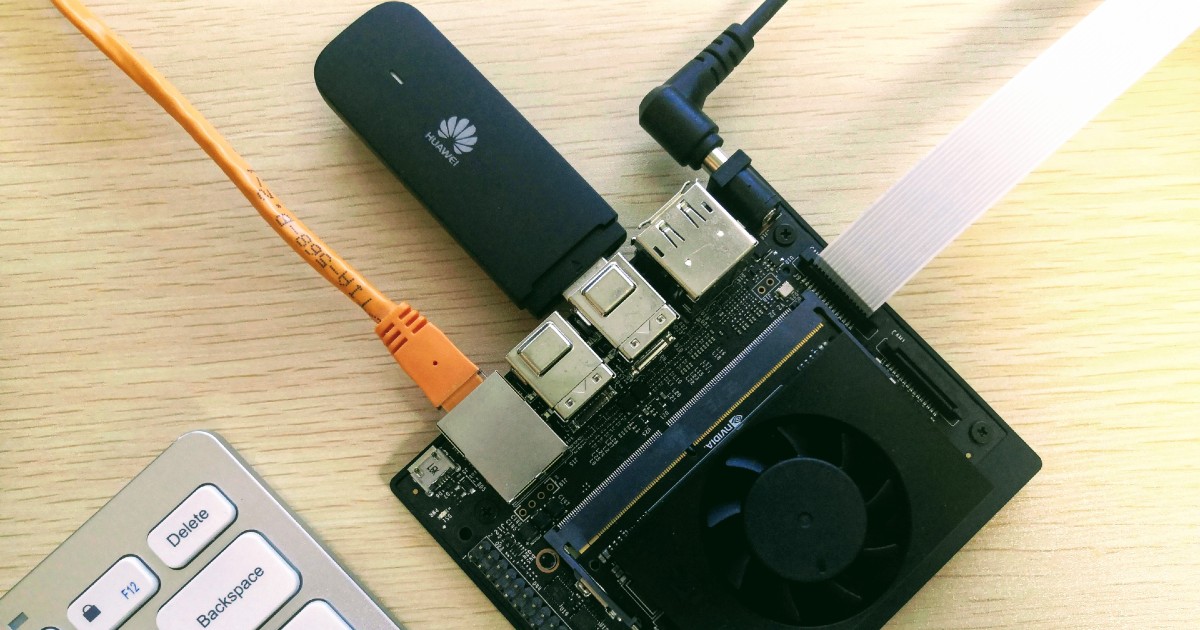
NVIDIA Jetson Xavier NX Developer Kit(以下Xavier NX)を手に入れていろいろ遊びたくなったのですが、SDカードをシステムボリュームとして使うのには性能面と耐久性で不安に感じていました。Xavier NXの仕様に「コネクティビティ : ギガビット イーサネット、M.2 キー E (WiFi/BT)、M.2 キー M (NVMe)」という記述を見つけたので、NVMe SSDディスクをシステムボリュームにする構成をご紹介します。
本記事で紹介する手順は公式のものではないため、試す場合は自己責任の元、行ってください
NVMe SSDディスクの設置
動作確認環境
- Jetson Xavier NX Developer Kit
- SDカードイメージ : nv-jetson-nx-sd-card-image-r32.4.2.zip
- NVMe SSD : WD Blue SN550 NVMe SSD 250GB
SSD自体の取り付けは非常に簡単です。Xavier NXの基盤裏側にM.2端子とSSDを取り付けるためのネジがあります。ネジを外してSSDを端子に挿入、再度ネジで留めればOKです。

システムボリュームの切り替え手順
一般的なLinux Boxであれば、システムボリュームは起動ボリュームであり、OSイメージを焼き込んでブートローダーで起動ボリュームを指定すれば良いわけですが、Xavier NXのリファレンスOSイメージ(Ubuntu 18.04ベース)はブートシーケンスが独特で、かつデバイスツリーが最小限になっているため、起動ボリュームの設定に一手間必要です。そこで今回は、JetsonHacksさんの記事にある以下のスクリプトを利用して、systemdによるシステム起動シーケンスのうち、initrdからルートファイルシステムへのchroot先をSSDに切り替えます。
まずはSSDのパーティションとファイルシステムを作成します。SSDのデバイスファイル名は/dev/nvme0n1、ファイルシステムはext4です。
$ sudo fdisk /dev/nvme0n1

Welcome to fdisk (util-linux 2.31.1).
Changes will remain in memory only, until you decide to write them.
Be careful before using the write command.

Device does not contain a recognized partition table.
Created a new DOS disklabel with disk identifier 0x665959bf.

Command (m for help): n
Partition type
   p   primary (0 primary, 0 extended, 4 free)
   e   extended (container for logical partitions)
Select (default p): p
Partition number (1-4, default 1):
First sector (2048-488397167, default 2048):
Last sector, +sectors or +size{K,M,G,T,P} (2048-488397167, default 488397167):

Created a new partition 1 of type 'Linux' and of size 232.9 GiB.

Command (m for help): w
The partition table has been altered.
Calling ioctl() to re-read partition table.
Syncing disks.

$ sudo mkfs -t ext4 /dev/nvme0n1p1
mke2fs 1.44.1 (24-Mar-2018)
Discarding device blocks: done
Creating filesystem with 61049390 4k blocks and 15269888 inodes
Filesystem UUID: 3908c0e3-83fe-4a08-9b16-ea16e9114998
Superblock backups stored on blocks:
	32768, 98304, 163840, 229376, 294912, 819200, 884736, 1605632, 2654208,
	4096000, 7962624, 11239424, 20480000, 23887872

Allocating group tables: done
Writing inode tables: done
Creating journal (262144 blocks): done
Writing superblocks and filesystem accounting information: done
これでOKです。続いてGitHubからスクリプトをコピーし、スクリプトを実行します。
$ sudo apt install git
$ git clone https://github.com/jetsonhacks/rootOnNVMe.git
$ cd rootOnNVMe/
$ ./copy-rootfs-ssd.sh
$ ./setup-service.sh
==== AUTHENTICATING FOR org.freedesktop.systemd1.reload-daemon ===
Authentication is required to reload the systemd state.
Authenticating as: takipone,,, (takipone)
Password: <ユーザーのパスワードを入力>
==== AUTHENTICATION COMPLETE ===
Created symlink /etc/systemd/system/default.target.wants/setssdroot.service → /etc/systemd/system/setssdroot.service.
Service to set the rootfs to the SSD installed.
Make sure that you have copied the rootfs to SSD.
Reboot for changes to take effect.
これでOKです。再起動します。
$ sudo reboot
この起動時にSSDをマウントしているはずです。確認してみると...
$ mount | grep nvme
/dev/nvme0n1p1 on / type ext4 (rw,relatime,discard,errors=remount-ro,data=ordered)
確かにルートファイルシステムがSSDのパーティション(/dev/nvme0n1p1)になっていますね。hdparmで雑にシーケンシャルリードの様子を見てみます。
$ sudo apt install hdparm
$ sudo hdparm -t /dev/nvme0n1 /dev/mmcblk0

/dev/nvme0n1:
 Timing buffered disk reads: 3870 MB in  3.00 seconds = 1289.94 MB/sec

/dev/mmcblk0:
 Timing buffered disk reads: 256 MB in  3.01 seconds =  85.11 MB/sec
SSDの方がSDカードよりもだいぶ速そうな事がわかりますね(ディスクキャッシュなど複数の要因が関わるため、結果は絶対的な性能差を示すものではありません)。
まとめ
Xavier NXでNVMe SSDディスクをシステムボリュームにする構成をご紹介しました。起動ディスク自体は引き続きSDカードですので、SDカードを抜いての運用はできないこと、起動に関するパッケージの更新はSDカードで行う必要がある点に留意してください。
Xavier NXのブログを同時公開しています
本記事の他にもXavier NXの記事(ただし機械学習ではなくシステム構成のTips)を同時に2本公開しています、こちらもどうぞ!
- NVIDIA Jetson Xavier NXをHDMI接続せずにHeadlessでセットアップする | Developers.IO
- NVIDIA JetsonとUSBドングルでLTE(SORACOM Air)接続するために nmcli を使う | Developers.IO