Hi, this is Charu from Classmethod. Today is the fourteenth day of Classmethod's Zendesk Advent Calendar.
Here are two important links for you to refer,
Class method Zendesk Advent Calendar 2023 article list | DevelopersIO
Class method Zendesk calendar | Advent Calendar 2023 - Qiita
This hands-on blog will guide you through leveraging Zendesk Sell can transform your lead management process.
Zendesk Sell
Zendesk Sell is a automated CRM (Customer Relationship Management) software platform to enhance productivity process and pipeline visibility for sales team. It is a customisable help-desk solution and user-friendly system that simplifies sales workflow and increases closing rates and customer success. With the help of Zendesk Sell teams can focus on sales instead of admin work and less time on data entry.
Initial Setup
Begin by customising your Zendesk Sell account settings to align with your business operations.
Easily transfer your existing contacts and leads into Zendesk Sell to create a seamless transition from your previous system.
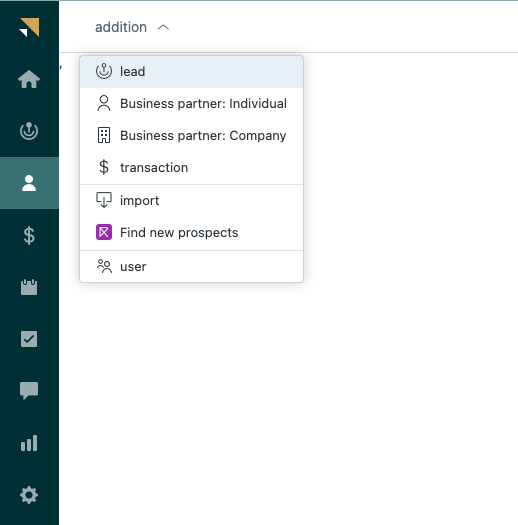
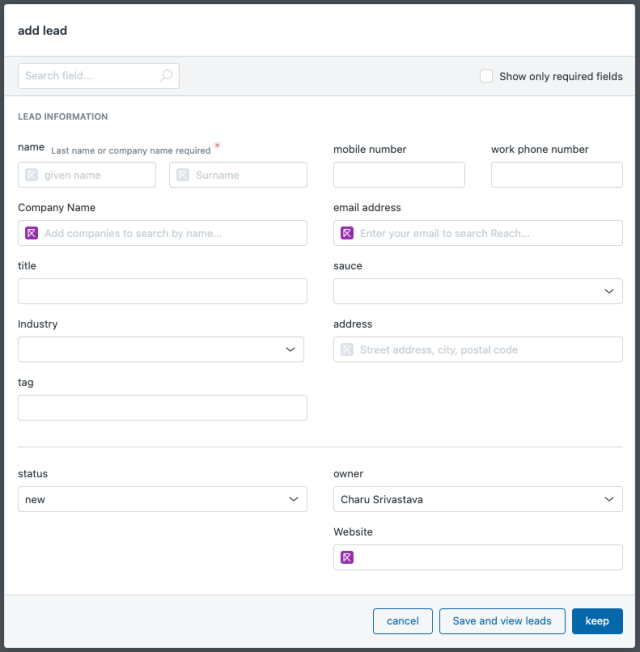
You can either add individual lead like this-
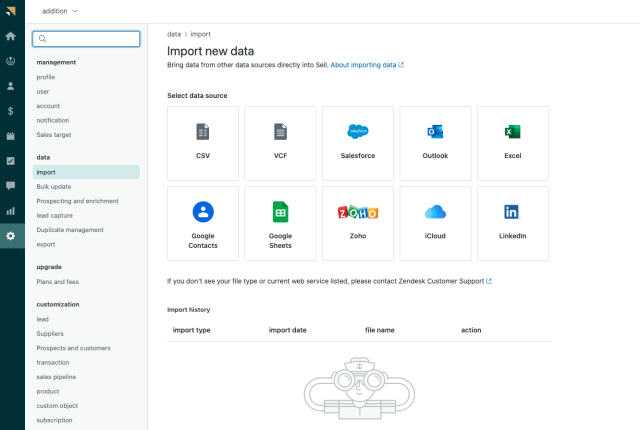
Or you can bulk import the leads in the following manner-
Lead Scoring:
Lead scoring in Zendesk Sell is the process of assigning a value to each lead to prioritise them. This value is typically based on various factors, including how well the lead fits your target market, their level of engagement with your business, and their place in the buying cycle.
SetUp
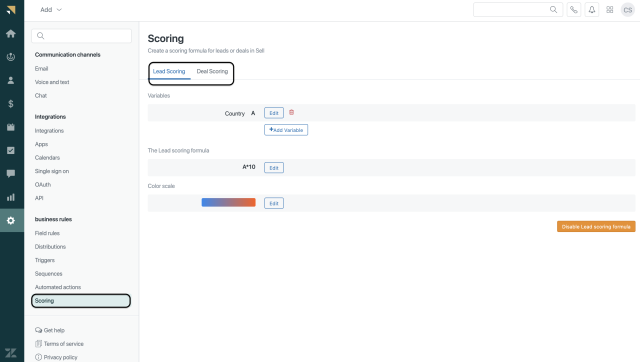
Under Settings, select Business Rules > Scoring.
There are separate tabs for leads and deals scoring. Choose which type of score you want to define. We will be seeing Lead scoring example in this blog.
Scoring involves assigning numerical values to significant data points, which are then combined into a formula to produce a score.
The process includes defining variables for the scoring formula, adding them, choosing a symbol for each variable, and selecting the desired field for these variables.
Example
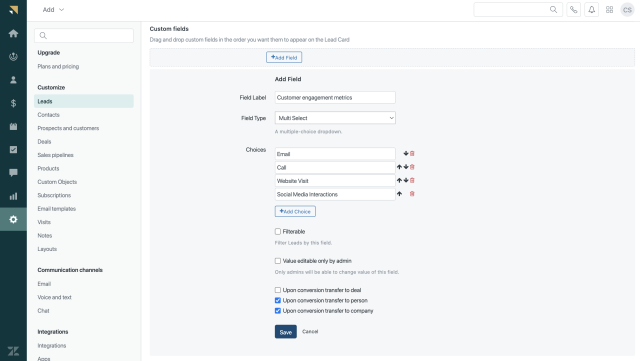
As an example, consider using Customer Engagement Metrics. Customer Engagement Metrics is not present by default in Zendesk Sell, so we will create one.
Go to the Settings in your Zendesk Sell account.
Navigate to the Custom Fields section under Leads or Contacts.
Create custom fields for the criteria you want to include in your scoring (e.g. we will be creating Customer Engagement Metrics).
You can use dropdown menus or multi-checkbox for certain fields to ensure consistency in the data entered.
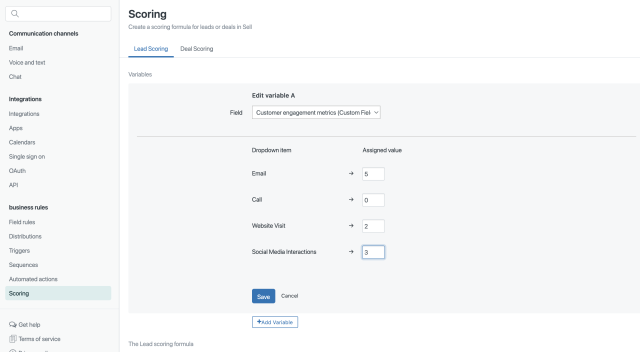
Now, let's move back to scoring and select our variable.
For Customer Engagement Metrics you could assign values to how often a lead interacts with your emails, website, or social media.
Email opens: 5 points
Call: 0 points
Website visits: 2 points
Social media interactions: 3 points
We’ve added the Customer Engagement Metrics field as a variable and assigned a value between 1 and 10 to each engagement type.
You can another field according to your requirements. I added Country field as shown below.
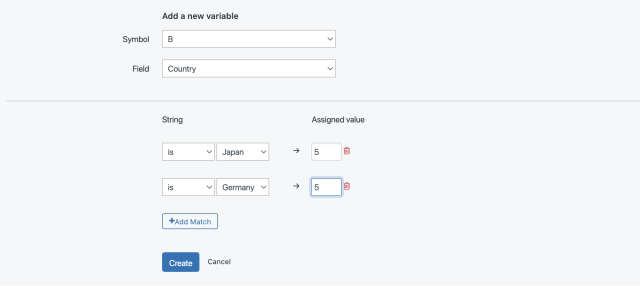
You can then enter the formula after saving both the variables.
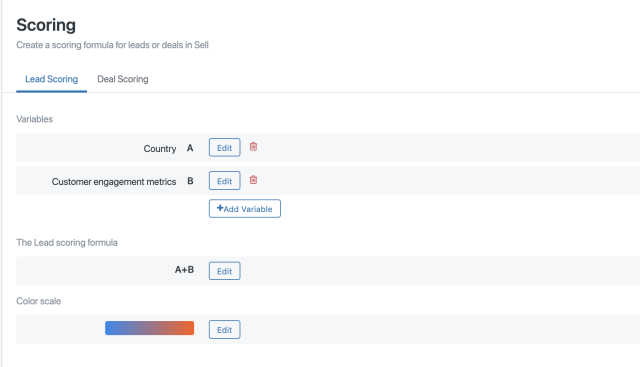
In this simple formula the values assigned to a lead's country and their engagement metrics are summed to create an overall lead score. This score could then be used to prioritise leads in the sales pipeline.
You can view the lead score under your leads.
Smart Lists:
Creating a Smart List in Zendesk Sell allows you to segment and organise your leads or contacts based on certain criteria.
SetUp:
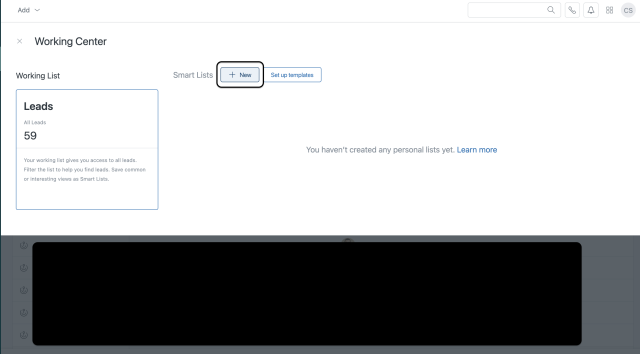
Navigate to the Leads or Contacts tab.
Click on the 3 dashes button in the top left corner. Then click on New,
Set the criteria for your Smart List based on the fields and data you've collected. For example, you can create a list of leads with website or with a high engagement score.
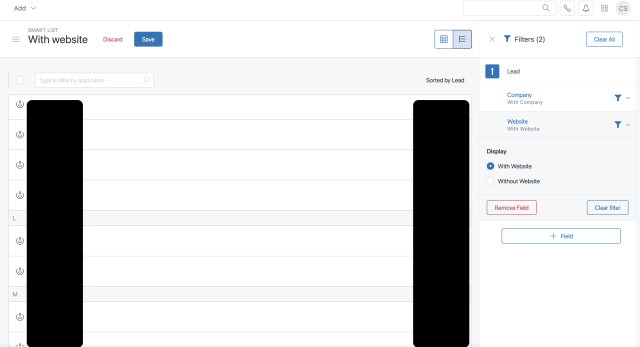
After setting your criteria, save the Smart List. It will now dynamically update to include all leads or contacts that meet the specified conditions.
Conclusion:
By doing these essential steps, you’ll be ready to harness the full potential of Zendesk Sell for lead management. Experiment with these features and know the power of Zendesk Sell.
Thank you for reading!
Happy Learning:)